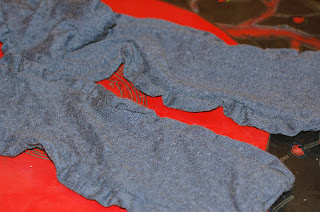
Now, I have been using most of my sweaters to make infinity scarves, but I couldn't really picture the 93-year-old Winnie wearing one of those. So I thought I'd go traditional. But this blue sweater with a subtle cable was very masculine, and I wanted to give it a feminine embellishment. I came up with the idea of adding ruffles down the sides of the scarf.
Have you seen this tutorial for making ruffles? Well, I've tried this before on thin knits and woven fabrics with very little luck. But I thought I'd give it a go on this project, and what do you know? It worked like a charm! I don't know if the thicker fabric was the key, but hey, I'll take it. I did recently discover this tutorial though, and I think I'll try it the next time I need a ruffle. It seems more consistent to me.
I was in a bit of a hurry as I made this scarf, so I didn't take pictures as I went. If I make another someday, I will update this post with how-to photos, but for now I will just talk you through it the best I can. Hopefully the photos of the finished product will help you see what I mean! Just think of this post as inspirational, rather than tutorial.
From the body of the sweater, I cut rectangles that were 7 inches wide. I wanted my scarf to be about 60 inches long, so I needed at least 120 inches of fabric because my scarf would be two-sided. I ended up being able to get about 126 inches out of the body of the sweater, and saved the sleeves for my ruffles.
I sewed the 7-inch wide strips together end to end so that I had two strips that were each 7 inches wide and 60 inches long.
Then I made my ruffles.
I cut enough pieces out of the sleeves to make two long strips. After joining the pieces end to end, each strip was 2.5 inches wide and about 90 inches long.
I started with one of the narrow strips and folded it in half, wrong sides together (I would not be turning it inside out.) I set the tension on my sewing machine as high as it would go (9, on my machine) and set the stitch to the longest length. Then I sewed down the open edge of the folded strip, leaving about a half inch seam allowance. The fabric ruffled itself right up--not too tight, which was good--I had to do very little adjusting (by pulling the bobbin thread and shifting the ruffles) when it was done.
Next I laid out one side of my scarf right-side-up. I lined up the raw edge of the ruffle with the raw edge of the scarf (finished ruffle pointing towards the middle of the scarf).
Then I laid the other piece of the scarf, right-side-down, on top. I pinned all along the edge where I had lined up the ruffle so that the ruffle would stay in place between the two sides of the scarf.
Then I made the other ruffle the same way, lined it up along the other side of the right-side-up scarf, then laid the top piece back down and pinned the other side.
Once everything was pinned, I adjusted my sewing machine again (I usually have my tension around 4 or 5, and my stitch length at about 3) and sewed down the length of both sides, making sure to catch the edges of the ruffle all the way down. I didn't want the seam I made when ruffling the fabric to show, so I used a wider seam allowance than I usually do--more like 3/4 of an inch.
I left both ends of the scarf open.
Once sewn, I turned the scarf right-side-out.
You could, at this point, follow these directions for closing up the scarf to turn it into an infinity scarf. However, I just folded my ends in and sewed a seam across the bottom on both ends.
 |
| I tugged the ends of the ruffle and tucked them in before sewing across the bottom. |
Here's how it came out--I'm pretty happy with it. It's like a hug from my grandpa.
 |
| I should have at least changed my sweater so you could see the dang thing! |
I hope that it doesn't make Winnie too sad.


What an incredible gift for Winnie! Not only a scarf made from a sweater worn by her beloved, matching his eyes, but made by his granddaughter. Such a thoughtful thing to do, Beth. I'm sad you won't have it to wear, but I know it warms your heart to know it belongs to Winnie now. Love the ruffle trim, too! :)
ReplyDeleteI'm sure Winnie's going to be very touched. It was great to see you. xoxo
ReplyDeleteThis made me tear up! So very sweet. I'm touched to have a snuggly hug from Ray (and Beth!) for myself as well.
ReplyDeleteThanks ladies!
ReplyDelete