Sunday, April 29, 2012

Poppy Applique Upcycled T-shirt Dress


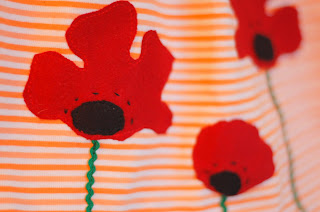
Isn't this appliqued poppy dress (from modcloth, no longer available) just adorable?  I loved this idea and had to give it a try, using an old t-shirt (a few of them, actually) and elastic thread to make a dress for Little Sister.

Inspiration dress to toddler dress!

If you're interested in how I got there, I'll go through it here.  If you just want to see cute pics of Little Sister, hop on down to the bottom of the post!  Seriously, you don't want to miss these :)

I started with this shirt that I picked up for $1 at Village Merchants (the consignment store in my neighborhood that I've mentioned before).  It had kind of a weird neckline/shape, but I thought I could make it work. 
See how the neckline and hem are rolled over?

I started by ruching the sleeves using elastic thread, like in the two-minute dress tutorial by Prudent Baby.  I sewed two rows of elastic thread on each side of the sleeve seam, all the way from the neckline to the band at the end of the sleeve.  For a great, simple lesson on using elastic thread, check out Flossie Teacakes' tutorial here.


What I should have done from the beginning was cut off the neckline that kept rolling over, since t-shirt fabric doesn't fray.  The picture below shows the neckline once the "hem" was cut off.  I cut this off after sewing my elastic neckline, I recommend doing it first.  Anyway, I sewed two rows of elastic thread all the way around the neckline, making sure I was only sewing on a single layer of fabric (the elastic thread won't gather right if you're sewing through the folded-over neckline.  I wouldn't have had to worry about that if I'd cut it off in the first place.) 
 
Your shoulder/neckline area will look something like this:
(this shows the neckline before I cut the extra fabric off)


At this point, I thought the body of the shirt still looked like it had too much fabric.  For reference, I was making approximately a size 2T. 


So I just made a curved seam from the sleeve all the way to the hem.  I made the sleeve opening a little smaller, then curved it in and back out to the original width at the hemline. 


You could use a dress or shirt that fits well to approximate the width you want.  I just eyeballed it, because the elastic waist is very forgiving.  Then I trimmed the extra fabric from the sides of the dress.

Speaking of which, that elastic waist was the next step.  I was delighted to notice that the stripes were lined up at the side seams, so I just decided to follow the stripe around with my elastic.

Unfortunately, the stripe that lined up with my seam was not the same stripe I started with.  Um, oops. 
Here's where I started and where I ended up after one trip around the dress on the sewing machine.
 Sooo, I would recommend marking the distance from the hem with pins to make sure your waistband goes straight across.  Because I started at an angle, my shirring has a...let's call it "artsy" cris-crossed look in the back.  But I did end up with a waistband that's the same width all the way across (wider than I originally planned, but hey, that's the way it goes sometimes).
The finished waistband
 To make the appliqued skirt, I used scraps from dark red and black t-shirts and green rick-rack.  I went through my general process in doing applique in my last post, but I'll give an overview here too:


Looking at my inspiration dress, I drew my poppy shapes on paper and cut them out.  I used those to cut out my red t-shirt fabric and iron-on webbing.  I just eyeballed the black centers (and cut out iron-on webbing for those too).

Once I had the flowers cut out, I laid them out on the dress then cut the lengths of rick-rack I would need to reach the hem.  I tucked the rick-rack under the flower so it would get stuck down when I ironed everything in place. 

After everything was stuck together, I used black thread to sew down the centers first, then the red for around the edges of the flowers, then switched to green (sewing slowly) to attach the rick-rack.  Then I just threaded a needle to add some black dots for accent.  I would have used embroidery thread, but I didn't have black, so I just used regular thread and went over each spot twice. 
 
And that was that!  I love the way this applique turned out so much, I will probably do the same image to add some interest to a boring brown and white striped t-shirt of my own.  I might use cording instead of rick-rack for the stems, to grow it up a bit.  Or maybe I'll embroider them, like on the inspiration dress.


And then, for Little Sister's best photo shoot ever, here's my advice: 

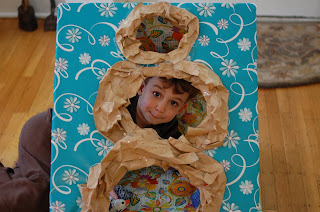
Have a 13-year old girl stand behind you and make poses for the toddler to mimic.  Little Sister has never been so happy to pose for me!  Thanks, Brittani!


Seriously, Tyra would have been so proud.  She didn't even need her extra frames.
 
I only have one photo in my hands...


Posted by Picasa

Thursday, April 26, 2012

Applique makes great gifts!

I took my sewing machine in to be serviced last week, so I have not been able to do any sewing since last Friday.  So you would think, with all this extra time, I would have easily been able to blog the projects I was staying up late to complete before waving bye-bye to my beloved Pfaff for seven whole days, but instead, I took the week off--a crafty vacation of sorts.  But now I'm getting my machine back tomorrow, AND the place that serviced it (Modern Domestic on Alberta) will be giving me a little private lesson on things like using the buttonhole foot and zipper foot that I never knew I had--so watch out world, I may be attempting some new and improved designs. 

I don't usually plan ahead and have birthday presents ready more than a week before the party, but I was pretty sure I wouldn't have time to make a present between the Friday 5 PM return of the machine and the Saturday AM party The Boy will be heading to this weekend.  Well, although now that I think about it, I did get this done in one evening, but now I don't have to worry about it.  Just in case there had been a problem and the service took longer than expected, bla bla bla. 

I picked up this new t-shirt at Old Navy for $3 (regular price $8, sale price 2/$10, additional 40% off = $3, booya!  Got one for Little Sister too.)

 This applique is the same basic one I did for Little Sister's 2nd birthday shirt, made out of scrap fabrics from a couple of other projects.  Applique is such an awesome use for scraps!  Beware--you might end up saving even the tiniest scraps, because you really can use them in these projects (check out the beak on the t-shirt!). But The Boy really wanted the present to include a toy, so I used more of the fabric to make the simple matching owl stuffed animal.  It's bigger than the beanbag owls I made for party favors, and stuffed with batting out of an old pillow I tore up a while back for just this sort of thing.  We've been into owls around here ever since the two owl parties.

I do raw-edge applique on my t-shirts, meaning I don't turn the edges under and when you wash the item, the edges of the applique get a little frayed.  Personally, I like that look.  Here's what I do when I applique knits:

1.  Create my design on paper.  Sometimes I trace it so I have all the pieces, plus the whole thing.  This owl, for example, has three pieces:  head, body, wing.  I eyeball the eyeballs and beak.

2.  Cut out fabric and iron-on webbing at the same time.

3.   Lay out the shapes on the shirt, with the webbing underneath.

4. Iron it all together so it stays put.

5.  Sew around the edges of each piece of fabric (sometimes using all one color of thread, sometimes switching for each fabric, depending on the look I want.)  I usually sew as close to the edge of the fabric as I can without worrying about going off the edge.  

6.  Add button embellishments, if using.

Or, you could just check out my custom applique page over at Sewbaby Crafts and place an order :)

$3 birthday present.  I am such a cheapskate!

To make the owl, I just folded my main fabric in half, eyeballed a general shape for the exterior, and cut out two at once.  Then I folded the accent fabric and cut two wings.  I sewed the wings (they just have raw edges), along with the felt eyes (added fabric paint for the pupils later) and the felt beak) all to the front panel of the body fabric.  Then I pinned the front and back panels together, right sides together, and pinned the rick-rack legs inside so they'd stick out once it was turned right-side out.  I left a hole for turning and stuffing (I actually left the hole on top, just above the eyes--not intuitive, but I did that so I could easily stitch the legs in).  Once he was turned (I poked the "horns" out with a pencil) and stuffed, I hand-sewed the top closed and painted his eyeballs on.  Done!

This one was a last-minute baby gift for my neighbor to bring with her to meet her new nephew, whose name begins with a T.  The hat and onesie were The Boy's when he was a tiny baby.  Awwww!  And yay for upcycling!  I decided at the last second to tilt the robot's head.  I thought it was cute that way.  For the robot's face, I just cut out specific pieces of the same fabric I used for the body.  I love it when it works out that way!

I couldn't resist throwing this robot video in--perhaps it was my inspiration for this onesie.


I had a few more crammed-in projects that I'll show you soon.  And back to sewing (and blogging) away for me starting Friday!
Posted by Picasa

Thursday, April 19, 2012

Insulated Casserole Carrier!

I saw these insulated casserole carriers on Pinterest and, like so many other things I see there, thought they were a great idea and pinned it.  I knew I could use one, and had a friend or two that I thought they would make a good gift for.  Although, like so many other things I pin on Pinterest, I wasn't sure when I'd actually get around to doing it.

But then my father-in-law showed up to Easter Dinner with his scalloped potatoes wrapped in a bath towel, and I knew I had found my first recipient. 

 
The hardest part about making this was finding fabrics that were manly enough for my father-in-law and still interesting enough for me.  I mean, I have a hard enough time picturing him toting his own personal insulated casserole carrier--it definitely would not work to have it in a lovely floral print.  I think I struck a good balance.  I love the woodgrain print for the interior--and he does a lot of woodworking, so that works too.


The tutorial for this project can be found here, at 2 little hooligans.  I found it via this post on the blog Homemade By Jill , who had some great tips that I took into consideration.  I followed her directions on using the cotton belting for the strap, as well as extending the length of the carrier to fit a pyrex dish with handles (pictured above).  
Closeup of the fabrics
I do feel like this is a bit of a strange gift for a guy. I knew that he would love it because he loves ME, but just in case...it never hurts to tuck a batch of peanut butter cookies inside.  That way my bases were covered.

Easy to carry
I did end up spending more money on this project than I typically associate with a DIY though.  This could have been avoided with better planning--as it was, I only had one Joann's coupon and one chance for a trip to Joann's, so I was paying full price for almost all of the materials rather than 40% off, the way I usually like to play it.  It takes 2 full yards of fabric (1 for interior, 1 for exterior--ooh, but if you used the same fabric for both you could totally get away with 1.5 yards) plus a full yard of the Insul-Brite lining, which costs $7.99/yard.  Then there's the velcro (about $8/yd if you use the 2" stuff, which I recommend you do, you need 2/3 yard), and the cotton belting (another $3/yd and you need 2.5 yards--but this can be avoided if you make fabric straps instead; there's enough fabric leftover to do this.) Just a heads-up.  Also, it's pretty quick--I made mine in about 90 minutes, but I admit that I was watching America's Next Top Model for 60 minutes of that time (I'm not ashamed), so it's possible you could get it done even faster.

Here's what it looks like when opened up
I had to stand up on the kitchen counter to get the photo of the carrier all opened up--which was quite interesting to a certain someone. 
My little helper
Posted by Picasa

Monday, April 16, 2012

Kids Apron and Chef Hat!

Little Sister finally did me a solid and put on the dang chef hat I made for her birthday!


Cute, right?  It's adjustible (velcro in the back), so it will fit for years--her four-year-old brother can wear it no problem.  So far, he has been far more willing to wear it than she has, as a matter of fact.  She's usually such a hat girl!  I don't get it!  I thought she'd be totally into the hat!  Oh well, maybe someday.


I thought that adding the chef hat took the apron gift from a fun practical item (which it still is--and she actually loves wearing the apron and "helping" me cook) to something that can also be a part of the dress-up trunk.
So she can pretend to be a fortune-telling gypsy chef, apparently.
Despite their looking more boho than kitchen professional, I did love these fabrics for this.  I actually used this same combo in one of the Phoebe bags I just posted about.  And I still have more scraps of it, so I'm sure you'll be seeing it again!

For my purposes, the apron is huge.  I followed this free tutorial from Michael Miller Fabrics. I like that it uses D-rings for the neck strap, making it adjustible, and I like the pocket on the front (although, like the last time I made this apron, I didn't follow the directions exactly for the pocket.)  In this photo (where it reaches her feet), it is folded under by about 4-5 inches in the middle.  This size would be perfect for a 5-6 year old, I think--I was thinking this would mean she would get lots of use out of it, but in retrospect I think I should have just sewn a smaller apron that she could use for the next 4 years, then make her a new one.  I suppose I should be able to manage a new apron every 4 years or so.

The Michael Miller tutorial I linked to above also has a link to a chef hat, but it wasn't working for some reason when I wanted to make mine.  So I used this free tutorial instead, and I liked it.  Especially the adjustible velcro closure (so maybe the hat will still fit her when the apron finally does!)


And just a little personalization--I'm not great at embroidery, but I still think it's fun.  I embroidered on a patch instead of directly on the apron so that I could center it without worrying about the name disappearing into the print.

If I were giving this gift to a slightly older child, it would be fun to include a kids cookbook.
Posted by Picasa

Friday, April 13, 2012

More Phoebe Bags!

I made the bag in this tutorial a few months ago, and loved the way it turned out so much that I couldn't wait to make some more!

Need a purse?  Because I've got a few.
I knew this would be the perfect use for the random yardage of this beautiful Amy Butler Passion Vine print (the bag on the left) that I picked up at a local consignment store for $5.  It's home decor weight, and I've been parsing it out in tiny little projects because I just couldn't bear to use it up until I'd found the perfect thing.  This purse was it.

Whee!  I love a contrast lining!

I also had this cool purple/spring green print (the lining for the bag on the bottom/right) that I wanted to use for a friend, but I knew it would be a beast to match.   I took both pieces of fabric to the mecca that is Fabric Depot, and amazingly found fabrics to coordinate with both in the "yard sale" area, so the prices were decent too.  The bag in the center was made with reversible home-decor weight fabric, found at the same neighborhood consignment store ($3 for a 60" yard!), so I could use both sides to make the exterior and the contrast lining/pocket.  I actually decided to use the lining side for the magnetic tab closure as well, just to show the other color a bit more. 


Can I just say how happy the magnetic closure makes me?  Not only are they totally easy to install, but they are also cheap (a 3-pack for $1.99!) and it makes the bag seem very professional (i.e. not homemade) to me.  The simple darts on the bottom edges also add structure and more of that professional look, but are actually very easy to execute.

If you need a mid-size, easy to make, easy to customize bag, this is it!  I love carrying my bag around and it's so fun to make as a gift. The tutorial (here it is again) includes printable pattern pieces and easy-to-follow directions, and a bag only takes 1/2 yard of each fabric (exterior, interior, and fusible fleece interfacing) plus the magnetic closure. I listed a few things I thought might be helpful while making this bag when I did it the first time, so check that out if you plan on sewing this.
Posted by Picasa

Tuesday, April 10, 2012

The DIY Owl Party--Whooo's turning Two?

She's been two for a whole week, so we thought it was time to have another owl party!

The good news is, Little Sister was feeling much better, so we were able to have Little Sister's buddies over for her "kid party" a week after the family celebrated.  And we needed the extra week--we had lots of fun projects we did together to get ready for the party!

Look whooooo's two!
I made a bigger owl cake, and based on The Boy's suggestion Little Sister decided she wanted her owl to be brown this time.  No arguments from me, as the chocolate frosting I used for decoration last time was SO GOOD--so this time I got to use it for the whole cake! 


I tried this recipe for the cake, and I felt like the results were pretty similar to the first cake that I made--good, homemade tasting, but still not fluffy enough for my taste.  I had such high hopes, too, because this recipe required me to whip the butter for FOUR WHOLE MINUTES before adding the sugar, then add the sugar in 1/4 cup increments, whipping for another full minute after each addition!  That was the fluffiest dang butter/sugar mixture I'd ever seen, but it didn't really pay off for me.  For this cake, I made a 1.5 recipe and baked it in a 9x13 pan, then after chilling it I cut it into two layers.   If I do that again, I will divide it into two pans and bake it for less time--I think it was too thick to bake properly.

For the shape, I cut a curve out of the top of the rectangle to make the owl tufts, then used the cutout to add feet to the bottom.

Note--the chocolate frosting recipe makes A TON.  I made a full recipe plus a third, but pulled out a bunch of frosting before adding the chocolate to use for decorating (so I just used the recipe amount of chocolate).  I frosted the cake and used frosting plus seedless jam for the filling between layers.  And I have enough left over to AT LEAST frost a batch of cupcakes.  I guess that means I'm going to have to make cupcakes.  Oh bother. 
Close up of the shape I cut out of the top of the rectangle
Side view of my fancy wing decoration.  Made by putting frosting in a ziploc bag and cutting
off the corner (obviously I cut a bigger hole in the bag for pink frosting.)
 You sure can't go wrong serving birthday cake to kids though.  They will always make you feel like you did a good job.  Even if you use box cake.  Which may be what I do next time.


These "owl glasses" were one of the favors--I picked them up at Party City for 10 cents each.  I actually bought a pair a while back and used it for the photo I put on the invitation, but then the dog chewed up the glasses.  They look like they'd be tempting to a dog, right? 


Another favor was the beanbag owls that I made using this tutorial.  The only difference is that I sewed the eyes and beak to the front piece of fabric before attaching the back and stuffing, rather than gluing them on afterwards. And I used fabric paint for the pupils.   I kept it simple by just using white thread for all of the beanbags, and learned after the first couple to keep the opening as big as possible at the bottom--SO much easier to get the beans in.  I used pinto, because they were cheapest.
Bonus points if you recognize any of these fabrics from other projects on this blog!
Each kid got a beanbag owl, and I made a few extra to keep around the house.  I made this "owl's nest" beanbag toss from an old cardboard box and wrapping paper, with grocery bag "nests."  Lots of duct tape was involved.  I didn't take photos of this process, but it turned out that a few extra strips of cardboard secured by duct tape were necessary for internal support, so keep that in mind before you recycle the part of the box you didn't use for the basic structure.


The Boy got some practicing in before the rest of the guests arrived. 
Get a little closer, why don't you?
(Actually, to be fair, I made him stand so close because I couldn't get any further back with my camera :P)
And it doubles as a tunnel/hidey hole.
 
Our other party game was "Pin the owl on the tree." 

The doorknob luckily did not become an issue, even when kids were blindfolded.  Phew.

I drew the outline of a tree on a roll of paper, then the kids painted it. (Some of Little Sister's painting did end up on the tree--once she figured out how to make "dots" she was more into it.)
Working together

Once dry, I cut the tree out and The Boy glued paper leaves that I had cut out on the branches.  I drew a knot with a nest inside for the older kids to have a target, but figured hitting the tree at all might be a challenge for some of the little guys.  I printed out some little royalty-free owls on cardstock (you can see them stuck to the door to the left of the tree in this pic and the one above), wrote the kids' names on the owl tummies, and used rolled duct tape to stick the owls to the tree.  Kids who were willing to be blindfolded got a scrap of fleece hastily grabbed from my stash tied over their eyes before landing their owls.


Another favor I added to the bags were these little coloring books.  I made the cover page from cardstock and just used regular letter paper for the inside pages. I found several free downloads of owls to color in and made a little booklet.  I got the idea to make these when I saw a cute crayon roll--I didn't have time to go hunting for owl fabric for this party, but I will totally make another theme coloring book and coordinating crayon roll for the next kid's birthday party!

Open to show all the different pages
The back cover had a photo of Little Sister that I used the new "pencil sketch" feature in Picasa to create.  I have done something similar using photoshop before, but it took forever!  Granted, the background hasn't been whited out here, but this was so quick.  I could feasibly reopen this image in Photoshop and finish the job there--I still think this would save me a lot of time. 
Front and back cover of "coloring book"
My favorite part was the favor bags that we made. 
Owl favor bags
 I made a little template for the wing shape,


I let The Boy pick pieces from my wrapping paper scraps (I knew I'd been holding on to those for a reason!),
The Boy can't wait to get started.
Then cut the wing shapes out.


In the meantime, Little Sister was coloring the bags.  This step was totally optional, but it was nice to have a way for her to feel involved :) 
Nice artwork, Sis!
I had The Boy glue the wings on--it was pretty easy for him because he just had to line up the corner of the wing with the corner of the bag.

We traced a bottle top on cardstock to make the eyes, then the kids colored pupils on them.


The beaks and feet were cut out of that foam paper stuff--I got a pack of 20 multicolored half-sheets at the dollar tree ages ago for various crafts.  Luckily we had some orange left (although I'm pretty sure that real owls don't have orange beaks.) You could easily use cardstock or construction paper for this.

Cutting squares in half diagonally is an easy way to make triangles.
Glue the feet to the bottom of the bag so that they will stick out in the front.
 The Boy glued on all of the eyes, beaks, and feet too.  I think these turned out so cute!  Once we had the top folded over, The Boy used alphabet stickers to spell out each kid's name on the top.  He enjoyed deciding who would get each owl.

When can we open them up?
The favor bags were filled out with some cute owl stickers I found at Target and a sucker that looked like an egg (I couldn't find any owl treats, and it was almost Easter--hey, owls come from eggs, right?)

I feel like I'm starting to get better at this theme party thing!  Maybe next time around, I'll branch into party decorations too--so far, I'm out of ideas (or more likely, time) before I get to that point.

Oh, and I almost forgot--this is what I sent out for invitations.  

Wearing the original owl glasses that were destroyed by the dog.
I know absolutely nothing about graphic design; it's something I would really like to learn one day but have resigned myself to the fact that no amount of messing around with programs I don't understand will get me where I want to be, so I'm going to have to take some classes.  Which means leaving the house at some point, and probably not after the children have gone to bed.  Sigh.  So in any case, I ordered this customizable digital invitation from Monkey Doodle Parties on Etsy--I think she's got all kinds of printable party packs too.  Then I just had them printed as a 5x7 photo--I think Costco is the best place to do that.  Easy, and still pretty affordable--I think the customized file cost me $8 (it was one of her sale designs), then the photo printing is something like 37 cents for a 5x7.

Posted by Picasa