Showing posts with label ideas/inspiration. Show all posts

Friday, July 15, 2016

Well Hello There! Tank + Skirt = Dress Combo

Let me get this out of the way:  It's been a while.

Clearly, I have not been blogging, but I'm trying not to let that bug me.  So what if I only blog every once in a while now?  Just because I have ignored the blog for the last 5 months or so doesn't mean that I'm not allowed to post when I DO feel like it, right?

It's just that I've been using Instagram (I'm bkcav, if you want to follow me there) to share my sewing lately, which has been more satisfying and engaging--I can immediately see what others are sewing, and there's such a huge active sewing community there.

But THIS project requires a few more words than what fits on an instagram photo, so I thought I'd accompany my instagram pic with an actual blog post to show off what I did here. I'm pretty pleased with myself!

First of all, I ordered a yard of this great rayon challis print with the intention of making a loose tank top (I've been perfecting my pattern for a while now--I started with the free Sorbetto Tank from Colette Patterns, and have tweaked and shifted and adjusted so many times that I'm not sure you can even count it any more!).


I was pleasantly surprised to get a bonus in the mail--I got the end of the bolt, so I got almost 2 yards of it instead of just one, but that meant I was faced with a dilemma--use the extra fabric to make a dress instead of a tank, or make the tank I originally had in mind and see what was left over?  I couldn't really let go of the tank, since that was what I pictured when I saw the fabric and I was anxious to use the tank pattern now that it was just how I wanted it, but I hated to waste the rest!


I have been doing a curved hemline on this tank pattern, but this time I wanted to try a vented side with straight hems on the front and back.  It was a nice break from the curves--I have been using bias tape to get curved hemlines to lay flat, and this time I could just fold, press, and hem the old-fashioned way!


Well, it turned out there was JUST enough to eke out a simple gathered skirt.  I did a rolled hem on my serger to avoid using fabric in the hem, and gave it an elastic waistband, both for ease and again to save fabric.  I was able to make pockets (OF COURSE) from the scraps around the tank top pieces.

I was ALWAYS going to give it pockets.
And now for the cool part--when I put the two together, it totally looks like a dress!

The skirt's elastic waistband gives it a belted-dress look.
And not only that, I have dress OPTIONS!  Depending on where I put the waistband, I can also get a dropped-waist more slouchy style:


Honestly, this is less my style, but it's still nice to play around with it!

And I could wear the top out over the skirt as well, giving it a layered look, although one that I probably won't wear.  Maybe with a belt--a sort of peplum idea?

Who can resist this kind of variety?  And I love the way it plays with my Totinette necklace too :)


Anyway, I have been sewing with rayon challis a LOT this summer--it's so nice and soft and drapey, and easy to sew with!  But it definitely wrinkles, which means a lot more ironing that I am used to.  But I think it's worth it, so far!

Monday, February 8, 2016

Queen of Hearts!

It's Week 2 of Project Run and Play, and the theme is Cosplay.  You would think that after a year in Japan, I would have some great anime/manga inspiration here, but for some reason I just couldn't get into that whole thing.  I was thinking of sitting this week out, but then I realized that this week is leading up to Valentine's Day, and I was hit with the idea to make an outfit inspired by Disney's Queen of Hearts.


Little Sister had fun getting into character, even though she's typically sweeter than the inspirational queen.

Aww.  That's my girl.
When I started looking at pictures of the Queen of Hearts's outfit for inspiration, the collar made me think of LouBee Clothing's awesome Bimaa sweater.  I have sewn this pattern a few times, for both of my kids.  I used the shawl collar and made a slightly larger size to allow for the thicker fabric (I used a light french terry sweatshirt fabric that I got in Japan for 100 yen per meter (about 80 cents)--I miss the fabric shopping in Tokyo so much!).  I also extended the length into a tunic, angling out slightly for some extra room, so I made the band at the bottom larger to accommodate.

I want the roses to be RED!
I love these little half-circle pockets that allow for a pop of color.  I've added them to quite a few things I've made--the tutorial is from Anu Miki, found here.  I had to add in the yellow--not only based on the inspiration outfit, but also because otherwise I would have ended up with two weeks in a row of red, black, and white all-knit outfits!

Multiple Personalities
The fabric for the leggings was another 100 yen per meter find--I swear, the knits floor at Tomato in Nippori is a magical place!  I have a cardigan that I made for myself from this fabric--it is a soft and snuggly double knit--you can sort of see the dots joining the two layers in the pic below. I sort of guessed on the knee patch placement, and I NAILED IT!


While I was getting ideas for this outfit, I tried out one of my Christmas gifts--this awesome design notebook is really fun for getting the creative juices flowing!  The body outlines are all grown women, so I had to shift the proportions to give myself an idea--does anybody know if they make one of these for children's designs?  Anyway, I was pretty pleased at how close my outfit came to my original design!  I had to switch the direction of the stripes due to the stretch, but otherwise pretty spot-on!


So, I found out today that Project Run and Play changed the method of determining the winner of the sew-along from being chosen by judges to random drawing.  Hmm.  I have to say, I'm not excited about that.  It's still fun to check out all of the contributors (here they are for this week's theme), but something about having a competitive aspect really inspired me to take my designs to the next level.  I love having the theme and the community to motivate me to sew and get stuff up on my blog (have totally lapsed on that lately, while I've been working on getting my business up and running), but winning (or losing) via random number generator rather than showcasing someone's skill is not very inspiring.  And I hope this doesn't mean people will just start searching their archives and uploading any old thing that might fit the theme, just to get extra entries.  [Edited:  I've been thinking about this statement more, and it's not that I really think people would try to get extra entries--it's more that I really want people to link up as much stuff as possible, because I love seeing all of the entries, regardless of skill and/or effort level, but now every entry is equal competition--I'd rather see the people who really put amazing thought into the theme be rewarded.  It was fun for me when I started sewing along with really no thought (or chance!) of winning to see what the winners were doing, and after doing it for a few years I felt ready to put in that level of effort.  I have won a couple of sew-along challenges over the years, and it felt really, really good to be recognized, and I also typically have some weeks where I'm inspired and other weeks where I phone it in because I still want to participate even if I'm not going all-out, and I tell you--if I won a drawing on a week where I didn't give it much effort, I would feel so bad to beat out the other amazing sew-along competitors!  But based on what I'm seeing, I'm feeling a little guilty that I'm sounding like it's all about winning to me--it's not, really, but as I said before the competitive aspect helps motivate me.  ANYWAY, blah blah blah!  Sorry!]  It just feels very anticlimactic to me--wah-waaahhhhhh.  And I'm not sure why the switch was made--was it so that the ladies behind PRP didn't have to worry about finding judges?  If so, I totally get it--it's a lot to organize.

Um, what?
Didn't there used to be voting on sewalong contestants?  That could be one way to eliminate the need for judges, although it can be unfair when some people have lots more followers than others.  What if there was a method for voting similar to the real contestants' method--that in order to vote on the sewalong, you have to upload something?  And then you can't vote for your own?  Anyway, I think it was more fun for me to have the chance to be recognized for designs, and to see what kinds of things turned out to be winners.

Wednesday, August 26, 2015

Sashiko Embroidered Double Gauze Shirts

Oh, I am so excited about this post!


This month's Project Run and Play theme was handwork, something I typically don't do.  BUT one of the last things I did before leaving Tokyo was to sign up for a sashiko embroidery class.  It was such a fun experience--a friend and I did it together, and it really felt like sitting in on a sewing circle with several Japanese ladies.  Most of the people in the class were repeat customers, bringing their ongoing projects back to work on them with some company.  I started a great embroidered panel (that I've since finished; not sure what I'm going to do with it yet!) while getting tips on the technique from the woman teaching the class.

Just getting started!

Making progress--a great project for sitting on the patio with a  friend!

Those of you in Tokyo, I recommend it--the class is on the first Thursday of the month at the Blue and White Store in Azabu-Juban!

In any case, my new sashiko skills were fresh in my mind when the ladies behind Frances Suzanne posted their challenge for Project Run and Play this month.  So while a couple of months ago I probably would have passed on this one, I actually had some excellent inspiration.


Unfortunately, the timing was a little difficult--on August 9th, we left Tokyo after living there for 15 months, so I sold my machine and packed up all of my fabric and kissed it goodbye until our shipment arrives in Portland in October.  But I held out a special piece of double gauze from Kokka--it's called Ihme Chamber, and when I visited the Kokka showroom in Tokyo I got to see the original watercolor for this print hanging on the wall!

So cool!

The display of the different colorways

I thought it would be perfect with my sashiko accents to make a really special item for returning to school this fall.  I was planning on making a top for The Boy, but Little Sister really wanted to get in on the action too, and so I made one for her as well.

Little Sister's top is the Norah Dress/Tunic pattern from Mouse House Creations, and
The Boy has the Prepster Pullover from Blank Slate Patterns.
I apologize in advance, but this is going to be a pretty long post since I used new patterns for both The Boy and Little Sister's tops, and I want to tell you about how they went together.  The pictures are really cute though--you should scroll through just for those! ;)

Both tops have the same sashiko embroidery detail on the pockets and the back yoke.

The Boy's shirt is the Prepster Pullover from Blank Slate Patterns in size 8, with some extra length (instead of doing a standard folded under hem, I just did a bias facing so I didn't lose any length from the cut pattern piece).  Otherwise I made the pattern exactly as written, and I really liked it!  I was nervous about doing the placket (I've never done one before), but it came out perfectly and the method was ingenious and very simple!  It made me want to start putting plackets on all the things.

About to start 2nd grade!
My only complaint is that size 8 is the largest size, and I just bought the pattern--I wish there were more sizes so that it would last me longer!  My guy is 7 and a half and slim, and the size 8 fits really well in the body but I did add length as I mentioned--but he is tall for his age (and long of torso, which he gets from me).  I have to say, it was nice to start with the short sleeved version since the long sleeves do involve a lot more steps--although I wonder if the long sleeves will need extra length for him too?  The size chart doesn't give a shoulder-to-wrist measurement, just chest, waist, and hip, so you have to kind of guess on lengths.

I got the free printable sashiko embroidery pattern from the tutorial posted by Jo of Dotta on Imagine Gnats.  There are lots to choose from--I'm excited to try more of them!  I printed the pattern out at 100% and it was a perfect fit on my pocket pattern piece for the Prepster Pullover.


I can't remember now where I found this tip, but it worked so well--I traced the sashiko pattern on to a piece of the thinnest fusible interfacing I could find, then ironed it to the backside of my fabric.  Then I had the design right there on the back!

I love all the little characters in this print--there's a cow, a swan, a fox, a frowny bird,
and of course the little guy poking his head out of a garbage can...

The embroidery on the back yoke was kind of an afterthought--as I was putting it together I thought that some extra detail would look nice there, but I had already partially sewn things together and didn't want to attach interfacing.  So I just traced the pattern with an air erasable marker and worked quickly!  I'm so glad I added it back there--I think it makes a huge difference.


I had originally planned to make a dress for Little Sister.  I just bought the Norah pattern when it was a Friday Fiver (yay!) and showed all of the cute options for collars and sleeves to Little Sister.  She chose short sleeves, and she adamantly did NOT want any kind of collar.   I made a mental plan to make the short sleeved dress with a  center panel of sashiko embroidery down the front, and had my fabrics all cut and prepped for that, but...

Starting Kindergarten!

She really wanted a shirt, not a dress, since she wanted hers to be a close match to her brother's.  She also vetoed the center panel (thankfully I hadn't started embroidering yet, or she would have been out of luck) in favor of a pocket like Big Brother's.  I re-cut the front to put that big tree front and center for the tunic length with no embroidered center panel.  Then she wanted a button placket too, but I didn't have enough fabric to cut another front panel out and I wasn't going to chop the focal point tree in half, so we compromised on the red bias tape neckline instead of the clean neckline with lining.  Honestly, even though I would have loved to do a few things differently design-wise on this dress, it's so worth it to listen to her input because then we end up with a garment that she will actually wear.  It's not worth it to make a dress my way that sits in the closet because I ignored what she wanted!

Turns out the pocket placement is PERFECT--she keeps putting things in there!
I used the same pocket pattern from the Prepster Pullover pattern.
 I did line the back yoke using the same method as in the Prepster Pullover, so it's nice and clean on the inside.  And of course she got the back yoke embroidery as well!


I love the fit on this top--I was worried that the sleeves might be too full, but they are just right.  I did french seams since I was using double gauze, so that did take the side seams in a tiny bit more.  My kids are opposites in sizing--the 7-year-old is almost too big for the size 8, and the 5-year-old is almost too small for the size 4!

Oh, and speaking of fit, since I added the embroidery, I shortened the opening in the back of the tunic.  But I shortened it too much--oops!  I had to widen the neckline slightly so that Little Sister's head could fit through.  But all's well that ends well!

Back to school
There was something so soothing about doing the embroidery.  First of all, the project was so portable!  We have been enjoying being back in our Portland house with a big front porch where we watch the neighbors go by, and it felt pretty idyllic to watch the kids eat ice cream on the porch swing while I sat and embroidered and drank craft beer.  It's also a great thing to do while watching a movie (although you may miss some key visual effects while you're looking at your stitching).  The longer I sew, the further down the path of special details and nice finishes I go--I'm working on being less slapdash and instant-gratification oriented, and this handwork inspiration project was really very enjoyable, and I love the results.

Can you tell we enjoyed our photo shoot today?

Monday, June 15, 2015

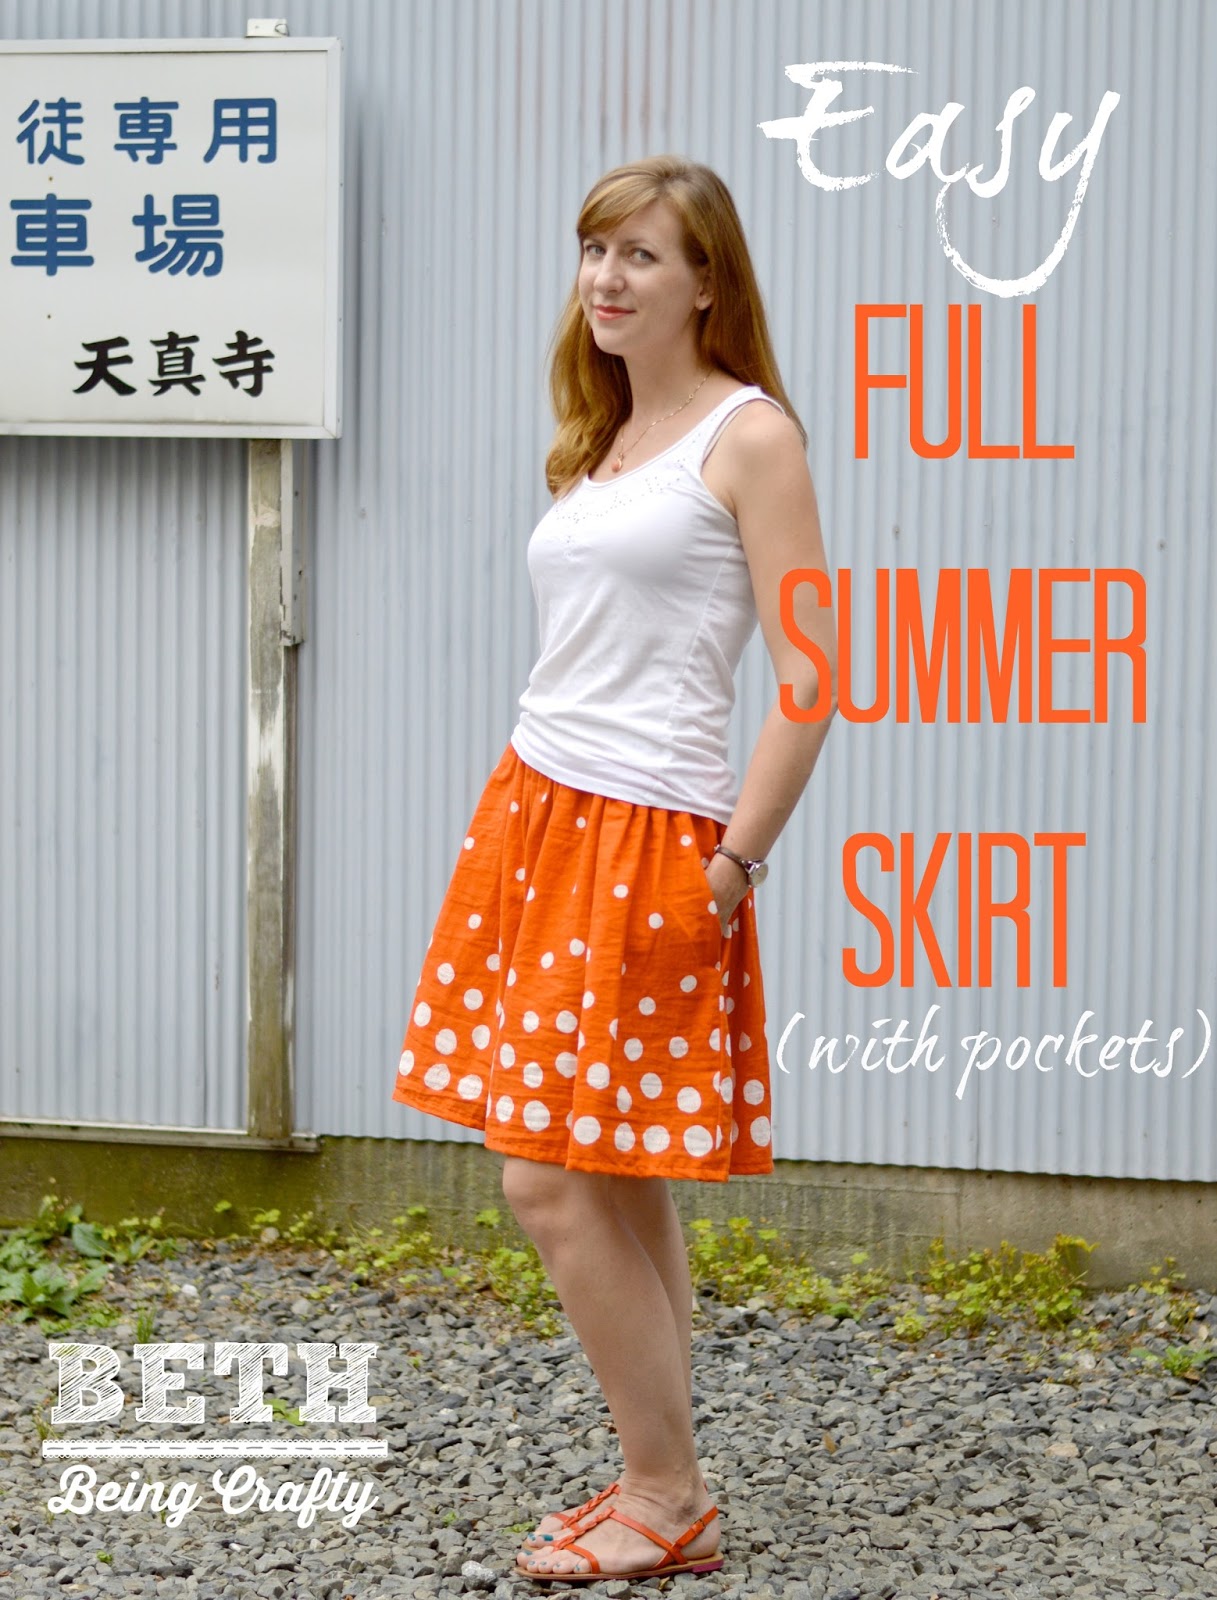
Double Gauze Dotty Skirt

This is one of those easy projects I've been meaning to do for a while, and finally got around to it.  Just in time, too--the weather is perfect for a breezy, comfy, fun, bright skirt!

Let's pretend that sign says "I love your skirt!"

This skirt has an exposed elastic waistband (here's a great tutorial on doing one from Dana of MADE), and the skirt is just a rectangle of some dreamy Japanese double-gauze (with pockets, of course!)


In case you want to make one JUST like mine, I'll give you some details:

1.  I had just over 2 meters of a border-print double gauze (like, 6 cm over), so I cut it lengthwise down the middle to put the print along the hem.  I had a tiny hem, first to use as little fabric as possible but also so I could remember what this fabric was later by keeping the selvage visible ;)

2.  I wanted 2 side seams, rather than one back seam, so that I could add pockets.  So I cut 2 rectangles that were each 103 cm wide (40.5 inches) and 20.5 inches long (since I had that tiny selvage hem--if you're doing a regular hem you will want to add a little length).  Oh, I guess it's relevant to know that my waist measurement is about 31", so the total width of the skirt was just about 2.5 times my waist measurement.  I wanted it to be full, since the double gauze is so soft and floaty!

Or maybe the sign says, "Parking for Awesome Skirts Only."


3.  I cut out four pocket pieces (I used a basic white muslin so I could save the rest of my double gauze) and attached them 2.5 inches down from the top of the skirt.  Here's a perfect free pocket pattern from See Kate Sew if you don't already have one you like!

Boo on my pattern matching!

4.  I sewed my side seams using french seams since double gauze frays quite a bit.  (Here's a french seam tutorial from Tilly and the Buttons.) Did you know you can sew a french seam even when you've added a pocket?  You just go right around it, and make sure to clip the curves when you turn it around to sew the second seam!  However you sew the side seams together, make sure to give it a good pressing before you continue.

5.  If I had a serger here in Japan, I would have serged the raw edges at the top of the skirt before attaching the elastic waist.  I don't, so instead I pressed the raw edges towards the outside of the skirt twice like I was doing a teeny tiny hem, except for turned to the outside of the skirt instead of the inside.  It doesn't really matter which way, but this way it's hidden under the elastic so you don't see it on the inside or the outside.

6.  Next, I gathered the top of the skirt so that it was just slightly bigger than my hip measurement.  I wanted it to easily slip on and off.  Dana from Made ALSO has a nice gathering tutorial if you need it--I admit to using the cheater method whenever I think I can get away with it! I like to gather the front and back separately, just because I get nervous gathering such a large amount all at once!  Once I have it to the width I want, I tie off my gathering threads then make sure the gathers are adjusted evenly.

7.  Time to attach the elastic!  The gathered top of your skirt should be a few inches wider than your elastic.  Now's the time to look at the tutorial from Dana on making the waistband and attaching the elastic!  Hers is an easy and nice-looking method--it's for a circle skirt but this one will work the same way.  But....

8.  Full disclosure--I did attach my elastic differently.  First of all, I started with the skirt inside out (with the gathers visible, laying on top of the elastic) so that I could make sure I had my gathers laying flat on the inside.  I did a wide zig-zag grabbing the gathered top of the skirt, about a half inch away from the edge of the elastic.  Second of all, I actually sewed the elastic twice.  After attaching the elastic, I turned the skirt right-side out and sewed the bottom edge of the elastic down with a tiny zig-zag.   Here's how my waistband looks, outside and in:

See the two zig-zag lines of stitching?


9.  Oh, you can see that I also covered the back seam on my elastic waistband with some bias tape.  Just for fun.  And then I don't need to put a tag in to find the back easily :)  If you do this, put it on before attaching the waistband to the skirt!

They had little one-meter packs of traditional Japanese print bias tape at the 100 yen store! I bought lots.


10.  I saved the hemming for last, so I could adjust the length if necessary.  I was using a border print, which gave me less leeway than usual on how much I can hem it, so I tried to be accurate with my cutting and it turned out right on.  I am 5'7", and depending on where I place the skirt on my waist it's just above knee or knee length.

With the elastic sitting below my belly-button.
I tried it at my natural waist but it just wasn't as flattering.

11.  I tried to find an online source for this fabric, but alas, I haven't had any luck.  This was a remnant I bought at Tomato, the awesome fabric store in Nippori, so just to rub it in I'll tell you that I paid 600 yen (less than $5) for 2 meters of it.

And now, I just want to wear this skirt all summer!  Or maybe I'll make a few more--I have been addicted to buying double gauze and this would be the perfect thing to make out of it :)

Oh, and one more thing...

Hey guys...guess what?  This skirt just won an award!

Yes, that IS how I really feel about it!
And from the skirtmaster herself, Audrey from Skirt Fixation!  This is so cool and unexpected.


I was awarded the Best Woven Skirt in her 2015 Spring Skirt awards.  Believe me, you have got to check out the winners in the other categories--so many great skirts!  I'm excited to check them out.


Wednesday, June 3, 2015

Me-Made May 2015 Wrap Up

I finished the rest of Me Made May without repeating my handmade clothes!  Before going into this I hadn't realized how much of my wardrobe is actually made by me.  And actually now that May is over I still have a few more things that I never wore during the month, but that I have worn since.  Not even including things that are for colder weather!

Here are the outfits I wore in the second half of the month (most pics from Instagram although some are pre-square-cropping so I can show you more of the proportions!)

May 17th:  I wore this dress out to tea at the Park Hyatt Hotel in Shinjuku (where Lost in Translation was filmed, although we were on a different floor) with some lady friends of mine.  I haven't worn this dress much, because I struggled a lot with the fit when making it.  Let's just say this is the dress that taught me the importance of making a muslin, especially when the project has multiple darts, piping, a full lining, invisible zip, and fitted waistband--pretty much impossible to alter without taking the whole thing apart!  I blogged about it when I first made it, and I don't know if I'll ever wear it again.


May 18:  Foldover waist yoga skirt.  I made this one out of a thrifted t-shirt and I thought I was pretty ingenious to use the square neckline to make the topstitched pockets.


 May 19th:  Railroad-Stripe Milkmaid Skirt (from this Crafterhours tutorial) and a cardigan I made out of a hand-me-down wrap dress, with a RTW tank and scarf


May 20th:  This is a Sorbetto Top but with a reverse pleat (blogged here) and a Boyfriend Cardi in some fun 100 yen per meter double-sided knit, from the free iCandy Handmade pattern.  I wore it to the Dirty Dish Shop in Tokyo (pictured), an awesome ceramics warehouse where everything is 40% off of retail price!


May 21st:  This was the first new item I made for Me Made May--a sleeveless Washi dress with some bodice alterations that I blogged about here.  It's also my favorite item of the month, and the one I was most excited to wear again when the month was over.


I had to show you a better close-up of the fabric too, because I love it--it's a little crinkly so it has some stretch, and it's nice and airy for hot weather.  Plus it was only 100 yen per meter--can't beat that!  This dress cost me about $2 to make! 


I wore it for our trip to a Sumo match, one of our bucket list items before we move away from Japan! Near the stadium we happened across this giant yarn ball and I couldn't resist the photo op.


May 22nd:  This dress was my Easter dress a few years ago.  It was one of my first splurge fabrics--a silky feeling cotton that was an end-of-bolt cut from Mood.  I think it also marks the first time I actually paid money for a women's pattern!  It's the Gathered Sundress from Pattern Runway.  I didn't make a muslin for this dress so the fit isn't great, but it still gets a lot of wear due to the beautiful print and the roomy pockets!  I think it's about time to give this pattern another try, now that my technique has improved quite a bit.


May 23rd:  Another Washi Dress :)  I LOVE this one in the Melody Miller border print arrow fabric, but being my first Washi Dress I wasn't sure how long to make it, and because of the border print I couldn't shorten it as much as I wanted to when hemming.  Still a winner though!


May 24th:  This skirt is another Milkmaid Skirt, this time made from a thrifted nightgown.  I rarely wear it since it's white, but I did manage to get through the whole day without spilling on it so maybe I'm getting less clumsy!  Or maybe my kids are older now and don't wipe their hands and faces on me as much anymore.  In any case, I think I can bring this skirt into more regular rotation now.  In other news, I loved this t-shirt Merchant and Mills made for Uniqlo--it has a faux measuring tape draped around it!  Of course, it's in centimeters...


May 25th:  Another take on the Scoop Top from Skirt as Top's free pattern.   Hmm, I guess I never blogged about this one.  It uses some sheer woven fabric from a blouse I ordered online that was a terrible fit.  This month made me realize how often I like to make the same pattern over and over--I have three milkmaid skirts, three (at least!) scoop tops, several Washi's, plenty of Plantains, and so on.


May 26th:  The 2nd NEW item of the month!  I found this fun strawberry print jersey for 200 yen per meter, and it made a great sundress for Little Sister but I was a little afraid of it for myself.  But I liked it so much I had to give it a try!  I think the black and white stripe mellows it out enough to be at least somewhat appropriate for a grown-up--but it's still a little crazy!  The pattern is the free Fun Summer tee from iCandy Handmade, and I haven't had a chance to blog about it yet.


May 27th:  Another dress I never blogged about!  I made this one here in Tokyo out of thrifted fabric that I brought with me from home.  The bodice is based on the Sorbetto Tank pattern again, but I'm pretty sure I used the Milkmaid skirt dimensions to figure out the skirt.  It has an elastic waist with bias casing.  And pockets, because duh.


This is another fabric that deserves a closer look, because it's printed on top of thin stripes.  Pretty cool!


May 28th:  A basic RTW black tee with a simple elastic waist a-line skirt (with pockets, of course!).  I  like the ribbon detail on the hem--you can get a closer look on my blog post about this skirt.


May 29th:  What's that, another Washi?  This time with long sleeves!  I made the elastic slightly too tight in the ends of the sleeves on this dress, so I ripped them out in the morning before putting this dress on--now they might be a bit TOO loose?  Maybe I'll put in a bit more elastic and try again.  This was my 2nd Washi dress and since I made the first one too long I overcompensated on this one and made it too short--and of course, I did a visible hem facing so no easy way to lengthen it either.  Grr!  It seems I never blogged about this one, either!

Cool double-sided 100-yen-per-meter fabric!

May 30th:   I based this top off of iCandy Handmade's free cap-sleeve tee pattern.  At first I just cut the yoke straight across, but it felt like it needed more so I re-did it with the sweetheart shape and was so happy with how it came out.  The knit has a subtle stripe that coordinated really well with the slate-gray cotton lace.  And what do you know--this is another project I never blogged about!

Sorry about the blurry pic of the back--it's hard to know when you're in focus using a phone self-timer!

May 31st:  My final outfit of the month was my 100-yen-per-meter Bess Top from Imagine Gnats in this weird map print!  I was pretty surprised to find that I had enough items to get me through an entire month without repeats (and then some!)


And that's it!  You can see my outfits from the first half of Me Made May here.  This was my first year participating in earnest, and I'm pretty happy with the results--the most major of which is realizing that a lot of my favorite things to wear are actually things that I made myself.

I have a few more projects on my to-do list now, some inspired by the great looks I saw from other sewists on Instagram, and some coming from the realization that I have a few dresses in my closet that I wanted to wear all the time, and I only avoided since I was trying not to repeat myself.  That tells me I need to make those patterns a few more times!