Showing posts with label holidays. Show all posts

Wednesday, October 12, 2016

Last Year's Halloween Costumes--Minions

Last year, we had fun making/adapting our own halloween costumes, but I never got around to posting them.  I intended to take some good pictures but never did it, and here we are a year later with still no post about what ended up being a really fun set of costumes.

So, here's the rundown:  The kids wanted to be minions.


Thrift store overalls (luckily found in close-enough sizes), thrift store yellow turtlenecks (adult sizes that I cut down), goggles made from empty duct tape rolls and those rounded masks you wear to keep from breathing in dust, and stocking caps ordered on Amazon.

And then the most amazing thing happened.  We were eating an early dinner, getting ready to go trick-or-treating, when we joked about how great it would be if the hubs had a Gru costume.

Then we realized...it wouldn't take much.  He had a black wool car coat and scarf.  He had a pair of pants that he bought in Tokyo not realizing he had accidentally purchased very skinny skinny jeans.  I stuffed a long, narrow decorative pillow into his jacket's shoulders, and Voila...


Is that amazing or what??

Since hubby had not originally planned to wear a costume, I planned my outfit separately and therefore don't fit in at all, but that's ok.  I was Kiki from Kiki's Delivery Service, a charming Miyazaki movie that you should watch this Halloween season if you've never seen it!


So that's it!  This year, we're not doing homemade costumes (sniff)...the kids wanted to be characters from Harry Potter, and it just didn't make sense to make Gryffindor robes when I could buy them so easily.  But there will be some surprises in store (if I get around to posting them before next year!)

Wednesday, December 17, 2014

Upcycled Holiday Dress!

I made Little Sister the sweetest holiday outfit to wear for her school Winter Concert!  She helped me choose the fabrics and style, she worked with me to make the fabric covered buttons, and it came out so cute!

This is not that dress.

The day after making that dress, I got a note in Little Sister's backpack that said that her class needed to wear RED for the winter concert.

So, out of the upcycling bin, I grabbed a knit top I bought a while back for 99 yen (less than a dollar), since it was the only red fabric I had on hand, and I whipped up a comfy little red dress.


Little Sister didn't want me to put the collar on it, so I'm saving that for another project.

I turned the shirt around to make the dress, since we both liked the little keyhole with a pearly button, but that left the scoop in the back of the dress.  It looked a little too low, so I added a bow:


And that's it!  Luckily she will have plenty of opportunity to wear the other dress I made during the next week.  I'll post photos of that once I have a chance to get some good pics!

Thursday, October 23, 2014

Halloween 2014: Peter Pan and Tinkerbell

I don't know how it happened, but the kids came up with the idea all on their own to be Peter Pan and Tinkerbell for Halloween this year!  I thought our themed costume days were over once they started having their own opinions, but somehow it worked out!  I went and bought fabric before they could change their minds, because at our house once Mom has bought the fabric, there is no more costume indecision.


Thanks to the wonders of Nippori Fabric Town, I was able to get the fabrics I needed for Tinkerbell's costume (dress plus winter fairy coat and trim) for about $4.  I had to spend a little more to get the great french terry I used for Peter Pan's pants and hat (I spent $6), and I bought a pre-made green mens' shirt for his tunic.


I'll do a quick run-down of the Peter Pan costume, since it was pretty straightforward, then I will share a little more about how I made the Tinkerbell dress and winter gear.  Isn't it nice that Tinkerbell has some stories where she gets bundled up, so I can make my daughter put on a coat and she'll still be in costume?

Winter fairy photobombed by Peter Pan
Like I said, the Peter Pan tunic is just a men's t-shirt.  I cut jagged lines along the sleeves and hem, and cut off the neck binding and cut a small slit straight down to mimic Peter Pan's collar.  That made the neckline pretty wide, so after The Boy tried it on I added a couple of angled seams from the neckline to the top of the shoulder to make the neck opening smaller.  Done!


I used my modified Hosh Pants pattern that I have used previously to make pajama pants for these Peter Pan Pants (I like to call them the Peter Pants).  I wanted them to be slim, since Peter wears leggings, but I wanted The Boy to possibly get use out of them as sweats after Halloween, so I didn't go full legging.

Flying
He had a belt from last year's Luke Skywalker costume that worked well--he can carry his Pixie Dust in there!  For the hat I mostly followed this tutorial, and I used this one for the boots using leftover fabric from my denim challenge outfit from Project Run and Play.


I had fun with Tinkerbell's dress.  I cobbled together ideas from a few different tutorials to come up with a shirred back tank dress with a double square circle skirt, and I think it worked great!

Very twirly

If you want to do something similar, I recommend adapting this free shirred back sundress bodice tutorial and adding this circle skirt (another free tutorial) to it--the points from the double square are perfect for mimicking Tinkerbell's leaves, I think!

Shirred back
I was only planning to buy a meter of fabric, and when the woman cut it for me it turned out there was a little over 1.5 meters on the bolt left, so she just gave me all of it for the price of one meter--which was only $1! (well, 100 yen).  And I was lucky she did, because I used almost all of it once I decided to make the double skirt.  Since I used a woven (a silky satiny stuff, which was not as difficult to work with as I feared it might be), I hemmed the skirt layers, which wasn't a big deal time wise.  I lined the bodice since the fabric was pretty thin, and I also added a layer of thin interfacing to the front of the bodice.

If I were Tinkerbell though, I might be a little chilly walking around in October, so I thought I'd try to make a winter fairy jacket.  I was so excited to find this quilted fabric (it's the same on the front and the back) for only $4 a meter!  And I only used half of it making this cute little coat!


I self-drafted the pattern using a t-shirt pattern.  I did french seams on the sides and shoulders since there's no lining; the fabric is double-sided so I wanted the inside to look nice and finished and also lay flat and feel comfortable.

The front and back dip down a bit to mimic the jagged leaf hem on Tinkerbell's coat.
The white crushed velvet trim came in a wide ribbon, so I just attached it like bias tape all the way around and as cuffs on the sleeves.  And I used a magnetic clasp to hold it closed!  The green quilted fabric is silky and has pin dots on it, and I've told Little Sister that she can use it as a jacket even after Halloween--I'm pretty proud of how it turned out!


I couldn't find any good green knit fabric to make leggings for her (or a shirt for Peter Pan for that matter), so I bought a pack of Rit dye in Kelly green and dyed a pair of white leggings out of our drawer for the winter wear.  Amazingly, they came out exactly the same color as the dress!  I would have liked them to be lighter, but at least they don't clash terribly!  I added some more of the velvet ribbon at the hem.


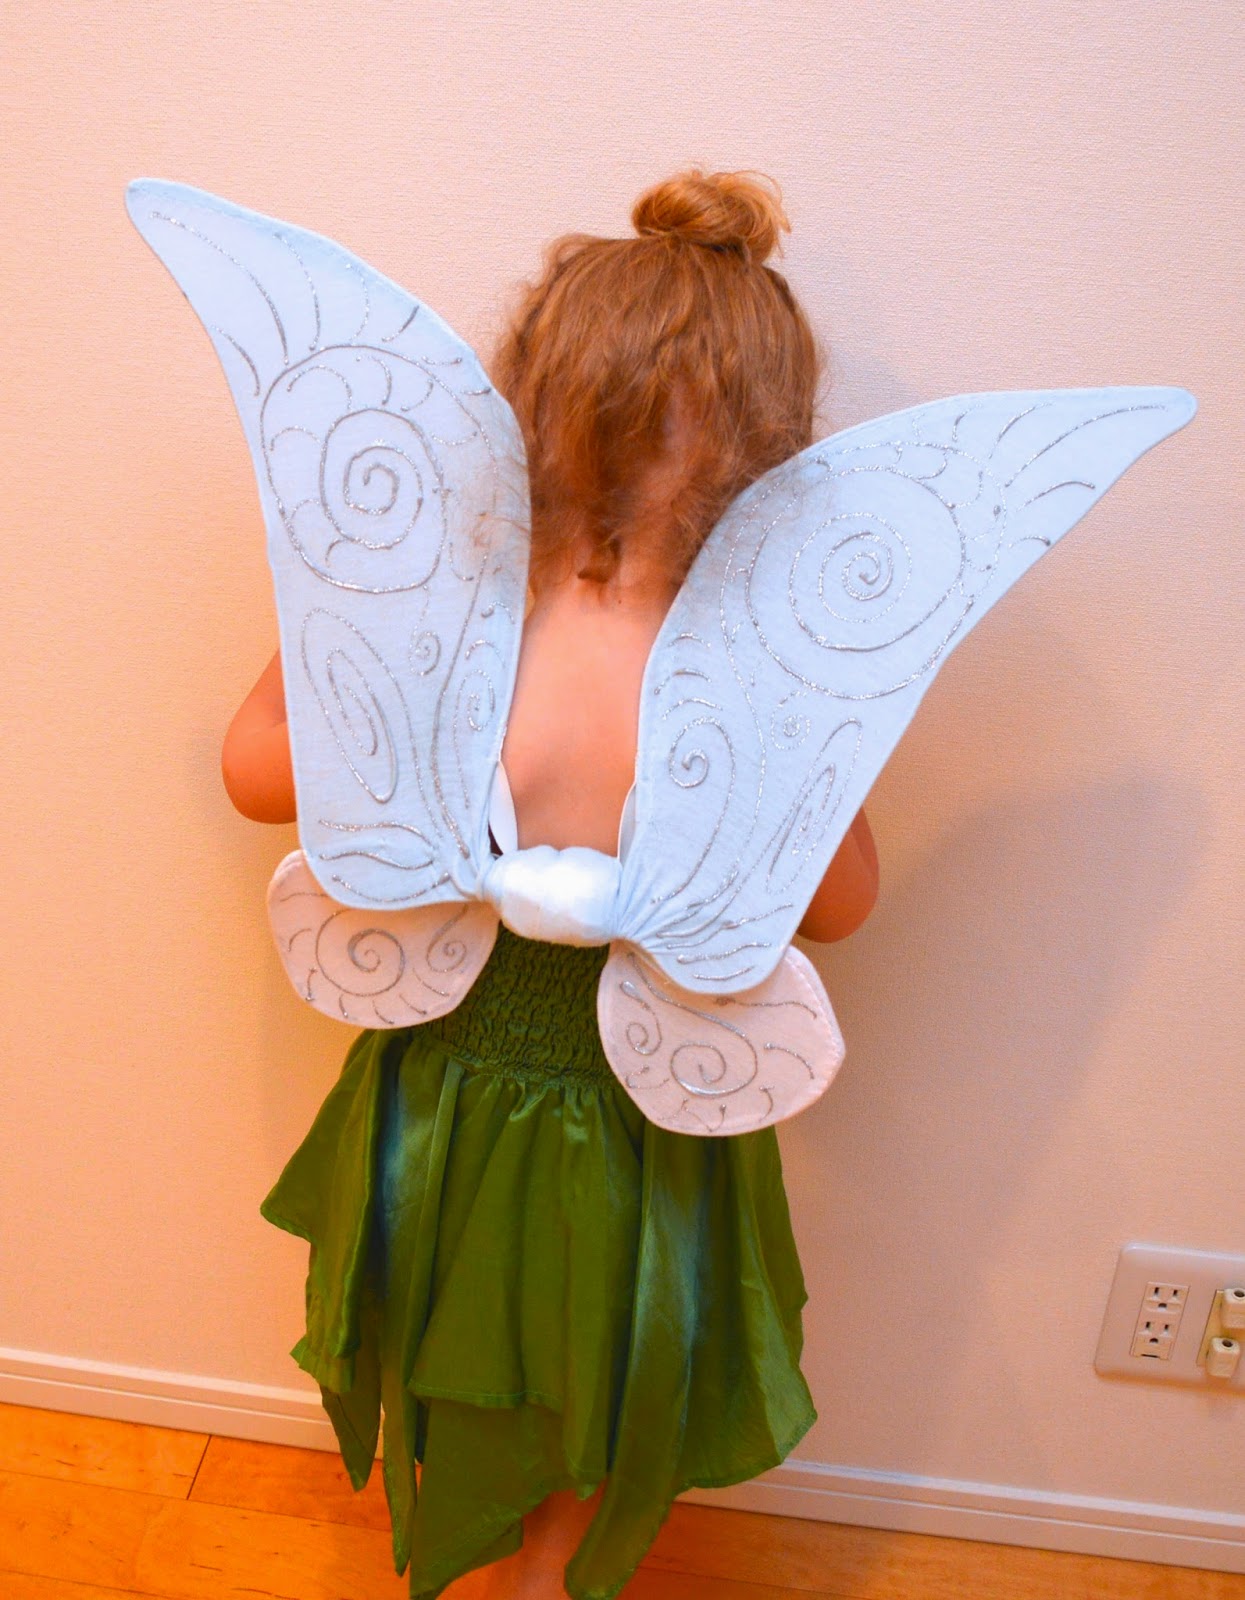
The dye match was even more amazing because I actually bought the dye for turning a white shirt green for Peter Pan.  But I couldn't read the fabric content of the white tee I bought, and while the leggings came out very green, the shirt came out a soft baby blue.  Not great for Peter Pan, but it was perfect for Tinkerbell's wings!  I had planned to buy the fairy wings but couldn't find any (except for fancy expensive ones for adult costumes), so I followed this tutorial to make our own, adapting the shape for Tinkerbell.  And I didn't have any white tights, so I improvised with 100 yen store t-shirts--both the one I accidentally dyed light blue and a plain white one.


And finally, I couldn't forget Tinkerbell's shoes!  Luckily these little white fabric shoes are easy to find in Japan--they are used as indoor shoes for little kids at school usually.  But they were a great blank canvas for fabric paint and a pom-pom.


If you've stuck with me this far, you get a reward--the silly pictures we took of these costumes! I would have loved to get out in the park for some fun outdoorsy shots, but it's been rainy and they get to wear the costumes to school tomorrow and I was afraid they'll get ruined before I got a chance to get good photos if I didn't just go for it.  These guys were so funny anyway.

Sneakerbell


Telling secrets

Toot noises: always funny.
Oh!  And we will be visiting Tokyo's unique Disney theme park, Disney Sea, on the day before Halloween!  So the kids will be able to wear their costumes to the park and be a part of the Disney Halloween fun.

Thursday, January 9, 2014

Upcycled Sweater Dress


I've been meaning to make this dress for ages!  I bought the sweater months ago from Goodwill, knowing it would make a darling dress for Little Sister.  I finally got motivated to put it together when the holidays were rolling around and I knew it would be good to have an outfit that was festive AND comfy and not too formal for the types of events we participate in.

For example, visiting Santa.
And I finally got motivated to get pictures taken and blog about this dress when I saw that one of this season's Project Run and Play themes was upcycling!  I actually planned on making this dress back when last season had a "personal style" theme since upcycling is so inherent to most of my sewing projects, but I just ran out of time.  Oh, and by the way--the outfit the boy is wearing in the Santa photo is coincidentally all upcycled too!  He happened to wear these pants and this sweater.  How nice of him!


I used a basic t-shirt bodice pattern I had drawn up based on one of Little Sister's tees, and cut it out to empire length at the top of the sweater, sewing new shoulder seams so I could make the opening smaller while still using the ribbed sweater neckline.


When I drew that pattern originally I made a few sleeve variations--this one uses the puffed sleeve no hem sleeve pattern (since I cut the sleeve from the bottom of the sweater sleeve and didn't need to sew a hem).

The accessorizing is all her--she chose flower hair clips, zig-zag shoes, and purple pin-dot leggings.
I thought it would be cute to dip the waistline down a bit in the back--I like the rounded effect with the fair isle stripes.


Unfortunately (or maybe fortunately, as it turned out), I cut the neckline too small and it was kind of snug over Little Sister's head.  If an item is difficult to get on, she will NOT wear it, so I knew I had to remedy the situation if I wanted her to wear the dress.  So I cut a facing out of t-shirt fabric and made a little elastic loop button opening in the back.  Now it's easy to get on and off, even without undoing the button, and it's a cute little added detail.

As if we needed any extra cuteness.
So there you have it!  My upcycled sweater dress.  Quick, easy, comfy, super cute, and about $5 to make!

I'll update this link with the Project Run and Play sew-along  when it's ready (it's there now)--so fun to see what everyone has been making!

Wednesday, January 1, 2014

Holiday Outfit

This is the outfit that I made for Little Sister to wear on Christmas Eve, when we go to church and have all of our family over to our house for a Dungeness Crab feast and presents.  She refused to wear the blouse though, instead choosing a red turtleneck, which was a pretty cute outfit too, I have to hand it to her, so I let her win.


But eventually I got her to put on the full outfit (on New Years' Eve) so I could snap some photos, and it came together just how I pictured it.


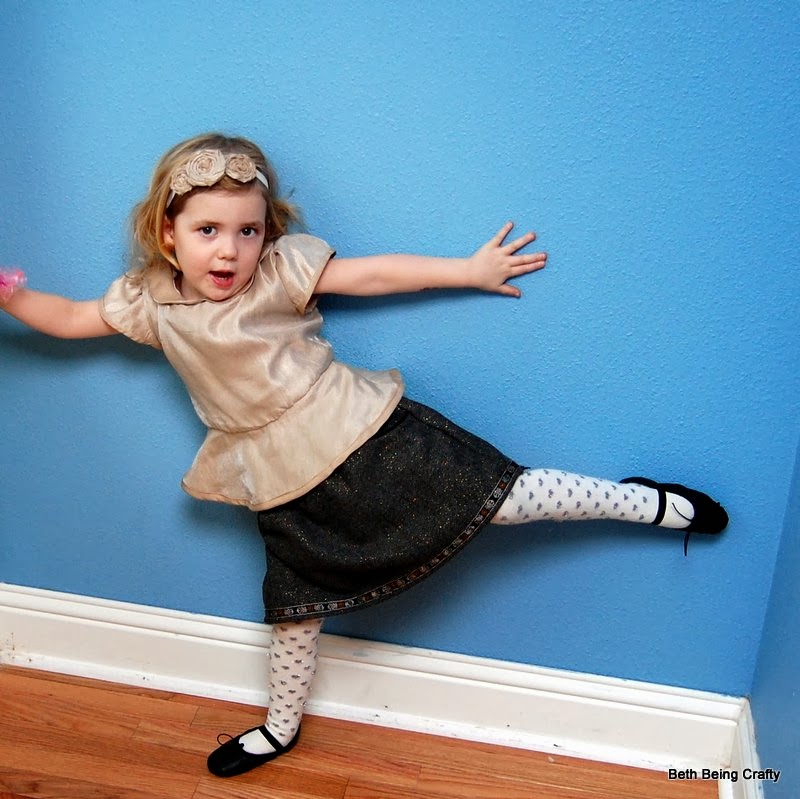
The blouse is the Cece Top from Popolok Designs.  I got to be a pattern tester for this pattern a while back, and I made the sleeveless dress version.  When Little Sister was her auntie's flower girl back in October, I had decided to make another Cece Dress, this time with sleeves, but once I had the top cut out I decided it was too formal for that wedding (I decided to make the Leah dress from Craftiness is not Optional instead).  I finished the peplum top version, with short sleeves and a peter pan collar, in time for the holidays.


The gold-flecked tweed remnant I used to make the skirt had been in my stash for a while, and I just loved how it went with the shimmery gold blouse.

fabrics and trim
 I used the Milkmaid Skirt tutorial from Crafterhours, which I had made for Little Sister once before and the grown-up version for myself several times.  On this one, I added black piping to the pockets and some pretty ribbon trim to the hem (leftover from another skirt I made for myself).

tucked in to show off the skirt
We topped it off with a hand-me-down black cardi, some sparkly tights, the headband I made for the flower girl outfit, and since we weren't actually leaving the house, some black ballet slippers.  Pretty sweet little outfit!

When I made the top, I was trying to keep things easy on myself, so I skipped the invisible zipper, and just did a button-and-loop closure using the same method described in the Leah dress tutorial I had used before.


But this blouse is more fitted than the Leah dress, so it is a bit of a tight squeeze getting it on and off, even though it fits great once it's on her (I cut out the 3T, which is what she's mostly wearing in store-bought right now).  I also cut the peter pan collar smaller than the pattern, and it flips up a little--I might try topstitching it down so it lays a little better.  One of the things I love about this fabric is that the backside is not shimmery, so I can use it for a nice subtle contrast.  I used the backside for the collar and the bias trim that I made.


Once she had it on, she decided she liked it after all, so maybe we'll have some occasion where she can wear it even though it didn't make a holiday appearance this year.


Or maybe not--you never can tell with this girl!

Sunday, December 29, 2013

Christmas Jammies


Just so you're not worried, I will say that these were done in time for Christmas.  As a matter of fact they got quite a bit of wear the week beforehand as well, but my kids have not felt like posing for any photos in addition to all of the family-holiday related pics I've made them take, so I haven't posted these yet.

You want us to do what?  We're not listening!

Fine, we're looking at the camera.  Happy?
There are also two upcycled sweaters to post about, in addition to a blouse-skirt outfit made for Christmas Eve wear and refused, so that also hasn't been photographed yet.  I'm hopeful that now that actual events have slowed down, the kids might prove more cooperative in front of a camera so I can show you some of these things.  Oh!  And!  I used my Christmas money (combined with the assumed future sale of my current camera) to get an upgraded camera!  So I'm excited to try it out once it arrives.

So, the pj's.

Ok, those pj's are pretty cool now that we look at them.
I used the exact same pattern that I made for this striped pair of pj's to make The Boy's set.  Once again, it worked out great.  This fabric had slightly less stretch than the stripe, so the fit is a little more snug, but there was enough room to accomodate.  I loved this festive fair-isle knit, as did many others out there in sewing-blogger land--I've seen lots of holiday outfits made with this!  It reminds me of the Hanna Andersson pj's that the kids have grown out of since last year.

Unhand me, Sir!
Little Sister chose a long-sleeved nightgown for her jammies.  I adapted a basic t-shirt pattern I had made, puffing the sleeves a bit and cutting it off at an empire waist, and then used the same skirt pattern I drew when I made this Leah dress a few months ago.  She likes 'em long and flowy, and I think that steered it more towards "nightgown" and away from "dress."

Since you're grumpy, let's photograph the back, shall we?
I bought 2 yards of the fair isle print, and 1 yard of the coordinating solid red knit.  I'm glad I didn't order less!  I had to cut the back panel of Little Sister's nightgown skirt in two pieces, but otherwise my amounts were perfect.  The fabrics came from Girl Charlee, my favorite online shop for knits.

OK, we love them! And each other!

And the most important thing--I got the Christmas morning matching holiday pj photos I wanted :) 

Checking under the tree

Opening up the stockings
I hope you had a happy holiday too!

Sunday, December 15, 2013

Upcycled Sweater Stockings!

While we were home for this "snow day,"...

Obviously.
The kids and I were all productive.

I FINALLY finished the stockings I have been planning since I got Christmas sweaters for 75% off at Goodwill after the holiday last year,

All hung by the chimney with care

And many forts and bear caves were built.


There are lots of stocking tutorials online, and I did get some inspiration there but ultimately ended up doing this my own way, as usual.  Since I made four of them in a row, by the time I was about to start the fourth one I thought I probably had enough information and expertise to do a tutorial.  So if you want to make stockings like this, read on!

Or if you  just want a better look at the end product, here you go:


The Boy was primarily excited about the new stockings because that meant he could take his old one up to his room for Christmas decorations.  I hope he realizes that he does not have a chimney in his room, meaning that Santa will not be filling up his secondary stocking.  Honestly though, he just loves the holiday decorations and wants to spread the cheer into his bedroom--he asked me if he could bring some of the nutcrackers up there too; they are his favorite.

I had not anticipated how much more fun Christmas would be this year.  Our kids are now 3.5 and almost 6 and there is a huge difference between how a two-year old reacts to the holidays and how it is for a three year old.  Little Sister is SO EXCITED!  About EVERYTHING!  And it's not even about the presents--she is asking Santa for a Rapunzel doll, but other than that she told me that she doesn't want anything.  I asked her if her family should just choose something that they think she would like, since they know her pretty well, and she said "Yeah!"  She is way more interested in dancing in front of the lights, playing I-Spy with ornaments on the tree, and singing Christmas songs.  And The Boy had an opportunity to "shop" for his family at school, choosing presents carefully for all of us (nothing costing more than $1.)  He can't wait for us to see what he chose, and he was so thoughtful about it!  He has been making snowflake garlands and pictures of reindeer to put up around the house, and he can't stop talking about playing The Angel Gabriel in the annual church Christmas play. It is fantastic.

Snowflake garland.  In the center he cut out the letters to spell "WINTER."

He adds a new reindeer every day--he's up to Cupid, I think.

My personal favorite decoration--when he saw me about to recycle the scotch tape wrapping, he said "Don't throw that out!  I can use it to make Santa's sleigh!"  And so he can.

Is he my kid, or what?


Alright!  Ready for the stocking tutorial?  Great!  These is such a Beth project:  Upcycled?  Check!  Clearance? Check! Figuring it out as I go?  Check!

You can easily find a printable stocking pattern online, but I just used our old stockings as a guide for cutting out my shape.  I had to be strategic about where to cut, since most of my sweaters were cardigans or had zip-fronts.  It's a lot more straightforward if you find a crewneck to start with.

I cut two main stocking pieces (one facing each direction for front and back), two lining pieces, and two cuff pieces cut from the hem of the sweater so it has a finished edge.  I then cut my letters out of felt and sewed them to the cuff piece that would be the front of the stocking.


Attach the letters towards the bottom of the cuff piece, close to the finished edge.

Sew the cuff pieces to the top of the stocking pieces.  Make sure that you attach the cuff piece with the name on it to the stocking piece that is facing the direction you want the stocking to hang.


Do the same with the back piece and blank cuff.


Now lay your lining panels on top of the stocking pieces, right sides together, and sew across the top of the cuff.

My lining was a thin curtain panel, also from Goodwill.
 Flip the lining pieces up and lay flat,


Then lay one on top of the other, right sides together, and pin.


Leave an opening in the lining between the heel and the top of the stocking.


Before sewing, make a little loop for hanging.  I used ribbon and tied a knot in one end.


Insert the loop with the loop tucked in towards the middle of the stocking, close to the top of the cuff.


Pin the loop in place so that you will sew the knot or raw edges into the seam.


Sew around the outside of the stocking and lining, leaving the gap to turn the stocking right-side out.  Trim the edges, being careful not to get too close to the seam.  This is especially important for the sweater portion, since a cut sweater edge can unravel if not handled carefully.


To close up the hole used for turning, I just sewed it shut on my machine, but if you'd like it to be invisible you can do it by hand.  I just thought that nobody would see the lining so it didn't matter.


You could be done here, but depending on the thickness of your sweater/cuff, the lining may stick out.  This bugged me, so I decided to do a topstitch around the opening to tuck the lining down inside the stocking.

Before

After topstitching
 And here they are!  I love them.

Dad and Mom

The kiddos
 Here's how they look on the mantle!  The pets didn't get new stockings.


And luckily, each member of the family chose their own stocking as their favorite.  Phew!