Wednesday, March 27, 2013

Harmonica Jacket!

I decided that what The Boy really needed to complete his Easter outfit was an awesome jacket.  I found this free pattern in his size, and I found some interesting fabric for $1.50 a yard (more about that later), and with very little $$ at stake I thought it was worth a try.  I had a vision for how this jacket would turn out. Not sure if I accomplished it, but it definitely makes a statement.


I don't know if "funky old man" was the statement I had in mind.  I really, really wanted to try piping.  I have seen so many cute boys coats that include piping, and I thought it would be a cool detail. I think in this coat though, with the jumbo lapels plus the kind of old-fashioned fabric I used, the piping was just a detail too far.


The Boy chose the buttons himself from the stash I got from the hubby's grandma.  I pulled out lots of buttons that I had four matching ones of-red, navy blue, antiqued silver--and he chose these retro brown ones.


Now I'm really wishing I had included the elbow patches that are in the original pattern and gone all the way with this look!


The biggest problem with the jacket is that it came out a little too small for my lanky guy.  My fault for not measuring--the pattern is supposed to be a 5/6, which is what he usually wears, but I should have checked. Mainly the sleeves were a little short.  I left out the back flap, so I should have widened the back panel a bit too, and I wasn't sure how to do the hem on the back since I was leaving out the flap, and I ended up cutting off some fabric that I shouldn't have cut, resulting in a slightly too-short jacket.


One of my favorite elements was the lining that I used.  I only had a remnant of this cool fabric, less than half a yard, so I was only able to line the body of the jacket with it.


I used a different fabric to line the sleeves, and in retrospect I wish I would have pieced in some of that cool fabric at least for the cuffs, because when this jacket gets handed down to Little Sister I bet we'll need to fold the sleeves back at least for a little while.


This was my first attempt at piping. It was much easier to do than I thought it would be! I followed this tutorial, for reference.  But because my outer fabric was so thick, adding the piping made the lapels reeeeeeally stick out.  It's thick.  And for some reason, I feel like the piping feminizes the jacket a bit.  Which will be nice when it gets handed down to Iris, but I'm not sure how it looks on a boys' jacket.  At least, on this pattern.  The original pattern didn't have piping, BTW--that was my own addition.  I bought one pack of piping (40% off coupon, so it was just over $1), and it just barely was enough.  Like, I was cursing my lax cutting for the pocket flap piping because it was soooooooo close on the collar and lapels.  But doable!

I am totally planning on trying this jacket in a simpler version with some adjusted sizing now that I know how the pattern fits my boy.

Here's the link to the tutorial and free printable pattern.


The directions were easy to follow with LOTS of pictures, and I love Sabra's writing style--it all made perfect sense to me.  I actually can't wait to do it again!

I noticed today that both of my kids were dressed head-to-toe in stuff I had made for them! Awesome! You might recognize this dress, this t-shirt, and these pants from previous posts.

Oh, I mentioned that my fabric was only $1.50 a yard.  I bought it at Wal-Mart.  I pretty much only go there to check their $1.50/yard fabric shelves, which I assumed were clearance.  But as I chatted with the lady cutting my 14 yards of various fabrics (that I paid a total of $20 for, totally crazy!), she told me something that I'm not sure I can believe.  She said that the fabrics were not on sale, that was the regular price for that rack, but the reason it's so cheap is because the fabric company takes all of the remnants of similar colors, breaks them back down into fibers, and re-weaves them into these "unknown content" fabrics that are a combination of natural and synthetic fibers.  Does that sound right?  Or even possible?  If so, I think it's kind of cool--it's like recycled fabric.  And I was astounded by the pretty fabrics I found on this trip.  You'll be seeing more projects made from them soon.  Semi-sheer swiss dot, beautiful smoky chiffon, shimmery antique gold linen-esque stuff, white baby sweater-knit that totally feels like cotton, this bias-weave textured stripe that I made the jacket out of, and more.  I will totally keep checking back for that rack.  

Back to the jacket, I do have a few pattern notes:

On the pleated pockets, the directions say to leave your hole for turning at the bottom of the pocket.  I did that for the first pocket, but on the second pocket I left the turning hole on the flat side at the top, and it was much easier--not to mention that the closed-up hole will be hidden by the flap so it doesn't need to be perfect.

I trimmed the points on the collar and lapel down by 1/2 inch or so.  Still looks huge to me!  I might use another jacket to help me figure out the shape I'd like next time.

Also, the collar wasn't quite tall enough for me.  Partially because my fabric is so thick (plus the piped edge), my collar won't fold down in the back on it's own.  I tacked it with thread, but next time I'd make the collar taller.

tacked back collar

I skipped the back vent flap (Sabra mentioned she'd had some issues with getting it to lie flat), so I just cut my fabric on the fold for the back.  I should have cut the back a little wider since I left out the flap--Sabra said to move the pattern off the fold by 1" to add the width.  I think that would have been perfect.

I thought the sleeves looked a little wide in the photos, so I trimmed my pattern pieces down by about 1/2 inch.  I thought the width came out perfect.

I don't know if it was the way I cut it, or if I folded my pleated pockets in too much, or if it's just personal preference, but I thought the flaps for the pockets were too wide.

So, there you go.  I'll post pictures of the complete Easter outfits after we've all sported them!
Thursday, March 21, 2013

Fake-Out Henley!

This fabric is another 1/2 yard cut of knit that I got from Girl Charlee, with accents cut from an old t-shirt (thanks, Angie!).  I loved these colors for the boy, and while the cotton-spandex blend ended up being more like a baby sweater knit than the t-shirt fabric that I expected, I still think it worked for this shirt.


The Boy loves what he calls "fake-out shirts"--where it looks like you're wearing a short-sleeved shirt over a long sleeved one, but really it's all one shirt.  So that seemed like a good place to start here.  I wanted to give it a little more visual interest, so I decided to try out a henley neckline too.  I followed this tutorial from Melly Sews for the button placket, but I decided to just do a squared-off neck binding instead of the tapered one she describes.  I loved this method for attaching the binding and will definitely use it again--I used zig-zag stitches on both the inside and outside to make sure there was plenty of stretch in the neck band even though the button placket meant that the stretch wasn't really necessary.

Plenty big neckline


I also braved my serger for this shirt.  While it wasn't really even necessary, I figured, I HAVE one, so I might as well use it, especially for stretchy knits.  But after my first experiment with the serger on this knit top, I still wasn't confident because the machine seemed to be dropping stitches.

This is where I tell you about how much I love my neighborhood.  Around the corner from me (about two blocks away), there is a relatively new little sewing shop called d & t.  They have darling fabrics, a small selection of notions, handmade clothing, and work space.  They teach classes there, but what has really appealed to me is the open sewing.  I finally made it over there for the first time this weekend, and the woman there (I'd better get her name next time, huh?) futzed around with my serger until it was running smoothly.  Huzzah!

The serger works!

At home, using my regular sewing machine, I had already made the button placket, sewn the shoulder seams, and attached the short sleeves to the shoulders.  Then I used one of their machines with a double-needle to hem the short sleeves and attach the long ones (cut out of the sleeves of an old t-shirt so they were already hemmed).  Once the serger was no longer dropping stitches, I sewed up the sleeves and sides of the shirt, then hopped back over to the machine with the double needle to hem the bottom!  It was so nice to switch from machine to machine (lucky for me it wasn't too busy in there)--that alone was worth the (VERY reasonable) price of admission ($5 an hour, and the first 1/2 hour free!  Are you kidding me?), and on top of that I now have a perfectly functioning serger!

Oh, and I can't forget to mention a very important bonus-- d&t has a kids' play area set up in one corner!  Little Sister came with me for open sewing, and she played there QUIETLY AND WITHOUT BUGGING ME for over an hour!  Over an hour!  She can barely go 10 minutes at home!  I don't know if the novelty will wear off the next time we go in, but wow, it was so relaxing.  I could ask an expert any little question that came up while working on my project, Little Sister was happy and playing, I came home with a practically finished project, there were other crafters there working on their own projects and contributing to an atmosphere of friendly creativity--it was awesome.  Loved it.  Can't wait to go back.


Run, don't walk.

Maybe I should think about making him some new pants, too?
Can I take just a minute here to point out that the stripes on my sleeves LINE UP with the stripes on the body?  I could totally pretend that I planned that and I am becoming more professional and detail-oriented, but those of you who know me would call my bluff, so I'll come clean and admit that it was totally luck, and I don't think I even would have known how to do that on purpose.  Also lucky, they matched up on both sleeves!  Imagine that.

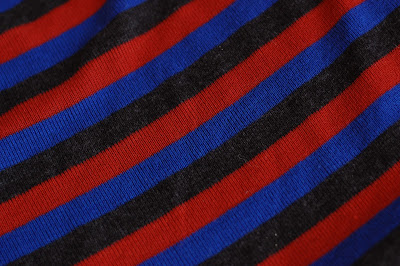
Here's a closer look at the knit fabric, which is very soft, but a little tricky to work with AND kind of see-through if you hold it up to the light.


It somehow doesn't look see-through when he's wearing it though.
And here's a close-up of my placket.


It works, but I'm not sure about the neckline.  It came out just the way I planned (which is to say, yes, I did it that way on purpose), but when I saw it finished I wasn't sure if I liked the open tab at the top after all.  I thought about adding an extra button there, but there wasn't enough room to space the buttons evenly, so I'm just leaving it as is.  I could just sew it closed, the neckline is plenty wide. Thoughts?


Wednesday, March 20, 2013

Shirred Maxi-Dress Upcycle!

Man, am I in summer mode around here, or what?  First this breezy Mrs. Roper-style muumuu, and now this.  But I had a major thrift store find today, and the effort was so minimal to turn what I got into this dress for Little Sister that I just had to take care of it this afternoon while it was fresh in my mind.


The first thing that caught my eye was the "Everything 50% off Today Only" sign outside of the Salvation Army.  Even though I know that "today only" actually means "every Wednesday" at this particular location, I just can't help myself.  The second thing that caught my eye was this yellow fabric peeking out of the dress rack.  It started out as what was pretty much a grown-up version of the dress you see Little Sister wearing there.  Since Little Sister wants every dress to be "long long to the floor," I thought perhaps a summer maxi dress was in order.  It's doubtful that I would have made one otherwise, since a maxi-dress takes quite a bit of fabric and I do most of my purchasing off of the remnant rack.  This fabric--pre-shirred, ruffled, and hemmed, AND with pre-made straps, since it was already in dress form--cost $4!  A bargain, since it's definitely over 2 yards of fabric; in fact I have plenty left over to make something for myself--a skirt, perhaps?  I'd love to make a top but I think this color would do horrible things to my skin tone if it was right up next to my face.

Rocking the mustard yellow.

So, all I had to do was figure out how long I wanted the whole dress to be (25" from armpit to hem is what I went with) and how wide the top should be.  I started by cutting the dress along the seam at the back and holding the shirred portion around Little Sister's torso, then cutting through the shirred part at the right width.  The ruffle was already at the bottom of the dress, and it was 10" tall.  The shirred part was 6" long so I knew I just had to leave another 9" or so at the bottom of the shirring to get the desired length.  I cut straight down from the shirred portion, then laid the bodice/top of skirt piece face-down on top of the ruffle at the bottom of the skirt.  I lined the fabric's raw edges up with the top of the ruffle and pinned, stretching out the skirt fabric so I knew where to cut the ruffle off.  Then I sewed that ruffle on and turned the dress wrong-side out and sewed a seam up the back.  All that was left then was to detach the existing straps, iron them out, and reattach them so they would fit Little Sister.  Easy peasy.

Long long to the floor, just the way she likes it.
We had some helpers with our photo shoot today.

One interesting thing about this upcycle is that the original dress was a handmade item.  Kind of cool to give it a second life when somebody else made it themselves in the first place!


And nice that I can blame somebody else for the uneven shirring on the bodice :)

Thursday, March 14, 2013

Upcycled Mini-Muumuu

It wasn't my intention to make a mini-muumuu out of my old shirt, but my girl can definitely rock it.

Channeling her inner Mrs. Roper


That's the thing with upcycling sometimes--you have to go where the garment takes you, which isn't always where you thought you would end up.

I was inspired by CINO's knock-off of a Tea Collection dress that I loved--we actually had one back when the girl was about a year old.

"Oh my gosh," I just thought to myself, "I think I have some pictures of her wearing the dress I'm talking about."  And lo and behold.

Just hold still while I poke you in the eye, Big Brother.
Goodness, was he sweet with her.  Still is.

And now I totally forgot what I'm doing and I am staring at these babies and wondering where the two lumbering giants I have in my house came from.

And HAHAHA I just looked again and that's not even the same dress.  But wait...


THERE it is.  I was blinded by the stripes before, but this floral one is actually the same CUT as the dress CINO knocked off.  And now that I've gone on this tangent, I've got to show you the rest of this photo, where The Boy is holding her hand...

SO FLIPPING SWEET!

Those photos came from a free department store photo session, an experience which we tried one more time after that before I decided I'd just better learn to take some decent photos myself.

ANYWAY, back to the dress... I printed off her pattern and enlarged the printable 2T bodice pieces by about 1/2 inch (so, making the bodice front and back each 1 inch bigger, since it is cut on the fold) since Little Sister is almost three now (LUMBERING GIANT.  Did I mention that?).  But here's how mine is different:

1.  I left the body of the shirt intact to create the skirt, meaning mine was about 20 inches wide instead of 18.  It had in-seam pockets on the side that I didn't want to mess with, and Iris will never complain about extra fullness in a dress.  Plus it was only 17 inches long instead of 18, the maximum I could cut off while leaving something to work with for the bodice.  Oh, but it was already hemmed, so the 17" was probably just about right!

2.  Obviously, the bodice front is way different, because I was trying to incorporate the v-neck from the original top.  This dramatically changes the overall look of the garment.

3.  I cut the sleeves so that I could reuse the elastic at the bottom.  Therefore my cap sleeves are more like short sleeves--and more about my lazy way to attach them later.

The end result looks totally and completely different than both the original Tea Collection dress and the spot-on knockoff.  But a great dress nonetheless!


I kind of feel like it's a waste of time to do a tutorial for an upcycle, unless it begins as a very common item like a t-shirt or a button-down dress shirt.  Unless you have a slightly-longer-than-average top with  a v-neck, short sleeves that have elastic cuffs, pockets, and a hood, I'm not going to be able to help you recreate this dress very well.  I can show you the pieces I started with:

I had this top to begin with:


These are the pieces that I cut it into:

skirt (from the bottom 17" of the top, with little curves cut out of the top corners for the armpits)
2 sleeves (using the existing elastic cuff for the bottom)
bodice front (using the existing v-neckline)
bodice back (cut out of the hood, because I didn't have enough of the shirt part left)
strip for binding the neckline (a scrap left over from the shirt)


what remained after cutting out the bodice back

I kept the gathers in the skirt right in the center of the front and back.  There are no gathers on the sides of the dress.


 There are a few things I did here that might be helpful in other upcycles.

1.  The binding at the back of the neckline:  I kept the binding on the v-neck in the front, but my original shirt had a hood, so there was no binding.  This is also an issue if you want to use the original hem on a shirt but you need a smaller neckline.  I made a strip of fabric twice as wide as the binding on the front of the shirt plus extra for seam allowance, and folded it in half (wrong sides together).  Then I laid it down on the back bodice panel (right sides together) with the raw edges together, and sewed the binding to the shirt.  Then I flipped it so it was standing up the way I wanted it to and topstitched so that the seam allowance was sewn down away from the neckline.


2.  Reattaching sleeves that already have elastic in them:  I hope I can explain this in a way that makes sense.  When I got to the bottom of the sleeve, instead of making a seam, I angled the two ends of the elastic in towards the armpit.  This meant that I didn't have an extra-bulky seam where I sewed the two ends of the elastic together, and I also didn't make it into a cap sleeve where I then had to deal with binding the rest of the arm opening.  The sleeve fabric goes all the way around the armhole.  It's kind of like attaching a cap sleeve but starting all the way down at the armpit seam and ending up with the other end of the cap sleeve touching it on the other side.  Hopefully this photo will help:

Clear as mud, right?

It's a little wide, but I think it gives it a lovely breezy by-the-pool type of attitude that I could frankly use some more of in this rainy part of the world.  This dress is making me mentally ready for summer.


Twirling!

Back view


Thursday, March 7, 2013

Knit banded waist top with cuffs

I've discovered something about myself.  I'm much better at live-blogging my projects than writing about them after they are finished.  There's something anti-climactic about rehashing a sewing project once I've already had the sigh of relief that comes with completion.  I find that if I leave the page open WHILE sewing, all of the clever little comments that come to me throughout the process actually make it into the post.  So with that introduction adding all kinds of pressure to be witty, let's see how I do as I live-blog this shirt project!

I actually started it last night with the cutting.  Well, I suppose it actually started about a week ago when I found some knits that I loved while browsing the Half Yard Cuts section on the Girl Charlee website (specializing in knits).  A half yard isn't enough to make a women's top ordinarily (well, not the kind that I would wear, anyway), so I bought a plain gray jersey to coordinate with this coral stripe that I fell in love with.  And while I wasn't totally sure what I would do with it, I had been ruminating on it while waiting for the fabrics to arrive.

Which brings me to last night.  I finally decided that I would use the gray for some extended cuffs and a wide waistband IF I could get an entire bodice and a set of sleeves out of the striped half yard.  I managed it, JUST.  This is what I had left over:


I used a couple of shirts I already owned to determine what shape to cut out--one for the neckline/bodice, and another for the sleeves.  Don't forget about seam allowance!

Now, this isn't going to be a full tutorial, but I will make some notes about my process in case you want to give it a whirl.

It's just occurring to me why I don't live-blog a project more often.  This could be a total fail.  Something I wouldn't have taken the time to blog about at all.  In which case all of this live blogging might be a total waste of time.  Well, let's call it a learning experience.  Don't worry--if the shirt doesn't turn out, I'll edit the post to let you know BEFORE you start taking all of my advice.

Here are the pieces I cut out:

From the stripes:
Bodice front and bodice back (I made them as long as I could with the 1/2 yard of fabric that I had)
2 sleeves (3/4 length, wider than average for some gathering

From the gray jersey:
Wide waistband (figure out how much length you need to add to the bodice to make your shirt long enough for your taste, then double it and add seam allowance)
2 wide cuffs (again, double the width you want your finished cuff to be)
1 narrow strip for binding the neckline (long enough to go all the way around your neckline with a few extra inches for safety, and about 2 inches wide)

(I started sewing the bodice together before taking this picture--make sure you have wrong sides together and sew the side and shoulder seams.)


Next sew up your sleeves, right sides together, from the armpit to the wrist.  The opening will line up with the armhole in the bodice.


Now, once you set in a sleeve a few times this will make perfect sense, but it is awkward to explain.  I was trying to find a tutorial that explains it better than I do to link to, but it seems that, um, I've been doing it wrong.  All of the other tutorials say to leave your side seams on the bodice open, attach your sleeves starting with the shoulder, then sew all the way down the arm and the side of the bodice in one fell swoop.  Here's a tutorial from Melly Sews on how to do it that way.  Feel free to ignore the explanation of how I did it below, I can't remember who the heck told me to do it that way in the first place but I may be changing things up from now on!

Leave your bodice inside-out.  Turn the sleeves right-side out, then slip one inside the shirt wrist-first so that the raw edges at the arm opening line up with the raw edges at the armhole in the bodice.  Line up the sleeve seam with the underarm seam and pin the sleeve in place, then sew.  The openings might not line up exactly, but you can stretch the knit slightly to match them as closely as possible.  Repeat for the other side.

One sleeve is tucked and pinned into place

Normally at this point I would be sewing a zig-zag stitch next to my seams for some extra stability.  I'm skipping that step this time because...dum dum dum...I have decided that it is ridiculous that I have put off learning to use my serger for so long.  I inherited it from my grandma and got it all fixed up OVER A YEAR AGO but I've been totally afraid of it.  But today is the day, my friends.  I am going to tackle the serger.  And if I am at a loss, there is a really sweet sewing store around the corner from my house that has open sewing for $5 an hour on Sundays and maybe they can help me.  But the goal is SELF SUFFICIENCY.  I will conquer the serger TODAY!  My point is, I will come back and serge those seams when I'm done if all goes well. (Edited to add--I have not gone back and serged the inside seam allowances yet.  I may do it later, or just zig zag 'em if I get lazy.)

After your sleeves are in, this is a good time to try on your top.  If you need to take it in a bit, go for it.  If it's too small, well...you might be out of luck.  Seam rippers and thin knits are not really best of friends.  Maybe you have a skinny friend who would like a new shirt?  My own sleeves came out a bit more snug than I would have liked, but they were as wide as I could get them with the amount of fabric I had, so that's life.  I can still squeeze my arm in there.

Since my neckline is wide enough to slip over my head without stretch, I am using this binding method from Omi Creates instead of serging (still putting off that damn machine over here).  I just started at one shoulder seam, leaving a little extra flap to join them together at the end, since mine is in one piece instead of two.

Flaps to sew together once the binding is attached

For attaching the bands and cuffs, I used this tutorial from Make it Love it, except that I'm going to serge instead of sew to make sure it's nice and stretchy.  And, you know, to prove to myself that I can.

I'll kind of sum up, so you don't have to jump over to the other tutorial if you don't want to:  To make the cuffs and waistband, fold your fabric in half right-sides together (make sure you've got the stretch going ACROSS, not up and down--particularly easy to make a mistake on the cuffs).  Pin each into a tube just slightly narrower than the openings.

You can barely see my pins, but they are just barely inside the edges of the sleeves and bodice.

Fold the tubes in half, right side out, so that the top and bottom raw edges line up.  Make sure your shirt is right side out, then slip the waistband tube upside down onto the bottom of the shirt so that all three raw edges are lined up (two on the waistband, one on the shirt).

Now is not the time to skip the pins (HILARY.)  This fabric will slip, stretch, and roll, so before you attach those bands you NEED to pin.  Lots.


Waistband.  Prepped for serging

This is where I paused to figure out the very minimum about my serger so that I could attach these bands.  I practiced a little on a scrap of t-shirt fabric and then off I went.

It's just you and me now, Serger.
I started with the waistband and then attached the cuffs the same way.

OK.  So.  I did it.  The stitches are a little weird, and I was playing with the tension as described in the manual, but couldn't get it just right, and some stitches seem to be skipped.  The nice thing is that the cuffs and waistband really do stretch, which is what I wanted.  It was scary, because the seam allowance was being cut off as I sewed, so not a lot of room for error!  I'm sure there's a way to turn that off but I haven't gotten that far yet.  I'm still going to visit the sewing open house to see if the lovely ladies there have any in-person advice for me.

Pretty sure it's not supposed to look like that.

One thing I will definitely do in the future is serge the cuffs on BEFORE I sew the sleeves closed.  I was so scared I would cut something that shouldn't be cut as the serger was making its way around the little cuffs!  It sews SO fast.

I'm taking this on as a learning experience.  I'm not sure that I'll make many knit shirts for myself, because I'm just not sure of the value.  I mean, when I can get this knit shirt from Old Navy for $4.18, why should I try to make my  own?

One of the shirts I used to cut out my pattern
I got a good deal on fabric and I still spent $6 (knits are expensive, you guys!), and several hours of my time (the entire 2.5 hrs I have to myself while both kids are at school, although a good portion of that was spent blogging, and, you know, learning how to use a serger), and the shirt isn't anything spectacular--I like it, but nobody's going to think I paid $100 for it at Anthropologie.  As a matter of fact, it looks fairly similar to that $4 Old Navy shirt.  BUT, it was worth it because this was the project on which I forced myself to tackle my fear of the serger.  Which represents my larger fear of failure in general.  So, you know, growth.

And now, what you've all been waiting for--how did it turn out?

Well, pretty great, actually!


That is probably how I'll usually wear it, but because of the stretchy waistband and cuffs, you can also fold the cuffs over or blouse the top out a bit more, like so:

Essential for my stay-at-home mom wardrobe.

It's funny, I really like the way the proportions came out, even though it's just what I was able to squeak out of a 1/2 yard of the main fabric.  It's good to know that it is possible to come up with a women's top using remnants that doesn't look like extra fabric is plonked on there because you ran out.

And just so I'm covering my bases, the coral stripe (which is very soft but pretty thin; I need a cami under this top) is called a cotton blend jersey knit fabric, and the grey, which is slightly thicker, very stretchy, and soft, is called a cotton lycra knit fabric.  Both came from Girl Charlee.  Oh, and this post is not endorsed in any way--I wasn't paid, I bought these fabrics, Girl Charlee didn't ask me to write this or anything.  I just thought you'd want to know, since I have had a hard time finding cute knits for cheap!

Tuesday, March 5, 2013

Eyelet Hem Top!

Super quick post here--a mini-post, if you will.

In a bout of insomnia the other night, I was organizing all of my clothes in the upcycling pile.  I came across a shirt of mine that would be a super easy upcycle into a dress for Little Sister, but I haven't been able to let go of it and chop it up yet.  I realized as I pulled it out that I wasn't ready to give it up.  I love the print and most of the fit, but I never wore it because it's just too short.

BUT I had a length of wide eyelet trim in my stash, and it occurred to me--just sew it to the bottom!  Problem solved!

For the record, that towering pile of laundry in the basket behind me is NOT MINE.