Thursday, February 28, 2013

Blazer Alteration!

This seemed like a scary project to take on, but this was a perfect opportunity to take a risk and see if it panned out, because I didn't have anything to lose.

A friend of mine was clearing out her closet and I scored a couple of fantastic blazers.  I was so blinded by their fabulosity that I didn't realize till I got them home that the fit was actually not great.  Rather than pass them on, I thought I'd try to alter one just to see if I could do it. Both blazers are fully lined, which is the main thing that gave me pause.  Luckily I found this tutorial on Cotton and Curls, and it actually is not as tricky as it would seem!

The part I wasn't sure about was how you reattach the lining when you're finished taking things in.  And the answer is--I'm still not sure.  I kind of faked that part, and it's a little lumpy on the inside but it still hangs well on the outside, which is what counts.  But the trick is, you don't take the whole lining out!  You open it up a little on one edge, enough to pull the entire blazer through the hole so it's inside out, letting you adjust the seams to fit it better!

I didn't even alter the lining--it's just a little baggier now on the inside than it used to be.

I don't have any "before" pics of my altered blazer, but here's how it looks now--like it was made for me, right?

Deep purple velvet.  Mmmmm.

Hairstyle courtesy of this post found on Pinterest
The other blazer is a deep rusty orange corduroy.  Love it!


Tuesday, February 26, 2013

5th Birthday: The Racecar Party

My oldest turned five.  FIVE!  That is full-on big kid territory.  As I've done a few birthday parties now, I am learning some things about myself as it relates to birthday party preparations.

1.  I am cheap
2.  I am lazy
3.  I am overwhelmed by the party setups I see on Pinterest.

While the full-on theme parties look amazing, I can't help but wonder how much the actual kids (both the birthday kid and the party-goers) appreciate all the work and expense goes into a party like that.  I'm sure the adults are all duly impressed, but...is the party for them, or for the kids?   I feel like the kids have just as much fun at a party that flows well and is well-organized, regardless of the tablescape.  I know for some people, decorating for the party is really fun and they love figuring out all of the little details, but for me...well, I think those parties look so fabulous in pictures, but when I start thinking about what is actually involved and what I would have to do to create it, I have to stop because if I got into it I'm pretty sure my head would explode.

Here are a few things that I have done to keep myself sane with the party prep:
  • Keep the decorations to one main party area.  In my case, this is the living/dining room, the first area you see when you enter the house.  Even though the kids will spend time in the kitchen, basement, and bathroom, I don't bother decorating those.  I subscribe to this same theory with my holiday decorating.
Our main party area

This became the food table.  Beverages were in the kitchen.
  • Reuse party decorations.  We have had the same basic Happy Birthday banner for years now, and have been slowly making our way through the same two colors of streamers (red and purple) party after party.  I also supplement the printed Happy Birthday plates/cups/napkins with leftover solid plates/cups/napkins from parties gone by.
  • Maximize Dollar Tree purchases, especially if they happen to have party stuff that matches your theme.  Unfortunately for me, I didn't buy up racecar party stuff when they had it a couple of months ago, because I was worried that my guy would change his mind before the invitations went out, and when I went back for it there were only a couple of racecar items left, but the few posters and cellophane goody bags I was able to get are nicely supplemented by plain colored plates and cups.  Racecar stuff for the goody bag is pretty easy to come by--I was able to fill the racecar-printed goody bags for less than $1 each--Hot Wheels stickers, a die-cast racecar, a plastic top (not racecar related), a Tootsie Roll Pop, and a pack of Sixlets.  
Goody bag contents--cars were in a 4-pk at dollar store, stickers were from a book of 300 Hot Wheels stickers so a $1 book was cut into favors for all the kids.  The bags were a Dollar Tree 24-pack or something like that.  Suckers were a 10-pack, and the Sixlets (reminded me of traffic lights) came in a big bag for $1, plenty for everybody.
  • Note--Dollar Tree's return policy is exchange only.  I SHOULD have just bought the dang racecar stuff, then traded it in for something else if the boy changed his mind.  Now that the girl tells me she wants a Mermaid party when she turns 3 in two months, I have been buying mermaid/underwater stuff there when I see it and holding on to the receipt so that I can return it if necessary later.
  • Have the kids make decorations and games.  No, they will not look like a professional party planner decorated your house, but the kids love to feel involved and giving them some poster paper and markers and letting them go at it gets them out of your hair for a while.  
He didn't want to color anything in.

Pin the car on the racetrack--the envelope to the left has little paper racecars in it. The boy colored each one a different color and wrote a party-goer's name on it, so when they play the game they know which car belonged to each kid.
  • I have also had the kids decorate brown paper bags for the goody bags when I couldn't find cheap ones that fit the theme.  Printing out coloring sheets then cutting out and gluing the images to the bags is an easy way to do it--that also works for wall decor.
  • Have a couple of games that kids can do when they feel like it--we like "Pin the _____ on the _____" (with the blanks filled in to fit your theme--"Pin the racecar on the track", "Pin the owl in the tree,"  etc.)  
The Boy posing by the game after the kids had played it
And of course, the special racecar shirt I appliqued for him

  • For the racecar party we made a ramp for the kids to race cars down--the cars that we put in their goody bags.  Some detail about the ramp:  I made it out of two sheets of black posterboard (Dollar Tree--2/$1), some styrofoam packaging that we hadn't thrown out yet (no room in the garbage--here in Portland we only get pickup every other week so sometimes it's hard to get rid of everything!), and duct tape.  I used whiteout tape to make the lane lines (bought at Dollar Tree), and some printable checkerboard and hot wheels images that I found here (also used it for the cake) to decorate it.  The whole thing cost me $2.  The kids LOVED racing cars down it!  They also found other things to race down the ramp--princess figurines, rubber balls, etc.)

Edges are folded up to keep cars on the ramp (somewhat)


Ooh, pretty.
It was not very sturdy, but I was amazed that it not only held up for the whole party, but is as a matter of fact STILL residing in our basement where it is frequently used by the kids and slept on by the cats, about a month later.

I should have written the kids' names on their racecars--we only had 4 different colors, so it was hard to keep track of which car belonged to whom.

  • We did have one game for kids to play all at once--a Racecar bingo that I found at Dollar Tree. But the kids were so happy just playing with the ramp, the pin-the-racecar poster, and the toys around our house that we never got around to playing the bingo game.  But good to have it in my back pocket.
  • The cake.  Well, this is such a personal decision.  I LOVE cake.  Make that, I love GOOD cake. But as I've mentioned, I'm cheap.  For a few years, we ordered beautiful cakes from a fantastic bakery and I loved them.  But they were not cheap.  So then I ordered grocery store cakes with cute decorations that fit our theme, and they were cheap...but they did not taste good.  So I've started making my own cakes.  To me, taste and cost is more important than decoration.  I would love to just do cupcakes, and put little toothpicks with flags in them that fit the theme (this is one way those Pinterest theme parties are helpful to me--free printables!  I would skip flagging the straws, silverware, napkins, etc--but flags for the cupcakes seems a lot easier than decorating cupcakes or a cake.)  But my kids so far have always wanted cakes, not cupcakes.  And cakes are harder to decorate, in my opinion.  So I just look at pictures online to get an idea and try to do something simple.  This year, I made 2 box cakes (doctored up to taste better according to this blog post--I really think it did work to make the cake more rich and from-scratch tasting) in 9x13 pans, and using this fantastic frosting from Smitten Kitchen.
I searched Pinterest for racecar cakes and got several ideas, and this is my version.

I wanted small cars--these were in an 8-pk at Dollar Tree. The trophy also came from there.

The Happy Birthday candles were $2.50 at Walmart. This was a nice purchase because I didn't have to worry about my writing, and they saved room for the racetrack.

A better view of the checkerboard finish line, taped to a couple of toothpicks.
A decorating note--I made my 5 by putting chocolate frosting in a baggie with a big corner cut off, then squeezed out the shape on top of the green frosting, and spread it flat with a knife into the 5 shape that I wanted.  


Then I topped that with crushed chocolate cookies to make the road.  Then, obviously, edged the road and the top of the cake with M&M's.  This cake was HUGE!  We had 8 kids at the party, and probably 14 adults.  Since hardly any adults seem to eat cake these days (with ME being the obvious exception, and a few others), we had over half the cake left over!  This worked out well, because I just cut the leftover into a rectangle, wrapped it in saran wrap and foil, and stuck it in the freezer.  Then a week later I pulled it out, scraped the old racetrack decorations off the top, made a little fresh frosting, and served it again for our family party!  Still tasted great.

Recycled birthday cake

Nobody seemed to mind.

  • Keep the DIY's simple.  I did go a little more all-out with last year's owl party, because it was harder to find inexpensive owl stuff for favors and games at that point, but I made sure to choose projects that would be fairly quick AND fun for me to make.  But I still do prefer to go Dollar Tree when possible, because it's obviously easier and usually cheaper than doing it myself.
  • Invitations:  I love photo invitations.  I have never figured out my Photoshop software, so until I take a class I have found many ways to make do.  My new favorite to make custom photo invitations is www.picmonkey.com.  So awesome.  I have been using them for everything--valentines, party invitations, display cards for my headbands, marketing postcards.  I love it, and it's so user-friendly, and I've yet to upgrade from the free service.  However, I had not yet discovered them when I made The Boy's party invitation, so here's what I did (I could have done ALL of this invitation creation on picmonkey. I'll show you how Little Sister's party invitation turns out so you can see what I do there):
    • Took him to the mall to ride in a "racecar" for 75 cents (I also had to let his sister do a ride, so that's an extra 75 cents) and took photos of him "driving"
    • Emailed the photo to myself so I could access it on my phone
    • Chose a decorative template from RedStamp (a cool free app to make photo e-cards that are also printable when you email it to yourself) but left the text area blank--there wasn't enough room to give all the party info.  The RedStamp part is the bunting, which kind of reminded me of something you'd see at a road race, I guess...
    • Uploaded THAT saved image to Phonto (another free app that has lots of options for adding text to photos), where I could add the translucent banner across the photo
    • Emailed THAT image to myself so that I could add party info text on my home computer (I used Picasa, Google's free photo editing software)--that's the red and blue text at the bottom.
    • Uploaded the finished invitation to Costco, where I had them printed as 5x7's for 39 cents each, and mailed them out using leftover Christmas card envelopes.  Total cost for 10 invitations:  $5.40 plus stamps (including our racecar rides).  
I can't resist the cheesy age-related rhymes!

  • I also made him a "special" breakfast before school on his actual birthday.  I spread nutella on a toaster waffle, laid down a layer of banana slices, then topped it with another toaster waffle and wrote "5" on top with frosting and added candles.  Looked like a cute little breakfast birthday cake for very little effort!


  • I have to make a note about the gift I made for him.  I did a separate post about it, but here's the Sleuth costume:
With accessories
Click here for the full post about the costume.


Finally, we STILL haven't gotten to it yet (BAD!  BAD host!), but I printed out these free Thank You cards for Liam to work on.  I like how they match the bunting on the invitation.

Freebie from 74 Lime Lane

WHEW that ended up being a long post!  Guess that explains why it took me a month to get around to finishing it.  

Monday, February 18, 2013

Boys' Jeans from mom's jeans--reusing the TOP

Well, this project felt like home to me after the last few things I've made.  I've been using patterns, learning new skills, and pushing myself to become better at sewing, but really my heart is still in haphazardly chopping up old clothes to make something new.


In this case, I was inspired by this post from Mama Bear Says that I had pinned on Pinterest ages ago. Like, back in the beginning of time of Pinterest for me. The idea is that you can reuse the TOP of a pair of women's pants, including the fly, to make a pretty dang professional pair of kids' pants.  I gave it a cursory glance when I first pinned it, but mentally shelved it because it said that the process worked best for making boys pants in size 8-12, and that is thankfully still a long way off for me.  But as I skimmed over it again recently, I realized that the blogger suggests using "mom jeans" so that the waistband will be high enough for boys pants.  I am embarrassed to admit that I own a pair of DEFINITELY "mom jeans"--although in my defense, they have been in the "to be upcycled" pile for quite some time--so I tried measuring out a pair of the boy's pants that actually fit with those, and it definitely wouldn't have worked, because he is still not a size 8-12.  They would have come up to his armpits.  But that got me thinking, maybe some low-rise pants would work to make smaller sizes.  And what do you know, the waist-to-crotch measurement on a pair of my old low-rise pants was pretty much identical to The Boy's current size, which is usually a 5 or 5T.  In the front, that is.  I had to get creative for the back, but getting creative and making it work is the fun part.

This is to give you an idea of how the sizes lined up:


So, I laid the boy's pants (Old Navy size 5T, for reference) out on top of my old pants.  In hindsight--I should have turned both pairs inside out for accuracy.  I cut around  one side of his pants, leaving lots of extra room at the bottom for a wide hem that could be let out later.  Measuring your child's waist might be a good idea, since estimating is a little tough when you are making a non-elastic waist pant but you are using an elastic waist pair as your guide.  I stretched out the elastic when cutting it out, but I ended up with much too big of a waist on my end product--and I'll show you my genius solution to that problem later in the post!  Aren't you tantalized now?

After I had one side cut out, I folded it over to cut out the other side in an attempt to have some sort of symmetry.  This particular pair of pants had wide pockets that were set in close enough that I think he may still be able to use them, even though they will be smaller now, so I made an attempt to keep the pocket lining somewhat intact too.


When I turned mine inside out to sew them up, I realized that the back was waaaaaay higher than the front.


So, I cut the waistband off (all the way down to the welt pockets) and reattached it.

I had the back of the pants right-side up, and laid the waistband right-side down on top, with the raw edges together, and sewed a straight line, with a fairly large seam allowance so I'd have room to sew the raw edges flat on the inside.

Then I sewed the seam allowance flat on the inside of the pants, and added a couple of patch pockets that I made out of the leftover leg fabric.

I ended up trimming off that extra fabric sticking out beyond the waistband,
just so you know.

Once the back was only a little higher than the front, the way it's supposed to be, I sewed the jeans up the outside of the leg, then added a zig-zag for extra stability, and hemmed.

Sewing the two sides of the waistband together was  pretty thick.

Hmmm, that doesn't look like it would be too comfy, does it?

I attempted to flatten the seams down by laying the seam allowance to one side and using a wide zig-zag stitch over the top:

That's a little better.


And in the interest of full disclosure, I should tell you that I didn't start out with a denim needle, but I did put a denim needle in when I broke the standard one.  I think it helped...but I broke the denim needle shortly thereafter.  All in all, I went through 4 needles on this project (all on the waistband seams), making it more expensive than the original "free" that I was going for, but what are you going to do?  One of those was totally a fluke though.  I can only blame the pants for three needles.  If you are careful and do some hand-cranking when you get to the thick parts, you will probably have better luck than I did.

These pants had a double closure (not a hook-and-eye--what are these things called?  A bar closure?  Just look at the picture!)

These things were always difficult for ME to do up, so I wanted to give the boy a break.

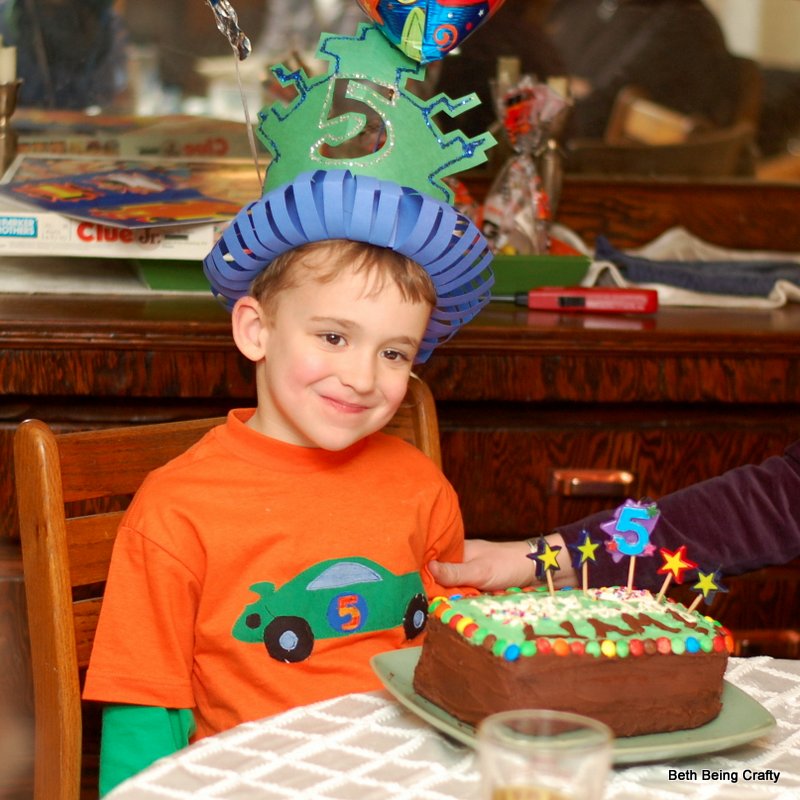
I thought that would be a bit of a hassle for my 5-year-old, so I removed one of the button details that the original pants had on the side of the waistband and reattached it above the fly.

Cut from the side of the waistband

Its new, more helpful position

After taking out those bars and stuff, of course.

I mentioned before that the waistband turned out way too big.  Well, after all of that needle-breaking on the waistband, I wasn't really prepared to take it apart and try again.  I thought about cutting a slit and inserting some elastic somehow, but I wasn't quite able to get my head around how I would make that work.  So I thought, what the hell, I'd try just sewing some elastic right on top.  I started just past the side seam (I thought the elastic might also help smooth the bump from all that fabric at the side), then sewed the 1-inch-thick elastic all the way across the back of the waistband, stretching the elastic as much as I could while sewing.   And, I was surprised as you to find that it actually worked!

Inside

Outside
Upside down (I couldn't help myself)

I thought the waistband would probably be too thick to be elasticized very much.  But nope!  The pants totally fit now.

I had him raise his arms to show the top of the pants.
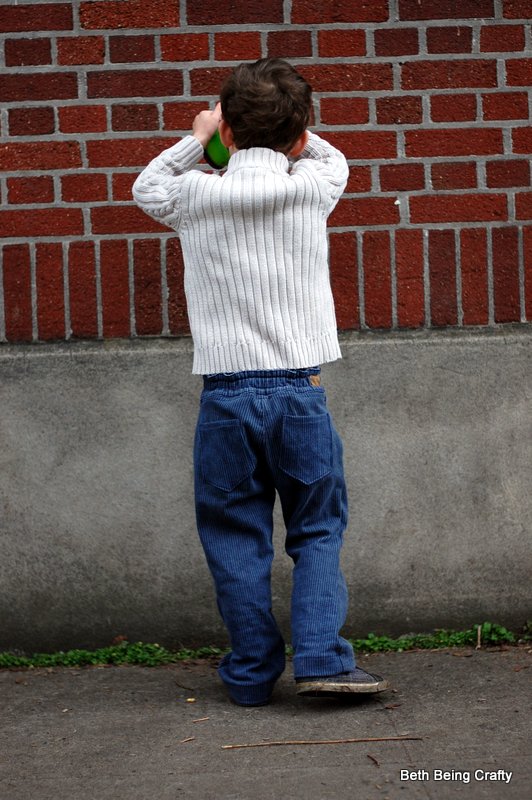
There is some room to grow, and I can let out the hem too, so if we can keep the knees intact these pants might last a while!  I do have to say that I actually would have preferred a slimmer leg, but I just get so nervous that things are going to be too small!  I always think to myself, I can always take things IN more, but it's much harder to make it bigger.  But the fact is, once I finish something I rarely go back and make adjustments if it already works.  So while these would probably look cooler if they weren't so baggy, they will probably work just fine as is.

Baggy backside.  We like to call this "relaxed fit."
It does feel like coming full circle, because these were the first pants I purchased after The Boy was born, when I was out of maternity pants but certainly not ready for my pre-pregnancy pants yet.  And now that little boy is wearing them.  Awwww.

Not so little any more

Pants in action
Summary--if I had measured my child's waist when making these pants, they would have been super easy!  Just three seams (1. reattaching the back waistband, 2. outside of right leg, 3. outside of left leg), then zig-zagging the waistband seams down and hemming the bottom.  If only I had listened to my college theatre tech's advice of measure twice, cut once, instead of my own philosophy of guesstimate and do it over.

Thursday, February 14, 2013

Cece Dress Pattern Test

So, I was flattered to get an email a while back from Alviana at Popolok Design, asking if I'd like to be a pattern tester for her newest design, the Cece Dress and Top.  I did wonder how carefully she'd looked at my blog though, being that I don't really sew from patterns too often and that my work is characterized by a certain slapdashery that I think most pattern designers avoid. But I thought, this will be fun!  I will accept the challenge and do her proud!  And you know my bargain-hunting self couldn't resist the temptation of a free pattern.

This dress is a lot more complicated than the things I usually sew.  Collar!  Lining!  Peplum!  ZIPPER! As a matter of fact, this dress marks the FIRST ZIPPER I have ever sewn into a garment!  Thanks for the motivation, Alviana!

The pattern has options to make a dress or a top, with or without short sleeves, and with or without a collar.  I did the dress version, because getting Little Sister to wear anything other than a dress these days is pretty challenging, and I went sleeveless because I think that will work better with long sleeves underneath in cold weather.  Plus you know girlfriend loves a tank top dress.  I also loved the look of the collar using coordinating fabric, so I did that too.  So without further ado, here are my results!

Little Sister's headband courtesy of
SewBaby Crafts, my little business.


The directions were clear and easy to follow.  It is a lot of pages, but it's worth it for the clear descriptions and lots of accompanying photos--something that the big publisher's patterns sorely lack, in my limited opinion.  As a matter of fact, after reading Alviana's directions, I thought, "Oh, THAT'S probably what they meant for me to do in that McCall's pattern that I couldn't decipher!"


I never found myself scratching my head.  Not even with the installation of the invisible zipper, something I had never done before!  It was pretty darn easy, and my zipper doesn't stick at all.  It is not, however, invisible, (partially due to the fact that the only zipper I had was black and I didn't want to go purchase any supplies)--not sure if that's the way it's supposed to be or if it was user error, but I don't mind how it looks.

My very first zipper
Iris trying to show me the back
I am pretty proud of myself for learning some new skills while sewing this dress.  Like using a zipper.  A whole new world of sewing is now open to me.  A simple tip like gathering the skirt fabric in sections made the process SO much easier--I will do that every time I gather a skirt now.  Also, the technique she uses for making the lined bodice is pretty darn easy, and looks SO professional inside!  I didn't think  I cared about how the inside of a garment looked, but I must care a little because I am so proud of how this one turned out.


Look at those beautiful tiny, even, hand stitches!  Under ordinary circumstances, I don't hand sew.  I use every method possible to avoid it.  But I felt a responsibility as a pattern tester to follow the directions as written.  And as I sat there with my needle and thread and cup of tea, I felt like Meg March, or Sansa Stark. Except that it will never come naturally to me, like it does to those pretty, dutiful girls who can sew perfect hand stitches but really aren't that much fun.  I'd rather be Jo any day, but it was still fun to pretend.  Or at least it was a way to get through the hand sewing--it's not like I'll be making a habit of it!

Little Sister is also impressed with my work on the lining.

Oh, and I didn't even get any blood on the dress!  Now, I know it's supposed to be good luck for the seamstress to get a little blood on the item she's sewing, but I just figured that was an old wives' tale intended to let the seamstress feel better about staining a garment.

Way to go, Mom!
Here's a few more photos I have to share in the guise of showing off the dress, but I'm really just including them because my girl is such a cutie pants.  And she cooperated so well in our photo session today.

Ballerina style
Did you happen to notice my peplum?
Yep, that's my peplum!


One downside, for me, to any online pattern, is printing and assembling the pattern.  I am fairly computer-illiterate about certain things, and one of them is figuring out if my print job is accurate.  This pattern does have a test square that should be an inch square if your pattern is the right size, so I could have faith, but it's still kind of painful to cut out all the pieces and hope you are lining them up correctly when you tape them together.  Another thing you might like to know if you plan on making one of these yourself one of these days is that the project took me about 4 hours from beginning to end, keeping in mind that I was learning several new skills along the way.  If you've done things like linings and zippers before, it will probably be faster for you.

The pattern is still in the test phase (that's part of my job, right?) so I will be passing on a little feedback, mostly about fit.  It's a funny thing though, isn't it, because no two kids are the same size!  I sewed a size 3 for Little Sister, who will be three next month (be still my heart!)  and the waist and neckline are just right, but the armholes do gap a bit and the bodice is a little wide.

This one shows the gap at the armhole pretty well.

And if I make this dress again, I would make the skirt longer and the collar a little smaller.  But those things are just preferences--some people would think that the skirt length and collar size were perfect.  In my case though, especially since she's got room to grow in the bodice, I worry that it will be much too short before she's grown out of the top.  But for wee toddlers with cute little diaper covers poking out underneath I think the length would be great!

It starts to get pretty mini when she tilts forward even a little.

Oh, I almost forgot--I was using some vintage fabric from my grandma for the skirt, and I didn't have quite enough, so my skirt is not quite as full as the pattern calls for.  It's 11 inches short--74 inches of gathered fabric instead of 85. I actually thought the sample looked a little too full for me, so I think the 74 inches is perfect.  My other fabric was a quilting cotton remnant that I just loved.  I had been staring at that fabric for a while, waiting for the perfect project to make with it, and this dress just called out for it, especially with that sweet little red vintage floral for contrast.  It was a Joann's fabric, nothing fancy, just a print that caught my eye.  And the lining was purchased for a dress I intended to make for myself but have put off because it involved installing a zipper.  Well, I have no more reason to fear!  Now I just hope I have enough of that lining fabric left!

Being a pattern tester was fun for me!  It put a level of pressure and responsibility on the project that I don't usually have (timeline, I committed to doing it, following directions) and I am happy with the results.  Makes me think that maybe I CAN have nice things.  Once the pattern is through the testing phase (and I'm sorry, but I have NO idea how long these things take), you will probably be able to find it on Popolok Design's Etsy page, but until then there are loads of other cute patterns there!

Edited:  The pattern is now HERE!