My oldest turned five. FIVE! That is full-on big kid territory. As I've done a few birthday parties now, I am learning some things about myself as it relates to birthday party preparations.
1. I am cheap
2. I am lazy
3. I am overwhelmed by the party setups I see on Pinterest.
While the full-on theme parties look amazing, I can't help but wonder how much the actual kids (both the birthday kid and the party-goers) appreciate all the work and expense goes into a party like that. I'm sure the adults are all duly impressed, but...is the party for them, or for the kids? I feel like the kids have just as much fun at a party that flows well and is well-organized, regardless of the tablescape. I know for some people, decorating for the party is really fun and they love figuring out all of the little details, but for me...well, I think those parties look so fabulous in pictures, but when I start thinking about what is actually involved and what I would have to do to create it, I have to stop because if I got into it I'm pretty sure my head would explode.
Here are a few things that I have done to keep myself sane with the party prep:
- Keep the decorations to one main party area. In my case, this is the living/dining room, the first area you see when you enter the house. Even though the kids will spend time in the kitchen, basement, and bathroom, I don't bother decorating those. I subscribe to this same theory with my holiday decorating.
 |
| Our main party area |
 |
| This became the food table. Beverages were in the kitchen. |
- Reuse party decorations. We have had the same basic Happy Birthday banner for years now, and have been slowly making our way through the same two colors of streamers (red and purple) party after party. I also supplement the printed Happy Birthday plates/cups/napkins with leftover solid plates/cups/napkins from parties gone by.
- Maximize Dollar Tree purchases, especially if they happen to have party stuff that matches your theme. Unfortunately for me, I didn't buy up racecar party stuff when they had it a couple of months ago, because I was worried that my guy would change his mind before the invitations went out, and when I went back for it there were only a couple of racecar items left, but the few posters and cellophane goody bags I was able to get are nicely supplemented by plain colored plates and cups. Racecar stuff for the goody bag is pretty easy to come by--I was able to fill the racecar-printed goody bags for less than $1 each--Hot Wheels stickers, a die-cast racecar, a plastic top (not racecar related), a Tootsie Roll Pop, and a pack of Sixlets.
 |
| Goody bag contents--cars were in a 4-pk at dollar store, stickers were from a book of 300 Hot Wheels stickers so a $1 book was cut into favors for all the kids. The bags were a Dollar Tree 24-pack or something like that. Suckers were a 10-pack, and the Sixlets (reminded me of traffic lights) came in a big bag for $1, plenty for everybody. |
- Note--Dollar Tree's return policy is exchange only. I SHOULD have just bought the dang racecar stuff, then traded it in for something else if the boy changed his mind. Now that the girl tells me she wants a Mermaid party when she turns 3 in two months, I have been buying mermaid/underwater stuff there when I see it and holding on to the receipt so that I can return it if necessary later.
- Have the kids make decorations and games. No, they will not look like a professional party planner decorated your house, but the kids love to feel involved and giving them some poster paper and markers and letting them go at it gets them out of your hair for a while.
 |
| He didn't want to color anything in. |
 |
| Pin the car on the racetrack--the envelope to the left has little paper racecars in it. The boy colored each one a different color and wrote a party-goer's name on it, so when they play the game they know which car belonged to each kid. |
- I have also had the kids decorate brown paper bags for the goody bags when I couldn't find cheap ones that fit the theme. Printing out coloring sheets then cutting out and gluing the images to the bags is an easy way to do it--that also works for wall decor.
- Have a couple of games that kids can do when they feel like it--we like "Pin the _____ on the _____" (with the blanks filled in to fit your theme--"Pin the racecar on the track", "Pin the owl in the tree," etc.)
 |
| The Boy posing by the game after the kids had played it |
 |
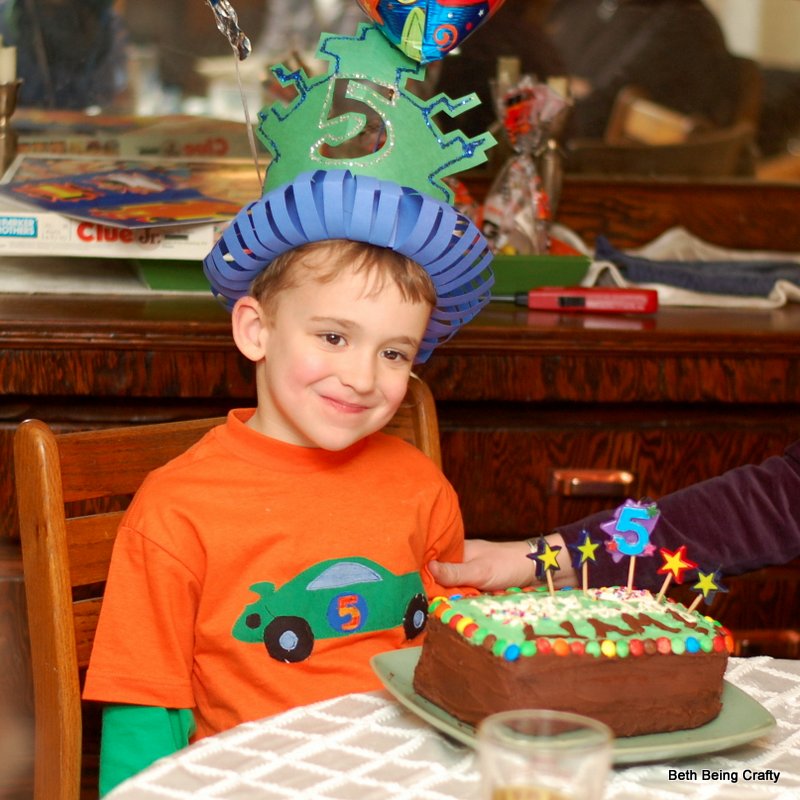
| And of course, the special racecar shirt I appliqued for him |
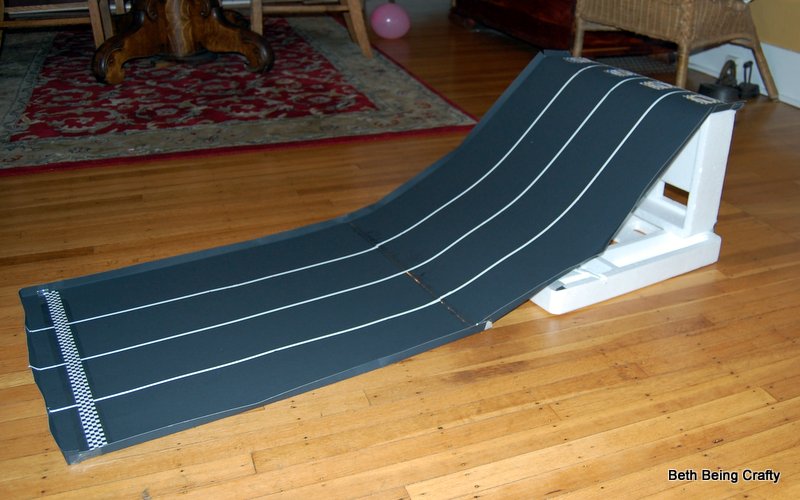
- For the racecar party we made a ramp for the kids to race cars down--the cars that we put in their goody bags. Some detail about the ramp: I made it out of two sheets of black posterboard (Dollar Tree--2/$1), some styrofoam packaging that we hadn't thrown out yet (no room in the garbage--here in Portland we only get pickup every other week so sometimes it's hard to get rid of everything!), and duct tape. I used whiteout tape to make the lane lines (bought at Dollar Tree), and some printable checkerboard and hot wheels images that I found here (also used it for the cake) to decorate it. The whole thing cost me $2. The kids LOVED racing cars down it! They also found other things to race down the ramp--princess figurines, rubber balls, etc.)
 |
| Edges are folded up to keep cars on the ramp (somewhat) |
 |
| Ooh, pretty. |
It was not very sturdy, but I was amazed that it not only held up for the whole party, but is as a matter of fact STILL residing in our basement where it is frequently used by the kids and slept on by the cats, about a month later.
I should have written the kids' names on their racecars--we only had 4 different colors, so it was hard to keep track of which car belonged to whom.
- We did have one game for kids to play all at once--a Racecar bingo that I found at Dollar Tree. But the kids were so happy just playing with the ramp, the pin-the-racecar poster, and the toys around our house that we never got around to playing the bingo game. But good to have it in my back pocket.
- The cake. Well, this is such a personal decision. I LOVE cake. Make that, I love GOOD cake. But as I've mentioned, I'm cheap. For a few years, we ordered beautiful cakes from a fantastic bakery and I loved them. But they were not cheap. So then I ordered grocery store cakes with cute decorations that fit our theme, and they were cheap...but they did not taste good. So I've started making my own cakes. To me, taste and cost is more important than decoration. I would love to just do cupcakes, and put little toothpicks with flags in them that fit the theme (this is one way those Pinterest theme parties are helpful to me--free printables! I would skip flagging the straws, silverware, napkins, etc--but flags for the cupcakes seems a lot easier than decorating cupcakes or a cake.) But my kids so far have always wanted cakes, not cupcakes. And cakes are harder to decorate, in my opinion. So I just look at pictures online to get an idea and try to do something simple. This year, I made 2 box cakes (doctored up to taste better according to this blog post--I really think it did work to make the cake more rich and from-scratch tasting) in 9x13 pans, and using this fantastic frosting from Smitten Kitchen.
I searched Pinterest for racecar cakes and got several ideas, and this is my version.
 |
| I wanted small cars--these were in an 8-pk at Dollar Tree. The trophy also came from there. |
 |
| The Happy Birthday candles were $2.50 at Walmart. This was a nice purchase because I didn't have to worry about my writing, and they saved room for the racetrack. |
 |
| A better view of the checkerboard finish line, taped to a couple of toothpicks. |
A decorating note--I made my 5 by putting chocolate frosting in a baggie with a big corner cut off, then squeezed out the shape on top of the green frosting, and spread it flat with a knife into the 5 shape that I wanted.
Then I topped that with crushed chocolate cookies to make the road. Then, obviously, edged the road and the top of the cake with M&M's. This cake was HUGE! We had 8 kids at the party, and probably 14 adults. Since hardly any adults seem to eat cake these days (with ME being the obvious exception, and a few others), we had over half the cake left over! This worked out well, because I just cut the leftover into a rectangle, wrapped it in saran wrap and foil, and stuck it in the freezer. Then a week later I pulled it out, scraped the old racetrack decorations off the top, made a little fresh frosting, and served it again for our family party! Still tasted great.
 |
| Recycled birthday cake |
 |
| Nobody seemed to mind. |
- Keep the DIY's simple. I did go a little more all-out with last year's owl party, because it was harder to find inexpensive owl stuff for favors and games at that point, but I made sure to choose projects that would be fairly quick AND fun for me to make. But I still do prefer to go Dollar Tree when possible, because it's obviously easier and usually cheaper than doing it myself.
- Invitations: I love photo invitations. I have never figured out my Photoshop software, so until I take a class I have found many ways to make do. My new favorite to make custom photo invitations is www.picmonkey.com. So awesome. I have been using them for everything--valentines, party invitations, display cards for my headbands, marketing postcards. I love it, and it's so user-friendly, and I've yet to upgrade from the free service. However, I had not yet discovered them when I made The Boy's party invitation, so here's what I did (I could have done ALL of this invitation creation on picmonkey. I'll show you how Little Sister's party invitation turns out so you can see what I do there):
- Took him to the mall to ride in a "racecar" for 75 cents (I also had to let his sister do a ride, so that's an extra 75 cents) and took photos of him "driving"
- Emailed the photo to myself so I could access it on my phone
- Chose a decorative template from RedStamp (a cool free app to make photo e-cards that are also printable when you email it to yourself) but left the text area blank--there wasn't enough room to give all the party info. The RedStamp part is the bunting, which kind of reminded me of something you'd see at a road race, I guess...
- Uploaded THAT saved image to Phonto (another free app that has lots of options for adding text to photos), where I could add the translucent banner across the photo
- Emailed THAT image to myself so that I could add party info text on my home computer (I used Picasa, Google's free photo editing software)--that's the red and blue text at the bottom.
- Uploaded the finished invitation to Costco, where I had them printed as 5x7's for 39 cents each, and mailed them out using leftover Christmas card envelopes. Total cost for 10 invitations: $5.40 plus stamps (including our racecar rides).
 |
| I can't resist the cheesy age-related rhymes! |
- I also made him a "special" breakfast before school on his actual birthday. I spread nutella on a toaster waffle, laid down a layer of banana slices, then topped it with another toaster waffle and wrote "5" on top with frosting and added candles. Looked like a cute little breakfast birthday cake for very little effort!
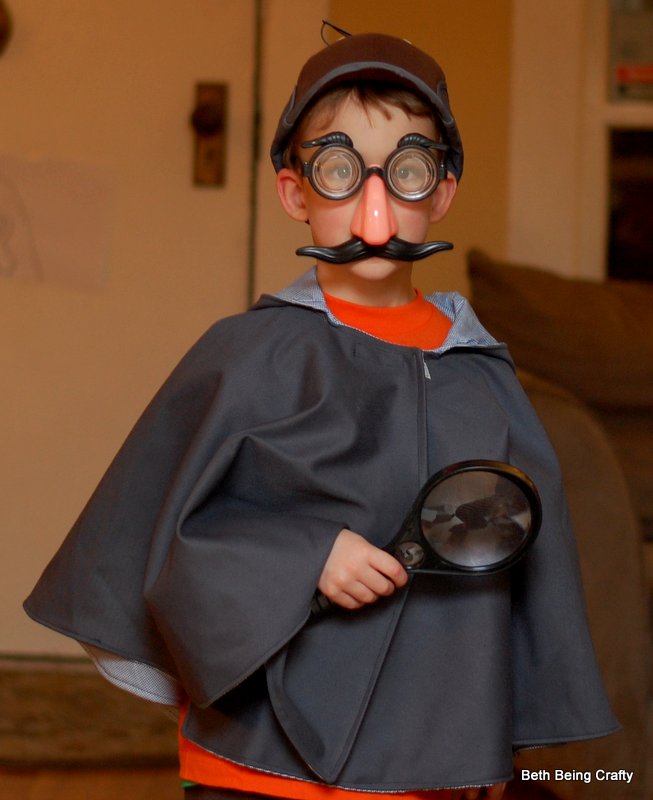
- I have to make a note about the gift I made for him. I did a separate post about it, but here's the Sleuth costume:
 |
| With accessories |
Finally, we STILL haven't gotten to it yet (BAD! BAD host!), but I printed out
these free Thank You cards for Liam to work on. I like how they match the bunting on the invitation.
WHEW that ended up being a long post! Guess that explains why it took me a month to get around to finishing it.


.JPG)


Thanks beth! Planning my sons 5th birthday race car theme party and got stuck. Lots on the internet to do with food & decorating but not games. We share a lot of the same perspectives so I really appreciated your in put. Thanks
ReplyDeletewow
ReplyDelete