Saturday, November 22, 2014

Printable Doll Kimono Pattern and Tutorial!

I finally gathered enough nerve to go into the shop near my neighborhood where they alter and sell vintage kimonos and yukatas, and spit out some vocabulary words about cut fabric accompanied with mime ask about purchasing some fabric scraps from them.  Amazingly enough, I was successful, and now I have a bag of vintage kimono scraps to play with!

One way I KNEW I would use the scraps was by making doll clothes.  Little Sister's doll play has reached a stage where getting the dolls dressed (several times) is every bit as important as the make-believe that happens afterwards, and I am looking forward to building the doll wardrobes beyond the Disney princess costumes they all came in.  So since I had kimono scraps, what better to make than kimonos!


I figured that since a doll kimono is a fairly simple shape and construction that there would be a tutorial or pattern out there that I could follow, but there was actually surprisingly little that I could find online.  So cobbling together a few things I found, I created a printable pattern that I decided to share with you!

Now, I have never shared a printable before, so please give me feedback if this link doesn't work for you.  I made it all fit on one sheet, and I included a box for scale, so make sure that you print at 100% (I am using A4 paper instead of letter size, but A4 is bigger so as long as you use 100% scale everything should fit just fine!)

It will look like the pic below, and the link to the printable is in the caption!

Print the pattern here!
Ok, so on to the tutorial.  Here goes!  It's been a while since I've done a full tutorial so let me know if you've got any questions.

1.  Print your pattern and tape pieces together.  They should look like this:


2.  Lay out your pattern pieces on the fabric.  The kimono can be cut out of a piece of fabric as small as 7" by 30" (or 13" by 20", depending on how you cut your pieces out).  Here's how I laid mine out:

Note that the body pieces are NOT cut on the fold, they are two separate pieces.  And I cut out both sleeves at once by doubling the fabric over at one end and cutting both on the fold at once.
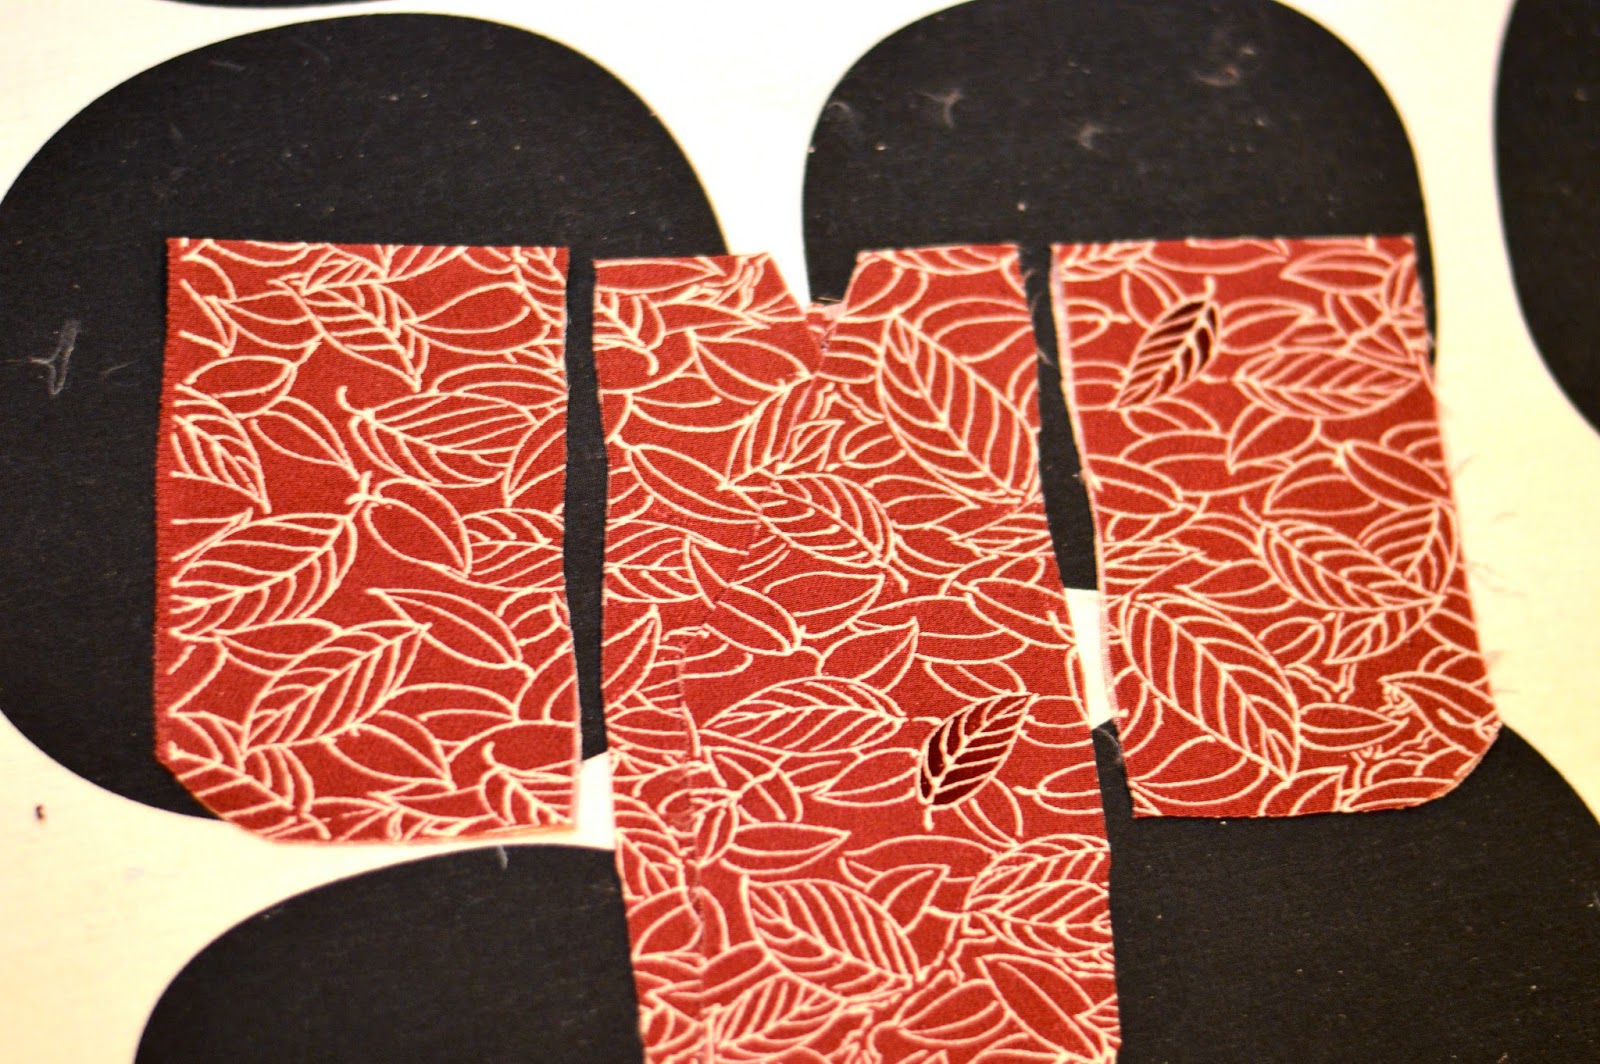
You will cut out two of the long body pieces as mirror images, and two sleeves, cut on the fold.  Your cut pieces will look like this:

Note--I rounded the neckline out in the final pattern so yours will look a tiny bit different.

3.  Lay the two body pieces right side together and sew the back bodice pieces together from hem to neckline, then press open.

Hmm, those pins are pretty hard to see.  If you squint, you'll see them on the bottom right edge of the fabric here, they go from neckline to back hem.
The back body of the kimono (wrong side, obviously)
4.  Fold the front body panels over to line up the hems, then press a sharp line at the shoulder.  Also press a nice line into your sleeves while you're at it.


5.  Lay the body panel out, right side up.  Take your first sleeve and lay it right side down on top of the body panel so that the pressed line on the sleeve matches up with the pressed line at the shoulder, and with the straight edge of the sleeve along the outside edge of the kimono body.


6.  Pin the pressed lines together, then pin 1.5 inches away from the center line on either side.  Sew the sleeve onto the body ONLY on these three inches in the middle. Then do the same with the other sleeve.

7.  Press the seam open where the sleeve joins the body, then press the rest of the straight edge of the sleeve over to match that seam allowance (so you should have 1/4 inch or so pressed over the full length of the sleeve).  Press the other edge of the sleeve (between the two curved corners) over as well as shown below.


8.  Sew the folded edge down that is closest to the body of the kimono--the straight edge where the sleeve is attached in the middle.  There will be an opening at the armpit like in a real kimono, so you want those open edges to be finished.

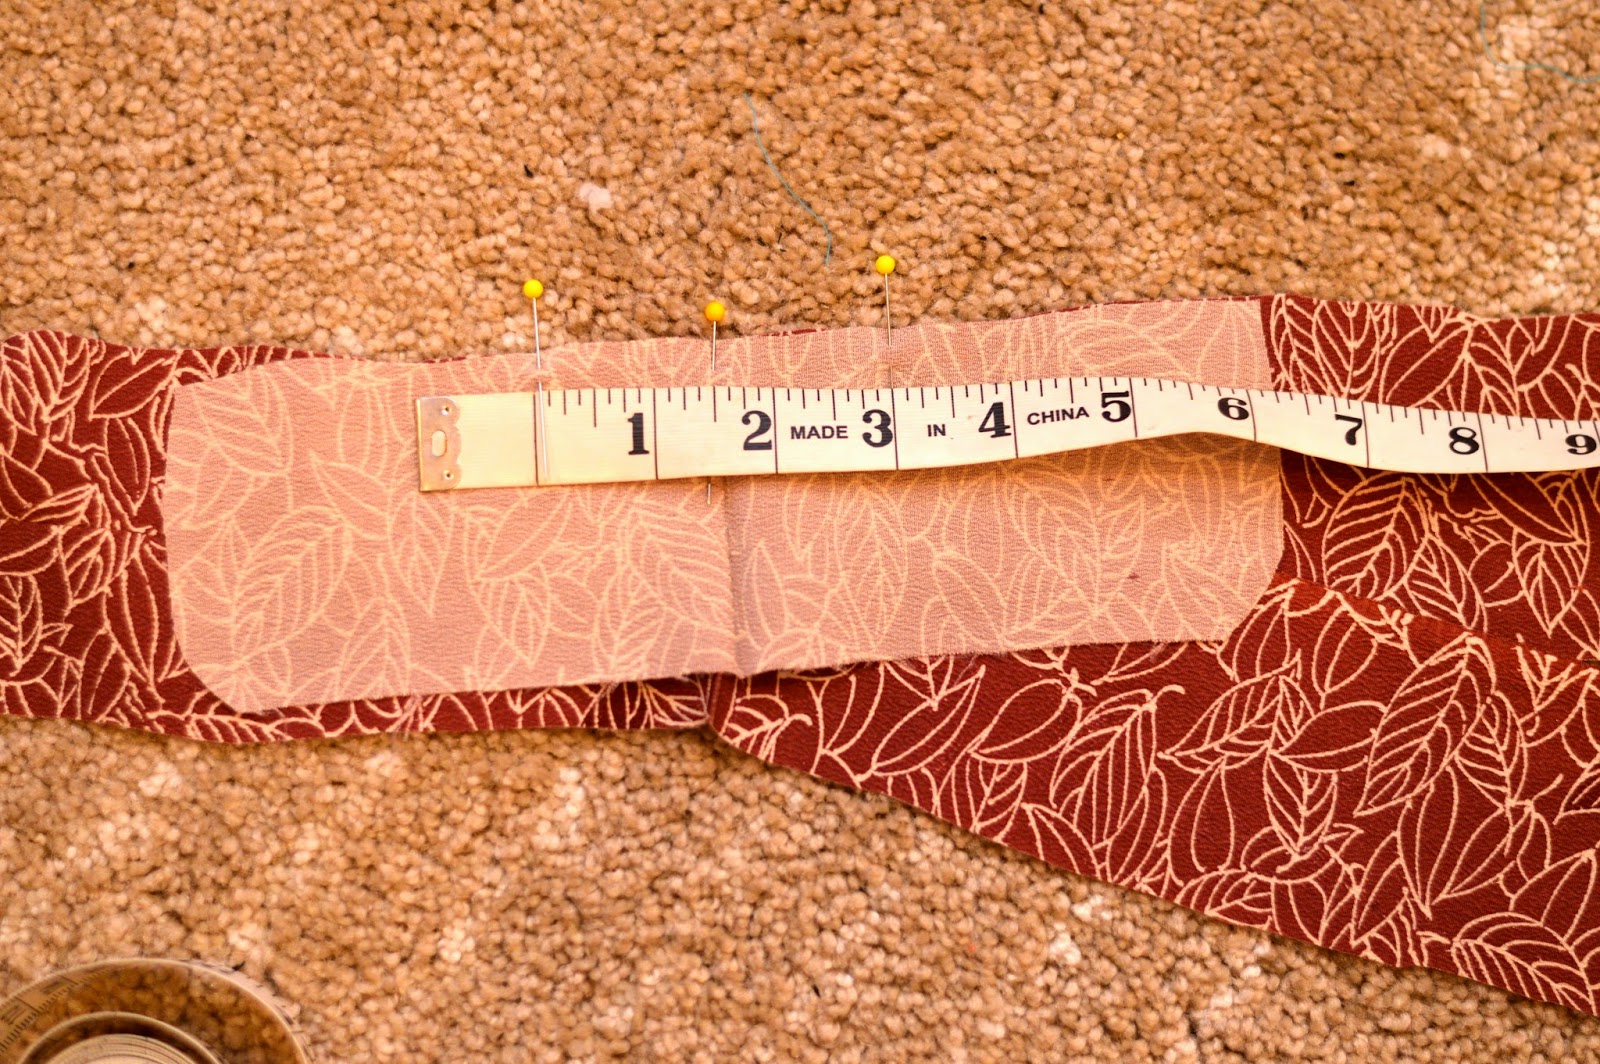
9.  On the outer edge of the sleeve (the one with curved corners), turn the middle 3 inches over a second time and hem in place.  This will be your wrist opening, so it needs to be finished.

Hem the area between the two pins (should roughly line up with the 3 inches sewn at the shoulder)
 10.  Now fold the sleeve in half, right sides together.  Sew together starting about an inch from where the sleeve joins the body of the kimono, around the bottom of the sleeve, and stopping at the finished wrist opening.
Pinned

Sewn
 11.  Now pin the side of the kimono with the finished sleeve.  Pin all the way from the armpit to the hem and sew closed.

I found it easiest to start sewing at the hem and end at the armpit.
 12.  Make sure you have completed all of these steps for both sleeves and sides of the kimono--it should look like this:


13.  Trim the corners on the sleeve seam allowances carefully, then turn the kimono right-side-out and press.


14.  Hem the bottom of the robe, like so:


15.  Now attach bias tape all the way around the opening, starting at the hem on one side and going all the way around.  I used single fold bias tape and folded it in half to get a thinner double-folded tape look.


16.  Once the bias tape is on, give it a final press and the kimono itself is done!

17.  Now you just need an obi/belt.  For mine, I just cut a piece of foldover elastic to 4.25 inches and sewed it together in the back.  It has to be pulled up over the doll's feet.  But you could also use a piece of ribbon and add velcro, or a snap. Also, real obi are very elaborate so you could have a lot of fun making a more authentic one!  But for my purposes the elastic worked very well.


Here are a couple of my earlier tries--I adapted the pattern several times along the way and am really happy with the way the final pattern came out.

Take 1

Take 2

I do have some sad news though-- I was making my 4th kimono, the thin fabric got caught in the machine and pulled the thing that catches the bobbin thread (hook timer? I can't remember) out of whack.  After watching a few youtube videos I was confident that I could fix it myself, but after removing every visible screw on my machine and still not being able to get the case off, I gave up and brought it to a sewing machine repair shop in Shinjuku, where thankfully the guy spoke enough English to understand my problem.  Well, that and he had eyes, and the problem is pretty obvious, so all was well.  But being without my machine for 3 days has been brutal!  I was on a roll with working on gifts, and now it's all on hold since I have a friend visiting (HOORAY!!!!  Picking her up in an hour!) and I know I'd rather hang out with her and show off Tokyo than sit in front of my sewing machine while she's here.  But I hate paying $85 to fix a 6-month-old machine that only cost $250 in the first place.  I don't even want to try to figure out the warrantee, since it's in Japanese and I don't want to send the machine out somewhere and get it back who-knows-when, but I am starting to think I should have invested in a better machine.  I didn't know how much sewing I would be doing when I picked out the one I have!  We'll see if this one ends up lasting me the rest of my time here, or if I end up upgrading after all!


Sunday, November 16, 2014

Deer and Doe Plantain Tee

I made myself a tee from the free Plantain Tee pattern from Deer and Doe.  I'm so happy with how the prints came together!  It's such a cheerful top.


The yellow and white stripe was another one of my 100 yen/meter (about $1/yard) finds, and it's a nice one.  It's soft but not too stretchy.  My top maybe came out a tiny bit small, but only because of this fabric--if I was using a more typically stretchy knit I would make the same size again.  Oh, and also because of the fabric I used (I think), I had a little trouble with my neckline binding.  I cut it on the bias to get a little more stretch out of it, but it came out too wide and wouldn't lay flat.  So I folded it over to the outside and topstitched it down, which worked great!  I am actually very pleased with the final result on the neckline.

Whoo, stripe matching!

For the accent panels, I used bits and pieces of the Melody Miller Ruby Star Spring 2012 that I found for 380 yen/meter (less than $4/yard).  This fabric has a bunch of different prints incorporated into it, so it was fun to figure out which pieces I wanted to use.

It's on sale at fabricworm.com for only $5.50/yard! Here's the link!

I cut up one strip that featured the floral and made that into the elbow patches and the shoulder panels (I added those; they are not part of the original pattern), and I used a different part to make the back yoke (also my addition to the pattern).


I have long arms, so my elbow patches ended up hitting just a bit high. When I tug the sleeves all the way down, my elbow barely hits the bottom of the patch.  So when I make this pattern again, I'll lower my elbow patches by about 2 inches I think.  I also added about 4 inches to the length, because I like long tops.  Partially because I have a long torso, but I also just feel more comfy in my skinny jeans if my top covers up a bit more!

To give a better idea of the length
I love the way the pattern looks with the woven fabric accents!  When adding in the wovens, it's definitely good to err on the side of caution in terms of size--the wovens won't stretch, so it's good to have a little extra room in there for the armpits and shoulders.  Next time, I will cut my woven back yoke a size or two larger than the size I am cutting for the t-shirt. I also made sure to leave a little extra seam allowance where I would be attaching the wovens.


The shape of this tee is great--it's fitted in the bust but has a slight a-line, so it feels comfy and casual without looking sloppy.   There are three sleeve options too--short, 3/4 (what I sewed), and long.  I definitely need more of these in my fall wardrobe!

Wednesday, November 12, 2014

Sports Day Dress: A Bimaa Pattern Hack!


Sports Day at school was on Friday, and it was really a lot of fun.  Both kids were on the Green Team, which means that both kids had to wear a long-sleeved green top.  No problem for the boy--green is his favorite color, and he had several shirts to choose from in his wardrobe.  But Little Sister never wears green (unless she's dressed like Tinkerbell), and therefore I had an excuse to try out my brand new Bimaa Sweater pattern from LouBee Clothing!

However, the girl also pretty much only wears dresses, and requested a short dress with pockets that she could run in for Sports Day.  So I adjusted the Bimaa into this cute, sporty tunic dress that was perfect for all of her activities!


I sewed the shawl collar option in a soft green jersey (literally the only green knit fabric I could find in Nippori last Monday--note to self, do NOT go fabric shopping on a national holiday in Japan!) trimmed with a white knit with a rainbow weave in it from Girl Charlee.  My daughter is 4.5, and usually wears a size 4 in RTW. I wanted the dress to last a while, so I cut out a size 5 but used the size 4 for the wrist cuffs to make sure the sleeves stayed up off of her hands.


To extend the top into this dress, I cut a gentle curve in the front bodice piece.  At center, the bottom edge of the bodice curve was 2.5 inches from the neckline, and it curved down to 3.75 inches away from the bottom of the armhole at the side seam.  


For the back bodice, I just cut it off straight across at the same spot as the lowest part of the curve, so that they matched at the side seam.  Like I said, this was 3.75 inches from the bottom of the armhole at the side seam.  


I have done this style of half-circle pockets before, using this tutorial.  I think they are just darling, and a fun way to showcase another fabric.  This time I didn't add an accent color, so I just topstitched the opening to keep it neat.  Just make sure that your pocket fabric isn't too see-through, since there's only one layer there.  


The fun thing about this dress was the shape of the skirt. I actually cut it wider at the top than at the bottom to get the gather at the bodice seam and the sweatshirt look at the bottom.  For the band, I used the band from the Bimaa pattern but I cut it about 2 sizes larger than the size I cut for the bodice.

When cutting out the front skirt panel, I mimicked the curve I had cut into the bodice, but cut the top of the skirt wider than the bodice so I could get a little bit of gather.  I added about an inch while it was on the fold, so the skirt front was a total of 2 inches wider than the bodice (14 inches wide total for mine).  Then I narrowed the skirt back in slightly towards the hem, so that the bottom of the skirt was about the same as the width of the bodice.  My skirt was 12 inches long from side seam to the bottom (then I added the band which gave it a little more length).  

I put in the pockets first on the front skirt panel, then gathered the top to fit the bodice, pinned, and sewed it to the finished bodice piece.  For the back piece, since I wasn't dealing with the curve, I just stretched the bodice piece while I sewed the skirt on, which worked fine. It seems that I unintentionally cut the back skirt piece a little narrower as well, so there wasn't as much extra fabric anyway.

For the rest of the assembly, I just followed the Bimaa pattern directions, which are so great and easy to follow.

Here are some action shots from Sports Day--Go Green Team!

Jumbo Stackers

Zig Zag Course

Some of our own sports action

And the amazing thing to me was that she chose to wear the green dress the day AFTER Sports Day as well!  We'll see if this pink-and-purple girl will give it any more chances as time goes by, but for now I will call it a success!


I almost forgot--I'm linking this up to the Sew and Show over at StraightGrain this week!  I could win a prize if I get the most clicks, so visit the Sew and Show by clicking the button in the sidebar or THIS LINK and click on Little Sister's picture!