Saturday, July 30, 2011

Amy Butler's Birdie Sling bag

One of my dearest friends had a milestone birthday party last weekend, which I won't specify but was not 30, and was not 35, but anybody looking at her would have a hard time believing it was beyond those numbers!  She threw the most fabulous bash, which my husband and I were able to attend, OUT OF STATE, WITHOUT CHILDREN.  She specified no gifts, but she gets a gift just for that, yes?

I knew I wanted to make her something, so I decided on this great bag after seeing the awesome one that a friend had made.  I wanted fabric that included the color I always think of as "Rona Green." We have a history of passing on our paperbacks once we have finished them, so I filled the bag with my old books--the bag was just a receptacle, not a gift!

Hey, I even put a bird on it!  How Portland of me.
The inside has pockets

I'm really happy with the way the bag turned out, but there are a few things I must tell you:

1.  OK, first of all, you must know that I am not great at following patterns.  So I decided to make one of these for myself as well, using my bag as the guinea pig to make sure I was doing things right.

2.  With that in mind (I was making two bags, not one), I spent over FOUR HOURS cutting and ironing before I did any actual sewing.  Are you kidding me here?

3.  The amounts of fabrics specified in the pattern are, to put it mildly, ridiculous.  Unless you are using a very large print and you want to make sure that a specific piece of it is placed in a certain spot on the bag (like with my bird pattern above), you will need nowhere near the amount of fabric listed.  Particularly for the handle/trim fabric and the lining fabric.  You could get away with about 1/3 of the fabric if you chose a pattern that wasn't very directional.  You do need all of the interfacing though.

The pictures below are from the bag I made for myself (which isn't finished yet...I ran out of time and gave up on the guinea pig bag about halfway through).
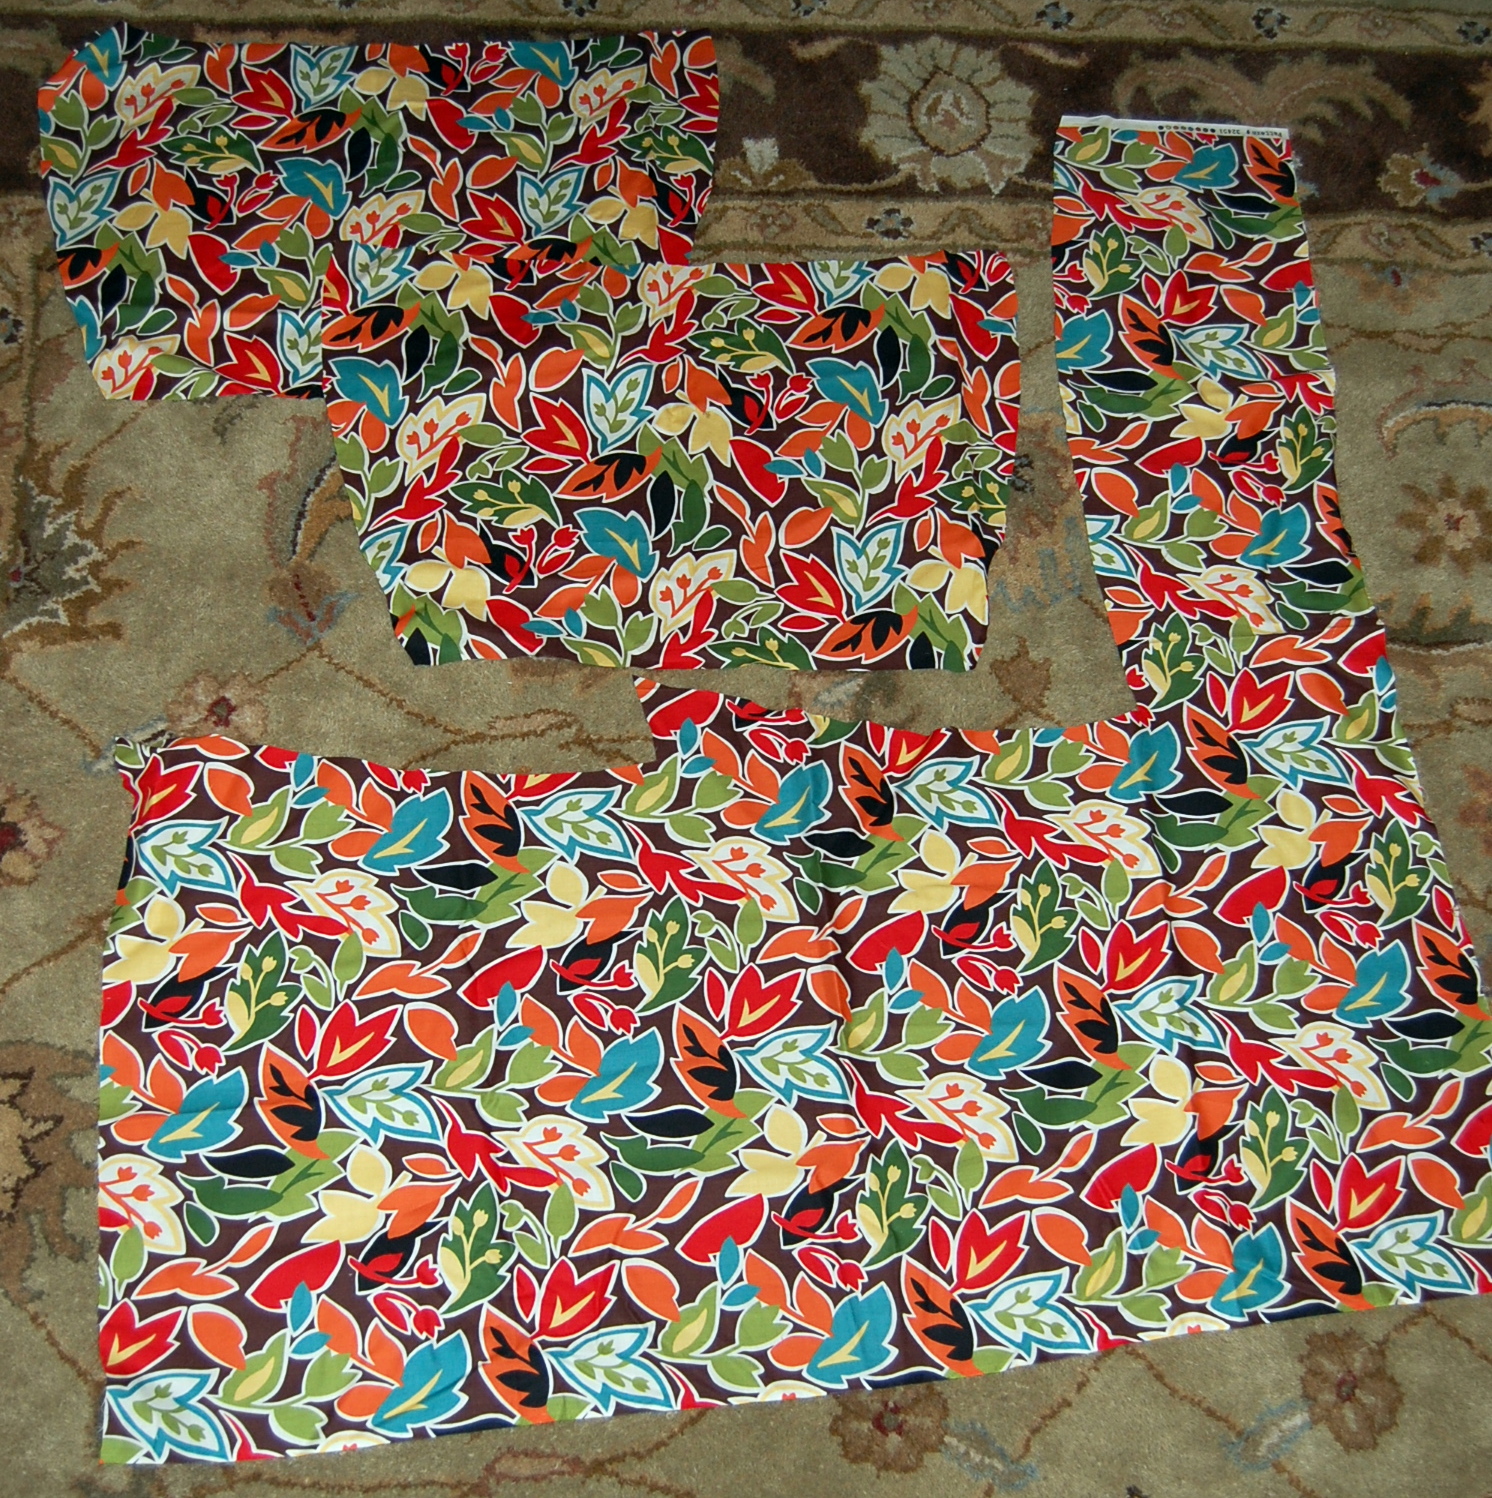
The exterior.  You can see my two cut pieces, and then what's left.

The pieces at the top are the cut out pieces for the lining and pockets.
The huge piece of fabric below is LEFT OVER!

The fabric for the trim/handles:  cut out on the left, left over on the right.

4.  You also can skip the tracing paper and pencils that the pattern calls for.  Honestly, I couldn't even understand how I was supposed to use those items, and marking things off with pins worked just fine for me.

5.  I really do love how the bag turned out.  It's roomy, it sits nicely on my shoulder, and I love the fabrics.  BUT, for the cost of the fabric (which admittedly could have been dramatically reduced) and interfacing plus the time I spent...well, they have really cute tote bags at Target for less than twenty bucks, you know what I mean?

Avert your eyes from the camera remote in my hand.
Soon I hope to show you the bag I made for myself too.  In the meantime, here is the birthday girl sharing her spotlight with The Boy.  I am so lucky to have her as a friend, and even luckier that my kids get to grow up with an extra "auntie" in their lives!
Thanks for the cake, Auntie Rona!

Wednesday, July 20, 2011

Freezer Jam!

Oh my gosh, have you ever made freezer jam?  If not, GO DO IT!  Right NOW! Especially if you have your own berries growing in your yard.

Mmmmmm.

Last year, we moved into a house that came with a very prolific raspberry bush.  Last summer, we ate all the raspberries, pretty much right off the bush.  I did make a few fresh-tart-style pies, but that's all I did with them.  We even gave some away.

This summer, with two active kids, I can barely keep up with getting the berries off the bush before they go bad. Little Sister helps, since she would live on raspberries and crackers if she could, and every time we step out into the yard she reaches for the raspberry bush with an open baby bird mouth, saying "Eh. Eh. bahh-beyyyy(her version of raspberry)."

But since we have so darn many berries, and they are my total favorite, I finally looked up how to make freezer jam.  Why didn't I know how easy this is?  It seriously took me 10 minutes.  And now I have a bunch of jam in my freezer.  Which may or may not last me through the end of the summer (we have been putting it on everything--french toast, regular toast, waffles, yogurt, even ice cream!).  But I do know I will be making more, and wouldn't it be great to have that fresh raspberry taste in the middle of the winter?

I just followed the directions on the package of Ball no-cook pectin:

About $3 at the grocery store, and I used  about a third of the container.
I bought this particular brand because of this blog post fromThe Damsel in Dis Dress that I read before starting the process.  She's funny!  And it let me know that yes, indeed, this was going to be easy.

So this is not really a tutorial so much as a little note to let you too know that yes, indeed, it is going to be easy!

I used about 8 cups of fresh raspberries, which came out to about 4 cups mashed.

In a bowl, mash your fruit (I used a potato masher), leaving it as chunky as you like it.  You determine the amount of pectin and sugar to use based on your prepared (mashed) fruit, so do this first.  I mashed mine right in the measuring cup so I would know how much I had.

In a separate bowl, measure your sugar and pectin and mix together.

Then mix the fruit in with the pectin/sugar combo:

Then put into your jars!  After 30 minutes, you'll have one jar ready to eat and the rest preserved in the freezer for when you're ready to open a new one (like, tomorrow).

Enjoy!

Thursday, July 14, 2011

Pillows!

I love it when I can finish a project in an evening after the kids go to bed.  Then I can sit and admire my handiwork while watching random stuff on TV (coincidentally, as I watched "Clean House" on the style network tonight, there was an appearance by this tunic, the very same one that I refashioned into a pretty little dress for Little Sister!)

In any case, these pillows (an example of a one-evening project) are one step in the ongoing project that is our basement.  We knew when we moved in that this basement would be a project eventually, but we are now most of the way through a saga that started innocently enough with renting a steam cleaner for the carpet, included spending a Friday night spontaneously ripping out carpet (after said steam-cleaning dredged up all kinds of gross old cat pee smells), and will end (for now) with five out-of-town guests staying in our house in a little over a week.

New rug, old pillows.  Sorry the new painted floor is not visible in this pic.  Same old baby.
So, after sealing and painting our concrete basement floor (another fun way to spend your weekend evenings after the children go to bed), we bought a great big new rug for the sitting/TV room area.  I have been wanting new pillows for ages, and this overhaul is the perfect excuse, since the sad old ones don't go with the new rug at all.

Bought on clearance at Cost Plus, I don't know, 8 years ago?  

I got to dig through the outdoor clearance section as well as the home decor 50% off racks at Fabric Depot, the best fabric store ever, until I found the combination that I wanted.  I was pleased to find three fabrics that coordinated with each other AND the rug, all on sale for at least 50% off (including the rug, thanks Tuesday Morning!)

The fabrics (on the completed pillows, as you can see)
Little Sister woke up from her nap before I finished cutting the fabric, so
she was eager to help/hinder the process.

In addition to recovering the saggy throw pillows that we have, I also decided to turn our poor man's sofa with a chaise into a poor man's sectional by making my old body pillow into a backrest for the chaise section. This pillow was not-so-affectionately nicknamed "the surrogate" by the hubby because I used it to make myself comfortable while sleeping when pregnant.  We kept it around as floor padding when The Boy transitioned to a big-boy-bed, and even though it has spent the last few months tucked underneath his bed since the falling-out risk has all but disappeared, he was very nervous when he saw me taking it  to the basement.  "What if I have a hard fall?"  he asked me.  Well, I'm sure he'll live to tell about it.

Little Sister was also reluctant to give up the old body pillow.

Now what you've all been waiting for...the transformation!

Our same old basement with the new pillows/backrest:
Ta da!  I think the new pillows lighten things up.
Now, even with the clearance fabrics, this project wasn't as cheap as I wanted it to be.  I spent $36 on fabrics, and while I do have enough left over to make about four more pillows, I don't actually need four more pillows, so that's kind of a wash.  Although I think I'll make a rectangular pillow for the recliner, and probably a seat cushion for my crafting chair, so that's making it go a little further.  I know that there are places where you can spend north of $36 for only ONE pillow, but I don't shop at those places, and I know that I could probably have gotten 3 or 4 pillows for that amount of money at my favorite haunts Marshalls/TJMaxx/Ross/Tuesday Morning, but honestly driving around to find enough coordinating pillows probably would have been more work than making these myself!  Plus, you can't buy a "backrest" just anywhere--that baby is custom.

So all in all, I'm pleased with the way it turned out--and I'll post more about our basement transformation as it progresses!

Thursday, July 7, 2011

Fourth of July dress!

I did another refashioned dress for Little Sister, and I am just kicking myself that I was in too much of a hurry to get going on the project that I neglected to get a "before" picture of the shirt that I made this dress out of. The transformation is pretty impressive, if I do say so myself.

I saw the shirt one day on my way home from dropping The Boy off at school in one of our neighborhood's notorious "free" boxes out on a corner.  I was drawn to these great red-white-and-blue stripes that I thought would be so fun for the Fourth.  It was one of those quintessential '70's big-pointy-collar button-downs. So I took it home and washed it (on extra-hot); Colby still thought it was gross that I would use abandoned clothing from a stranger to make something for our daughter, but oh well.

I mostly followed this tutorial, but as usual I made my own adaptations.  The first thing I noticed was that she says the bodice will be about 4 inches high, but on my shirt the back seam was much closer to the top of the shirt than that.  So I used the fabric that was in the collar in my bodice too.  I had to do some creative fabric folding to get it to lay flat, but I actually like the effect of the seams in the bodice.

The other main difference is that I made the center of the bodice (the part inbetween the straps) higher up.  The writer of the tutorial uses a cute trim to raise the neckline, but I didn't have anything handy so I just used more of the collar fabric.

Finally, something that I DIDN'T do differently but will if I make this dress again--I had a really hard time turning under the curved hem for the ruffle sleeves.  Next time I would just cut two pieces for each strap, sew the wrong sides together, then turn it right-side out and sew a casing for the elastic.

Overall, I thought it was a great tutorial--easy to follow, and with great results.  I especially love re-using the button placket for the back of the dress.  I like it when the new item, while totally looking like its own thing, still retains some sense of the garment that it came from.  Mostly so I can say, "Look, I made her dress out of an old men's shirt!  See, there are the buttons!"  Hold on to those old men's shirts--I can't believe the great ideas these ladies on the internets have come up with for them!
Grandpa helping Little Sister model for me


P.S. Now that Little Sister can walk/stand by herself, I should have an easier time getting pictures of the clothes I make for her, right?  Right?