Showing posts with label toys. Show all posts

Monday, May 18, 2015

Random Never-blogged gifts

Looking through photos I found several little projects that I gave as gifts but never blogged about.  Thought you might be interested in seeing them!  I'll have to do another post like this soon--I just tucked some very special baby gifts in the mail so I'll tell you about those once they have been received!

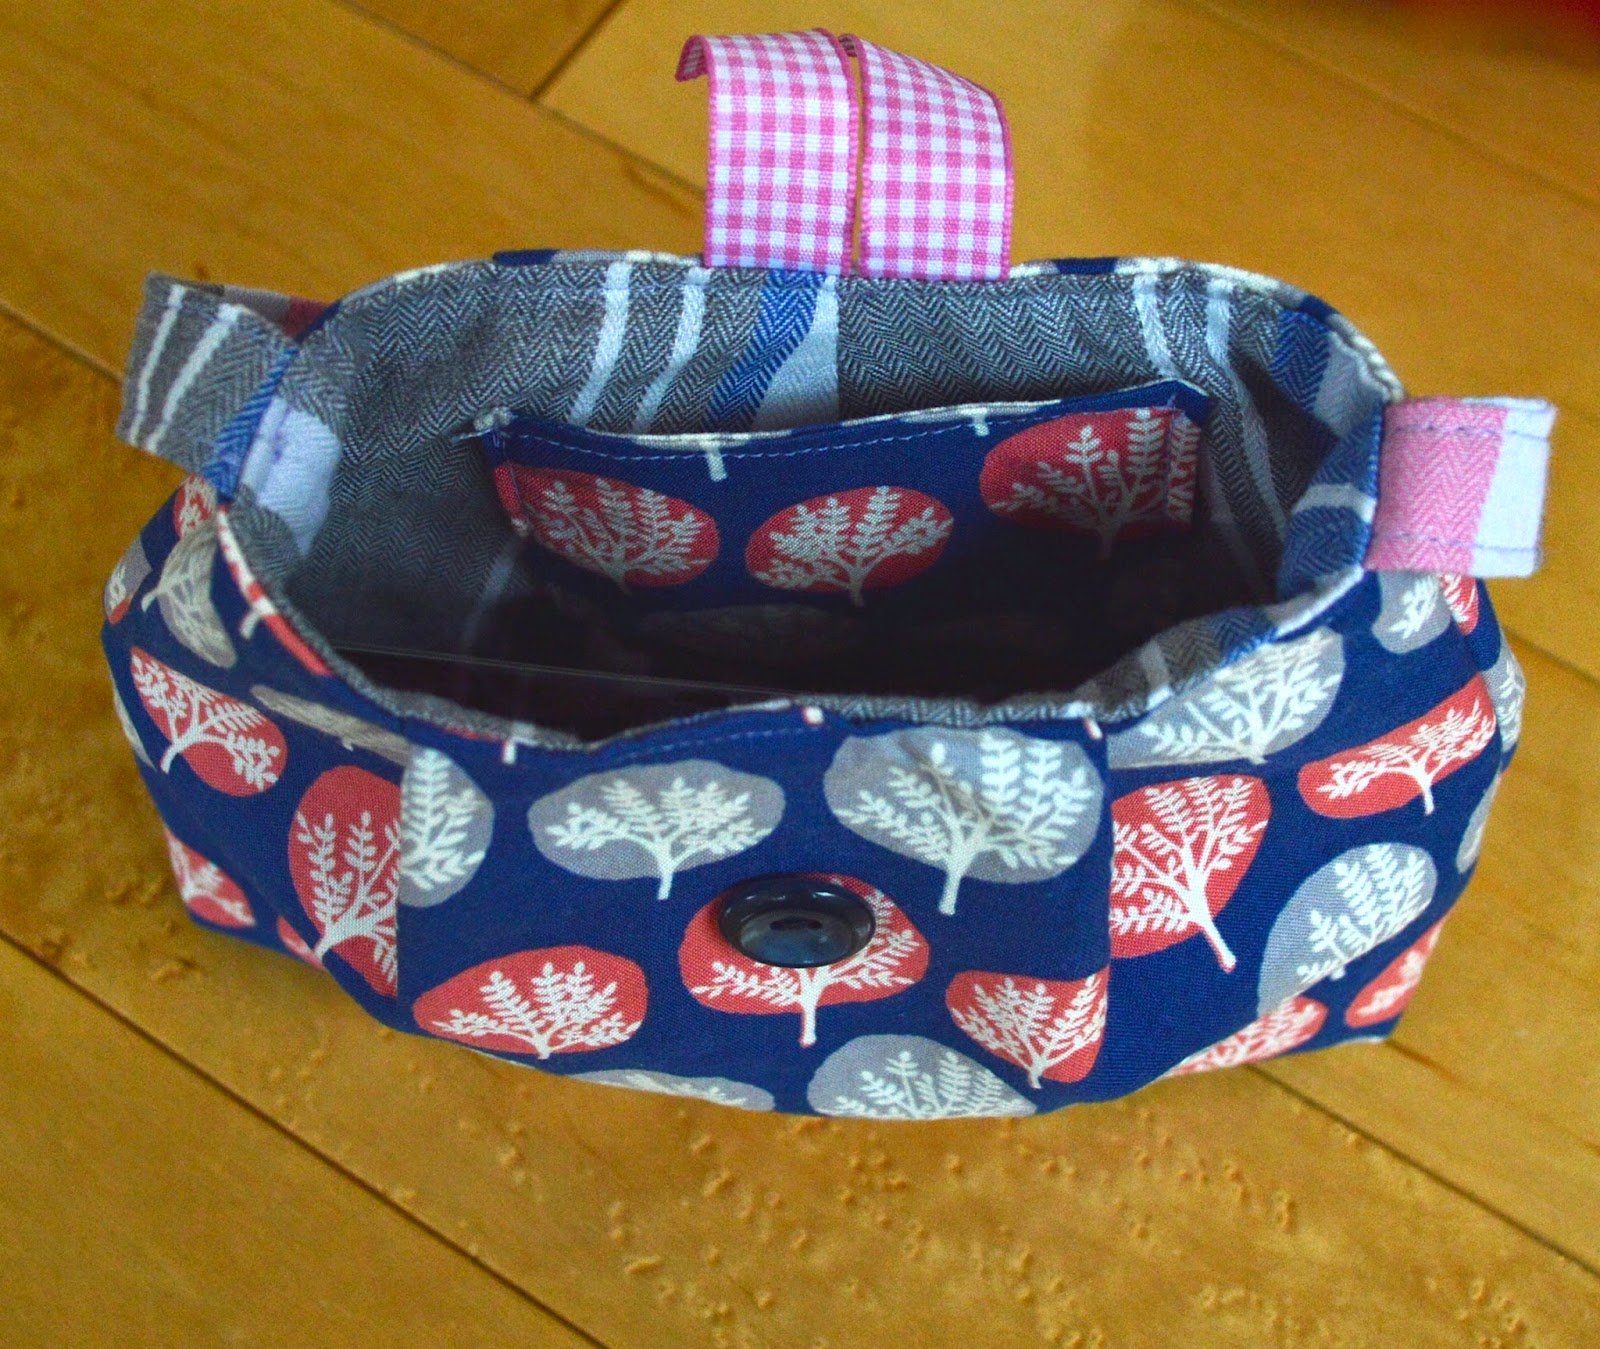
1.  This cute little purse, made from the free tutorial from Seven Layer Studio for one of Little Sister's friends:


2.  A Totoro stuffie, for our little friend's first birthday (along with a bib/apron that I didn't manage to photograph).  I used this free pattern, but using the stretchy knit I had on hand made him pretty lumpy.  I recommend using something more like the felt in the tutorial!


Oh, and I don't think I ever blogged about the pajamas they have on in those photos either--bonus!

3.  I made 10 of these reversible fat quarter aprons as a custom order for a friend who used them as favors for her daughter's cooking theme birthday party--fun idea!

Little Sister was not happy about modeling this, so her grumpy face is cropped out ;P

4.  I made this purse with leather trim to donate to a school fundraiser.  First time sewing with leather, and it was pretty easy!

Adapted from the free Phoebe bag pattern


5.  Mother/daughter birthday outfits--my friend and her daughter have birthdays two days apart, so how could I resist?


The top is the Fun Summer Tee from iCandy Handmade, except that I added a woven insert for the shoulders.   The printed fabric is a Nani Iro double gauze--sooooo nice!  The stripe is a 100 yen per meter find.

And the dress is this free Caravan Dress patter from Dotta.  Since I used the same woven for this skirt, I cut the back pattern piece in half instead of having the same fabric top and bottom.


I thought it would look cute to have this little inverted pleat in the back instead of a gather.


Update--I finally got a photo of these lovely ladies wearing the outfits I sent!  How cute are they?


6.  A skirt from the fabric that my friend picked out when she visited in November--I finally got it made in April!  I'm terrible!  It's a Milkmaid Skirt, from this free Crafterhours tutorial.


It works better as a spring skirt anyway, right?  She wouldn't have been wearing it in the winter...


7.  The scarf I included with my friend's skirt as an apology for taking so long on her skirt ;)  Dimensions from this Imagine Gnats Circle Scarf Tutorial.


8.  Oh wow--this one is old!  I made this dog sweater out of a thrifted sweater sleeve as a joke for my parents' dog after my dad sent me a link to a similar idea.


Modeled by Maddie Dog:


Saturday, November 22, 2014

Printable Doll Kimono Pattern and Tutorial!

I finally gathered enough nerve to go into the shop near my neighborhood where they alter and sell vintage kimonos and yukatas, and spit out some vocabulary words about cut fabric accompanied with mime ask about purchasing some fabric scraps from them.  Amazingly enough, I was successful, and now I have a bag of vintage kimono scraps to play with!

One way I KNEW I would use the scraps was by making doll clothes.  Little Sister's doll play has reached a stage where getting the dolls dressed (several times) is every bit as important as the make-believe that happens afterwards, and I am looking forward to building the doll wardrobes beyond the Disney princess costumes they all came in.  So since I had kimono scraps, what better to make than kimonos!


I figured that since a doll kimono is a fairly simple shape and construction that there would be a tutorial or pattern out there that I could follow, but there was actually surprisingly little that I could find online.  So cobbling together a few things I found, I created a printable pattern that I decided to share with you!

Now, I have never shared a printable before, so please give me feedback if this link doesn't work for you.  I made it all fit on one sheet, and I included a box for scale, so make sure that you print at 100% (I am using A4 paper instead of letter size, but A4 is bigger so as long as you use 100% scale everything should fit just fine!)

It will look like the pic below, and the link to the printable is in the caption!

Print the pattern here!
Ok, so on to the tutorial.  Here goes!  It's been a while since I've done a full tutorial so let me know if you've got any questions.

1.  Print your pattern and tape pieces together.  They should look like this:


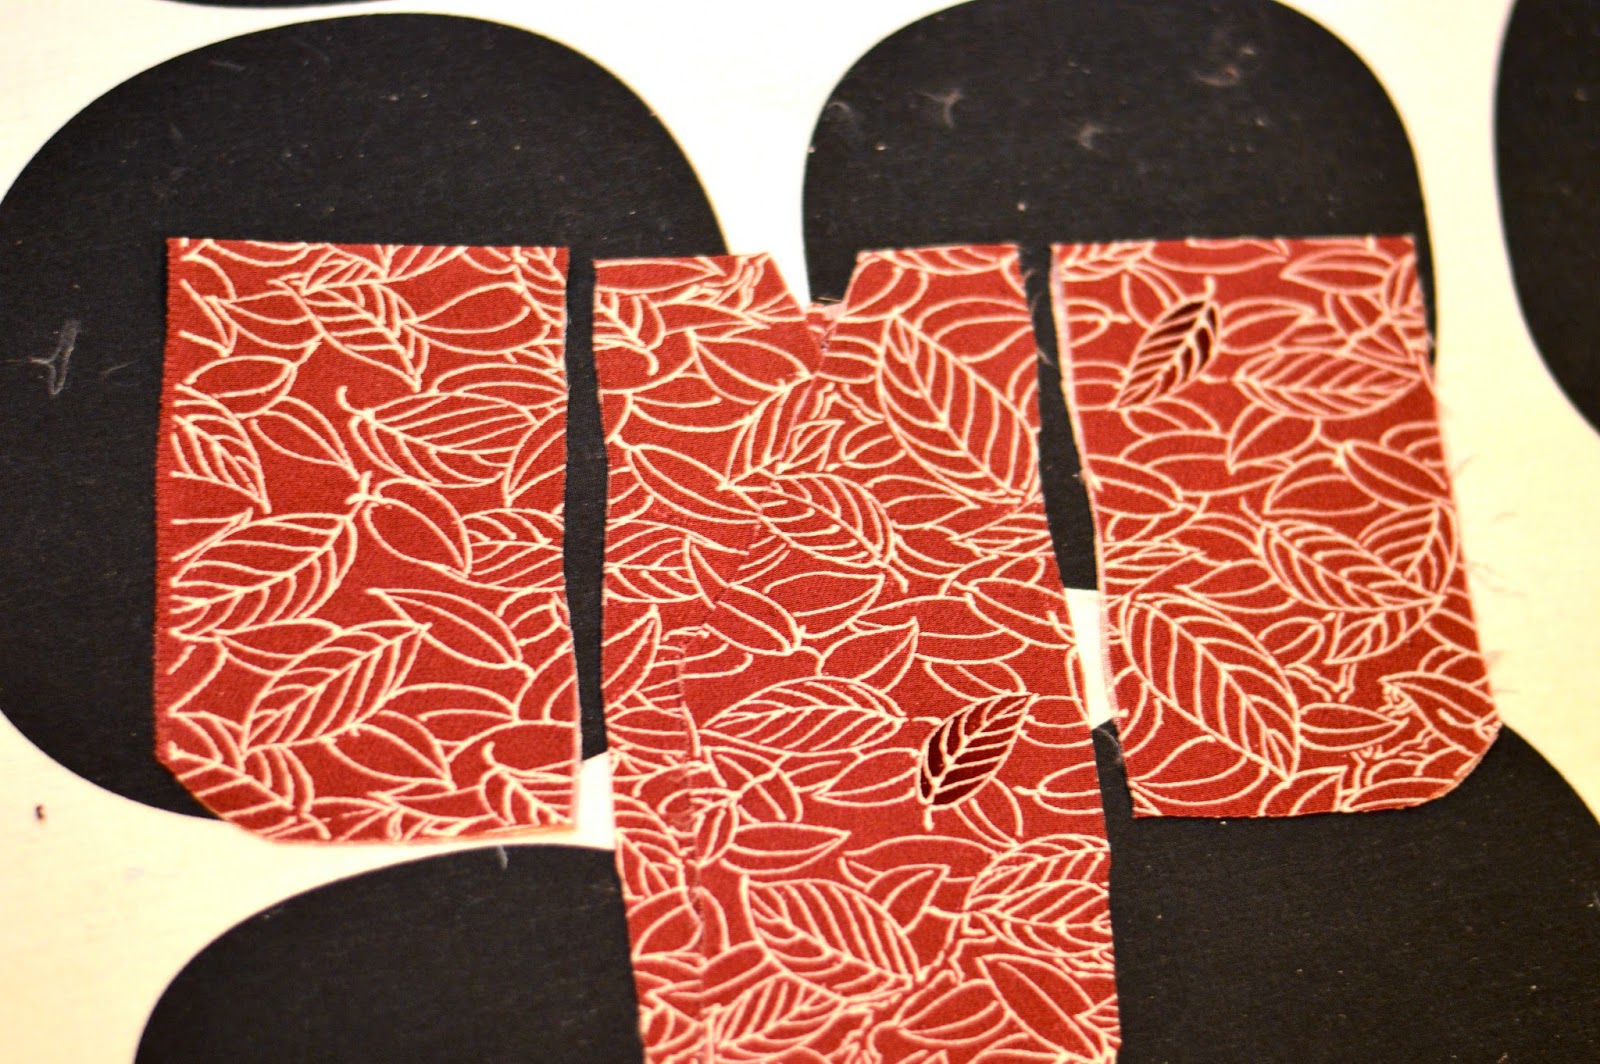
2.  Lay out your pattern pieces on the fabric.  The kimono can be cut out of a piece of fabric as small as 7" by 30" (or 13" by 20", depending on how you cut your pieces out).  Here's how I laid mine out:

Note that the body pieces are NOT cut on the fold, they are two separate pieces.  And I cut out both sleeves at once by doubling the fabric over at one end and cutting both on the fold at once.
You will cut out two of the long body pieces as mirror images, and two sleeves, cut on the fold.  Your cut pieces will look like this:

Note--I rounded the neckline out in the final pattern so yours will look a tiny bit different.

3.  Lay the two body pieces right side together and sew the back bodice pieces together from hem to neckline, then press open.

Hmm, those pins are pretty hard to see.  If you squint, you'll see them on the bottom right edge of the fabric here, they go from neckline to back hem.
The back body of the kimono (wrong side, obviously)
4.  Fold the front body panels over to line up the hems, then press a sharp line at the shoulder.  Also press a nice line into your sleeves while you're at it.


5.  Lay the body panel out, right side up.  Take your first sleeve and lay it right side down on top of the body panel so that the pressed line on the sleeve matches up with the pressed line at the shoulder, and with the straight edge of the sleeve along the outside edge of the kimono body.


6.  Pin the pressed lines together, then pin 1.5 inches away from the center line on either side.  Sew the sleeve onto the body ONLY on these three inches in the middle. Then do the same with the other sleeve.

7.  Press the seam open where the sleeve joins the body, then press the rest of the straight edge of the sleeve over to match that seam allowance (so you should have 1/4 inch or so pressed over the full length of the sleeve).  Press the other edge of the sleeve (between the two curved corners) over as well as shown below.


8.  Sew the folded edge down that is closest to the body of the kimono--the straight edge where the sleeve is attached in the middle.  There will be an opening at the armpit like in a real kimono, so you want those open edges to be finished.

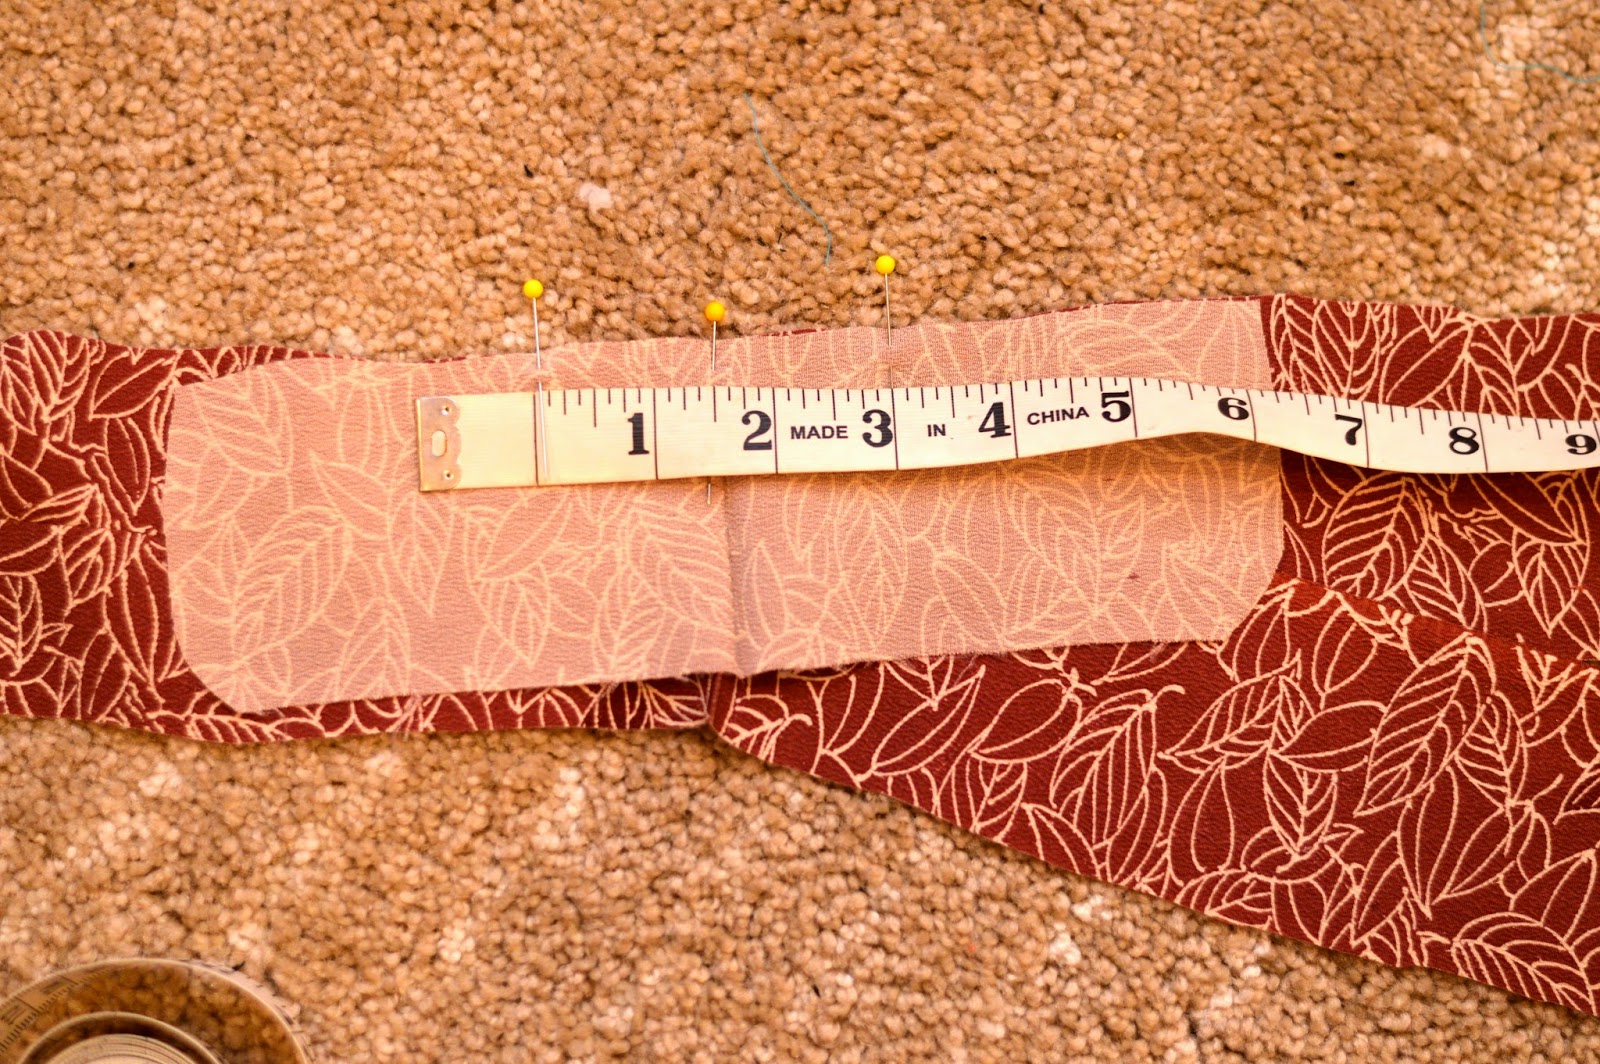
9.  On the outer edge of the sleeve (the one with curved corners), turn the middle 3 inches over a second time and hem in place.  This will be your wrist opening, so it needs to be finished.

Hem the area between the two pins (should roughly line up with the 3 inches sewn at the shoulder)
 10.  Now fold the sleeve in half, right sides together.  Sew together starting about an inch from where the sleeve joins the body of the kimono, around the bottom of the sleeve, and stopping at the finished wrist opening.
Pinned

Sewn
 11.  Now pin the side of the kimono with the finished sleeve.  Pin all the way from the armpit to the hem and sew closed.

I found it easiest to start sewing at the hem and end at the armpit.
 12.  Make sure you have completed all of these steps for both sleeves and sides of the kimono--it should look like this:


13.  Trim the corners on the sleeve seam allowances carefully, then turn the kimono right-side-out and press.


14.  Hem the bottom of the robe, like so:


15.  Now attach bias tape all the way around the opening, starting at the hem on one side and going all the way around.  I used single fold bias tape and folded it in half to get a thinner double-folded tape look.


16.  Once the bias tape is on, give it a final press and the kimono itself is done!

17.  Now you just need an obi/belt.  For mine, I just cut a piece of foldover elastic to 4.25 inches and sewed it together in the back.  It has to be pulled up over the doll's feet.  But you could also use a piece of ribbon and add velcro, or a snap. Also, real obi are very elaborate so you could have a lot of fun making a more authentic one!  But for my purposes the elastic worked very well.


Here are a couple of my earlier tries--I adapted the pattern several times along the way and am really happy with the way the final pattern came out.

Take 1

Take 2

I do have some sad news though-- I was making my 4th kimono, the thin fabric got caught in the machine and pulled the thing that catches the bobbin thread (hook timer? I can't remember) out of whack.  After watching a few youtube videos I was confident that I could fix it myself, but after removing every visible screw on my machine and still not being able to get the case off, I gave up and brought it to a sewing machine repair shop in Shinjuku, where thankfully the guy spoke enough English to understand my problem.  Well, that and he had eyes, and the problem is pretty obvious, so all was well.  But being without my machine for 3 days has been brutal!  I was on a roll with working on gifts, and now it's all on hold since I have a friend visiting (HOORAY!!!!  Picking her up in an hour!) and I know I'd rather hang out with her and show off Tokyo than sit in front of my sewing machine while she's here.  But I hate paying $85 to fix a 6-month-old machine that only cost $250 in the first place.  I don't even want to try to figure out the warrantee, since it's in Japanese and I don't want to send the machine out somewhere and get it back who-knows-when, but I am starting to think I should have invested in a better machine.  I didn't know how much sewing I would be doing when I picked out the one I have!  We'll see if this one ends up lasting me the rest of my time here, or if I end up upgrading after all!


Monday, April 7, 2014

DIY Elsa and Anna Barbie Clothes

Try not to be too jealous--I actually got my hands on an Elsa doll, at a reasonable price, and in time for my daughter's 4th birthday!  After a few weeks of calling the Disney store and checking Amazon, this just happened to be on the shelf at Target for $25:

Luckily we didn't have an Anna doll yet either.

Problem is...no signature sparkly Elsa dress.  But this presented a fun challenge for me!  Because I KNEW that the outfit would be an issue, I would have to make a dress for this doll myself.  And while I was at it, I might as well make Anna's outfit more like the movie too, right?


And what do you know--as soon as she opened her present, she asked if Elsa had another dress.  And then, lo and behold, she pulled the handmade one out of the bag and oohed and aaahed!  So satisfying.

Craftiness is not Optional has a great tutorial for a fancy Barbie dress that I was able to modify into Elsa's look pretty easily.  I had a too-small Cinderella dress-up costume that I could cut up (so the color isn't exactly right, but close enough) so I didn't have to buy any fabrics!
This is the exact dress--couldn't find any pictures of it out of the box!  But I used the darker blue with sparkly swirls for the bodice, and the light blue for the skirt.  One sleeve was enough for the band at the top and sleeves, and I needed both of the sheer "poofs" from the hips of the dress to make Elsa's cape.  

The modifications that I made to the tutorial are pretty simple (and obvious):

1.  When attaching the band at the shoulders, I pulled it down in the center to create the sweetheart neckline.  Then I just folded the blue fabric and stitched it down on the wrong side so that it didn't show.


2.  I made two small rectangles for sleeves.  I sewed the top of the sleeves right on to the shoulder band, then sewed them closed and turned them right side out.


3.  I made the cape in two pieces.  It's serged then sewn directly to the dress--I attached it under the arms (on the blue fabric--it doesn't actually touch the sleeves) and across to the velcro closure.


Then I sewed it down on each side of the velcro, and underneath the closure I sewed the two sides of the cape together.  I didn't have to finish the edges since I cut it from the existing Cinderella costume.


Anna's cape was really fun and SUPER easy!  Sorry I didn't take any pictures--I was in a hurry to get this all done for the girl's birthday present.  All the photos below are of the finished product.  I made it from a piece of knit jersey I had in my stash.  

1.  I cut an oval shape out of a piece of printer paper for my pattern, then pinned it to my fabric and cut it out using pinking shears (to give it some detail--the knit won't fray even if you use regular scissors).


2.  I decided where I wanted my cape to fold over; about 2" from the top of the oval, and marked both sides with pins.


3.  Using a double needle and two colors of top thread, I sewed a scalloped design around first the top part of the cape, then flipped it over and sewed the rest of the way around.  This is not necessary but it mimics the design on Anna's cape in the movie in a really easy way.


4.  Cut a piece of thin elastic so that it will reach across the top of your cape (where you marked with pins) when stretched all the way out.  Mine was about 4" long.

5.  Sew the piece of elastic on the cape so that it will be hidden by the collar when you fold it over (so, if you're looking at the right side of the cape that will hang down on Anna's back, your elastic should be on the same side as your decorative stitching that goes around the bottom of the cape.)


6.  Flip the top part of the cape so that it hides the elastic.  Stitch the cape together in the front and add a button.  It's super easy for little ones to pull the cape off and on over the doll's head without Mommy's help!

This was my first foray into Barbie dresses, and I have to say it was pretty fun.  I loved dressing my dolls up in the dresses my grandmother made, and I hope Little Sister enjoys it too!

I also have a small vent about the Disney Princess dolls.  Little Sister likes the princess dolls better than regular Barbies, since she knows their stories from the movies (I like that too.)  And while I appreciate Disney trying to make the dolls individuals, it's a little maddening that their bodies are shaped so differently.  A huge part of the fun of these dolls is dressing them up, and when the dresses don't fit all of the dolls it's frustrating for both of us!  She likes to switch their dresses and have the dolls play dress-up, but our Merida dress is totally ripped from squeezing Tiana into it.  Why can't they all be the same size?!  At least everyone can trade shoes.