Friday, September 30, 2011

T-shirt to toddler dress!

Have you been to the  Prudent Baby blog?  I recently discovered it (that's where I found the tutorial for the business card case that I made too), and there are SO MANY great projects on there.  I am particularly in love with the nap time projects section, for obvious reasons.

This is another project from that section, called the Two Minute T-Shirt Dress.   I knew as soon as I saw it that this would be a perfect repurpose for one of my former favorite shirts that was all stretched out and baggy from doubling as a nursing top.  Because of the stretched-out neckline, I did need to adapt this tutorial a bit, as I will outline below, so it was a bit more than two minutes.  Also, this marked my FIRST EVER SHIRRING with elastic thread!  I am in love with this method.  I am already looking for other things I can shirr (is that right?) because it is so fun--easy, forgiving, and instant gratification, all things that are high-priority for me in a sewing project.

This is the shirt I started with.
Before I get to what I did here, you must know that there is a strange story about this shirt.  You know you want to hear it.  We had a dinner party once where lots and lots of dungeoness crab was served.  While one guest was attempting to pass the large bowl of crab to another, the bowl was tipped and the poor guest was doused in crab water.  I lent her this shirt and a pair of shorts since she was totally soaked and smelly.  Her girlfriend, who had had quite a bit to drink by this time, was going on and on about how much she loved this shirt and offered me $75 to let her girlfriend keep it.  While it was a tempting offer for this Old Navy masterpiece, I told her she should sleep on it, and if she still wanted it for $75 the next day, it was all hers.  Well, the shirt and shorts were back on my porch the next day, and no moolah.  Ah well, if she had still loved it so much when sober, then this dress wouldn't have come to be.

So moving on, the tutorial uses a typical crew-neck t-shirt, and this one was a fairly deep scoop (rendered deeper by my stretching it out for baby feeding), so I had to start by shrinking the neckline.  I used a favorite dress to figure out about how big the neckline should be:

You've seen this dress before in my refashions--it gets pulled out for template purposes frequently.
Then I cut off the top of the shirt, including the sleeves, to make the neck opening the right size.  However, I wanted to have the trim that was still on the front of the neckline to go all the way around, so I cut the strip of trim off the back of the original shirt and reattached it to where the top of the back of the dress would be.

strip of trim removed from original shirt and pinned to the back of the dress
(curved up slightly at the ends so it would meet up with the neckline in the front)
The new neckline in the back
Once the new piece of neckline trim was attached, I turned the whole thing inside out and just sewed the tops of the sleeves together.  Then I was ready to follow the tutorial I linked to above!  I did decide to have my waistline a bit higher than pictured in the tutorial--one of the great things about making your own stuff is the ability to customize, am I right?

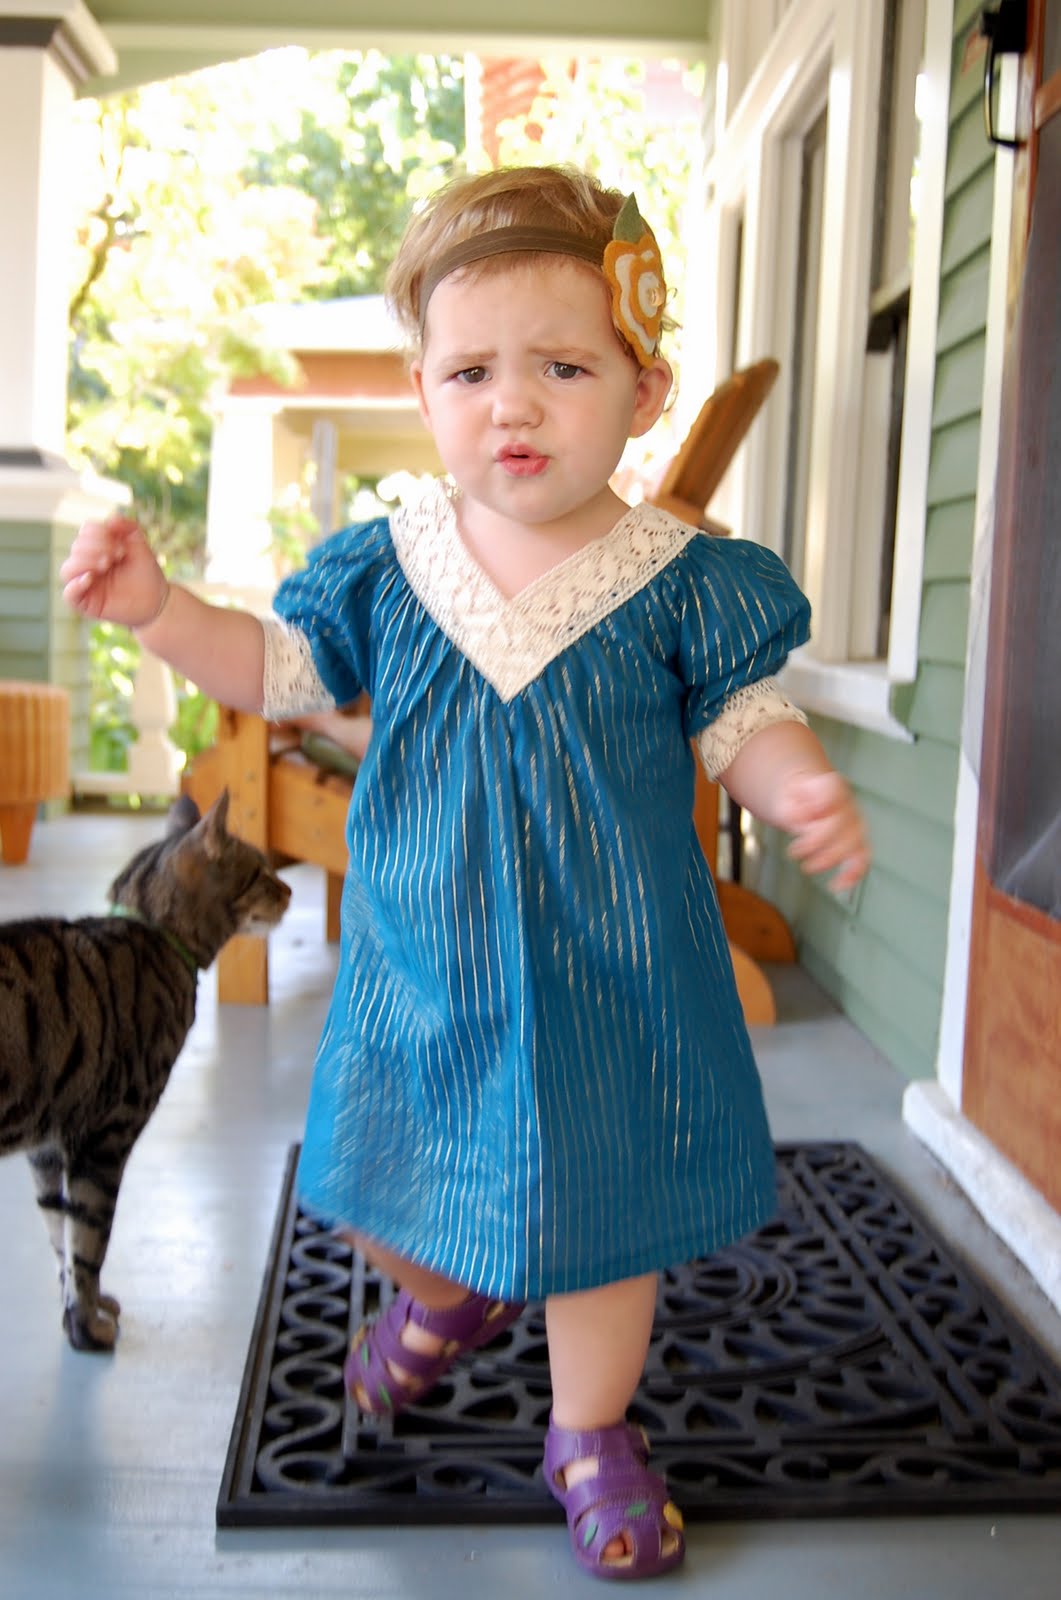
Here's the finished product. The pattern continues on the back, too. I love it!  It's still a bit big for my 18-month-old, but next summer it will be PERFECT!

She picked out her own socks and shoes.  She's very opinionated that way.

Wednesday, September 28, 2011

Food, glorious food!

I have been in a cooking mood lately, partially inspired by all the amazing recipes that keep popping up on Pinterest, and partially due to the glut of Italian plums and cherry tomatoes we have in our garden.

My plum pitter/tomato picker
 It has been a lot of fun, but MAN the dishes are starting to get to me.  Every time I finish preparing a yummy meal (with a delectable dessert, of course), the sink is piled high but it's time to sit down and eat, creating even MORE dishes.  Where is that live-in housekeeper/nanny when I need her--oh wait, I guess that's my job.

In any case, here's a run-down of the recent dishes I have been trying out.

1.  Plum freezer jam
2.  Plum Clafoutis
3.  Dimpled Plum Cake
4.  Oven-roasted tomatoes
5.  Eggplant parmesan
6.  Ham, Spinach, and Gruyere Savory Bread Pudding
7.  Strawberry Rhubarb Crumble
8.  Baked Oatmeal with fruit
9.  Cinnamon Raisin Swirl Bread
10. Apple Bread Braid

There are a few more, but I'll start here (SPOILER ALERT--I don't get through the whole list in this post.)

Why was it so hard for me to figure out what kind of pectin I should use for plum freezer jam?  From various articles, I picked up that I should cook the plums before making the jam, but the only options for pectin at my grocery store were "No-cook Freezer Jam Pectin" or the regular kind for canning.  But I was going to COOK my plums!  Well, I finally figured out (from the Ball website's Pectin Calculator--which will also eventually lead you to a recipe) that I should use the no-cook pectin, but cook the plums first.  Makes total sense, right?  Oh well, now I know.

Ready to make some jam?

BUT--I learned a few other things too.  First, I figured that when I cooked the plums they would reduce significantly.  Not the case.  In fact, they didn't reduce AT ALL.  Giving me about double the jam that I intended, which is cool, but it left me scrambling for jam containers, especially since you're not supposed to freeze glass jars that curve in at the top.  Also, (and maybe this is part of the first issue too), my jam is runnier than I wanted it to be.  So maybe I should have let the plums reduce instead of only simmering them for the 5 minutes that the instructions indicated?  Let me know if you know the answer!

When you're putting jam in an old hoisin sauce jar,
you know you're in trouble.  We're eating that one first
(so I don't forget what's in there).

OK.  The Plum Clafoutis.  LOVE!  It's like one of my all-time favorite breakfasts, the Dutch Baby Pancake (this is the recipe from Sunset Magazine that I use), but a little denser and sweeter.  I used plums, since that's what I have a ton of, but there are recipes using cherries, apples, pears, pretty much any fruit you like.  It's SO EASY and delicious if you like eggy custardy sorts of treats.  Top with whipped cream if you're serving it for dessert (I left off the cream when I ate it for breakfast).

Just say "cla FOO tee."


Next up, Dimply Plum Cake.  This is yummy, but not a real wow factor for me.  It's a dense spice-type of cake with plums baked into the top.  I think the next time I make it I will use a 9x13 instead of an 8x8 pan to get a thinner layer of cake, and a higher ratio of plums.  This is also a food that for me, whipped cream on top=dessert, no whip=breakfast.  It actually reminds me of coffee cake.  I think my runny plum jam on top would make the plum-to-cake ratio just right!

Dimply plums.

Now on to the oven-roasted tomatoes.  I have a confession to make.  I don't like raw tomatoes.  Not even the kind grown fresh in my own garden.  If you give me tomatoes, I will eat them because I am a grown-up and I care about you.  But I would never choose them. These, however, make me want to eat tomatoes.  And I can use them in about a million things, including sauce (OMG so good).  I have made three batches of these so far this year out of the little sungold tomatoes, and MAN I wish I had more room to freeze things because I hear they freeze well (just put the cookie sheet in the freezer until they freeze individually then bag 'em up).  For my own tomatoes, I lay the sliced-in-half tomatoes out on the parchment with some cloves of garlic, then (avert your eyes, true foodies) spray them with the Trader Joe's olive oil in spray can for an even mist.  A misto would work AWESOME for this because then you could use some quality olive oil, but I don't have one of those.  Then I sprinkle with a little salt and some Italian seasoning before popping them in the oven at 225 for 3 hours or so.

Put 'em on a pizza, in your tomato soup, on pasta with a little fresh basil...yummm.

Okay, this is starting to get crazy.  I'll leave off here for now and get to the next batch in a couple of days.  Let me know in the comments if you're particularly anxious to hear about anything from the list above--I'll make sure to tell about it next.  Yum!

Tuesday, September 27, 2011

Sleep Sack Extensions!

The little one snuggles into a sleep sack every time she goes to bed, be it naptime or bedtime.  I pulled out the warm fleece sleep sacks this week when the weather got colder, and her little feet were pushing against the bottom.  I thought, I should make her a new sleep sack.

But then I realized something.  The handed-down sleep sacks we were using were fine, they just weren't long enough.  AND I'm afraid of zippers.  So if I just added some extra fleece to the end of these sacks, I could extend their useful life AND avoid inserting a zipper.

Before, and after.  And no, I didn't even press the seam :P

Note:  I really don't care if my kids have cute things for sleeping.  They are just sleeping in them, right?  So while these sleep sacks are not the cutest, they do the job.  Another note:  I did no measuring in this project, and was as a matter of fact very imprecise.  I didn't feel like it mattered in this case.  Feel free to measure and be exact--you can even go ahead and make it cute if you want!

I consider this more of a "Oh yeah, that's a good idea.  I can do that," post than an actual tutorial, since the steps are pretty self-explanatory, but I'll walk you through it.

First, I cut the bottom off of the sleep sacks.  They have a slight curve at the bottom so I tried to cut above that.


Next, I folded a piece of fleece from my stash in half and cut it to the width of the bottom of the sack + a little for seam allowance. I laid the bottom of the sack on top of the fleece and cut around it to mimic the slight curve I left at the bottom--you could just cut it in a straight line.


I also curved the corners at the bottom of the new piece of fleece (totally optional).

Then, I sewed up the two sides of the extension.

Finally, I turned the extension right-side-out, turned the sleep sack inside-out, placed the extension inside the bottom of the sleep sack (right sides together) and pinned.  Then I ran it through the sewing machine.

I pulled the extension out so you could see what I was talking about.
Then I turned the whole thing right-side out.

The end.

Wiggle room for the toes!

Thursday, September 22, 2011

More Upcycled Infinity Scarves!

I've been at it again!


One of the great things about being crafty is that people pass things on to me when they can no longer use them, but can't bear to throw them away.  My mother-in-law gave me a vest/tunic that she got in Paris.


The piece itself was outdated, and it didn't fit her anymore, but the fabric is lovely and deserves a second life!  So lucky for me, her birthday was coming up, and I got to surprise her by repurposing her own Parisian outfit, with all the memories of that trip, into a contemporary infinity scarf that she can wear with lots of things!

Although, probably not with this top.

I made her pose for this picture after opening her birthday gift since I hadn't gotten a pic of the finished scarf yet, and she kindly let me take this photo even though her shirt didn't go with the scarf.  Thanks for going along with me, Ann!

In the tutorial that I followed the last time that I made an infinity scarf, the blogger mentioned doing different fabrics for the front and back of the scarf, and I was excited to try that.  It's a little hard to tell here, since both fabrics are so neutral, but in person the subtle two-tone looks pretty cool.

And while I was at it, the chilly mornings we've been having got me thinking that now was the time to cut up my old cashmere sweater to make my own infinity scarf too.


Oh my gosh, if you have cashmere that you can't wear anymore for some reason, DO THIS with it!  It feels SO great up against my neck, and I love throwing it on in the morning (even when it's not officially cold enough to need a scarf).

Ahhhhh.
I almost don't even miss my sweater.

These guys saw me with the camera and remote, and couldn't stay out of the frame.
The boy could not figure out how the camera was snapping pictures all by itself!  Magic!
Oh, just as a side note, when I made both of these scarves, I had two pieces (a front and a back) that were about 54 inches long and 7-8 inches wide.  I think that each piece should be about the same size as a regular scarf, would that make sense?

Tuesday, September 20, 2011

Business Card Case!

I saw this tutorial for a fabric business card holder on a blog with lots of other great tutorials too, www.prudentbaby.com.  I actually couldn't stop scrolling through the section called "Naptime Projects," because, how perfect is that?  I love a project I can finish during naptime!  And this business card case totally qualifies.

So since I have been giving out quite a few of my new cards lately (yay me!), I realized that the time had come to stop the digging through the coupons for a dented business card from a dark corner of my huge bag and make this card case already.  So I did, and I'm happy I did.


For the exterior, I used an Amy Butler fabric (passion flower, I think) that I picked up at a secondhand store and have been hoarding; the lining is a scrap from my grandmother-in-law's quilting stash.  The tutorial shows a snap closure, but I was worried that the snap would leave an imprint on the cards, so I went with the elastic option she mentioned in the post.  I like the ease of it, but I think it does give the impression that I just rubberbanded a piece of fabric around my business cards.


So, it may not be the most professional-looking case, but I think it works for my crafty little business!

Saturday, September 17, 2011

Repurposed Shirt Sleeve toddler leggings

Well, Oregon's 1.5 week summer appears to be over.  So the old ribbed Gap turtleneck from my high school closet was a timely find:  perfect for toddler leggings!

Before, and after.

Seriously, who didn't have one of these turtlenecks in 1994?  Oh, you didn't?  Then congratulations, for you were far cooler than me, my friend.

Believe it or not, I had been actively searching for leggings in this olive green color, to no avail.  Well, since I didn't want to spend an arm and a leg for them.  So I knew when I spotted this old turtleneck, I could re-use the sleeves for some quick and easy leggings.  I seriously finished this project in about 20 minutes.

There are several tutorials online for easy leggings.  I followed this one (sort of), but I skipped the pattern-making step.  Here's my quick step-by-step (sorry for the lack of pictures), you can refer to the internets for a more comprehensive tutorial.

1.    Choose a pair of leggings that fit well, turn inside out, and lay flat on top of the shirt sleeve with the hem lined up with the bottom of the shirt and the fold of the pants lined up to the fold of the sleeve.
Hmmm, I guess you don't really NEED to turn inside out, it just feels more official that way.

2.  Cut around one leg of the leggings (you'll have to guess a little at the seam since your template is still attached to the other leg), leaving a seam allowance on the cut side.  At the top, leave extra (about an inch) to sew your casing for the elastic waistband.

3.  Once you've cut out the first leg, lay that piece on the other sleeve of your shirt and cut the other one the same way (that way they'll be exactly the same, whereas if you cut around the template again it might come out a little differently).

4.  Cut the waistband down a bit in the front on both sides (optional, but I like the fit better when I do this).

Lay the legs out before doing this, so you don't accidentally
lower the front on one side and the back on the other.

5.  From this point on, I had two pieces of fabric cut out, so I did exactly what the tutorial I linked to above says (minus the double needle).  Basically, pin and sew from the waistband to the crotch front and then back, then pin the legs closed and sew up the inside of one leg and down the other.  Then fold the waistband over to the inside and sew the casing, leaving an inch or so to thread your elastic through, sew the elastic together, and close up the casing.  But really--go to the tutorial.  It's actually explained in such a way that you won't mess it up :)

I forgot I had a different color of thread in my bobbin, hence the
unintentional contrast stitching at the waistband.  Oh well, you never see that part.

These are so fun to make, and easy, and perfect for fall.  And bigger shirts are great to make wider-leg pants for little guys and gals too. I've done this before out of sweater sleeves, which are so cozy! (I think that post has a link to another tutorial option for this project). And I still have a bunch of ribbed fabric left over from the body of the shirt--maybe I'll even make something for the boy!  I'd love to hear about it if you make your little one a pair.

Ta da!


Thursday, September 15, 2011

Blast from the past

The kids and I are staying at my parents' house while the hubs is out of town and some construction is going on at the home front.  I took the opportunity to poke in my old closet, which my parents have not emptied since I moved out 15 years ago.  This led to some embarrassing finds, but mostly a treasure trove of pieces that I can repurpose for the kids!


I was going to pose for you wearing the babydoll dress and leggings I found (remember leggings when people wore them the first time around?), but then I remembered that I sold my 10-eye steel toed Doc Martens on Craigslist about ten years ago, and that outfit's really just not the same without them.

So keep an eye out for refashioned garments from the mid-nineties--a little window into my late teen suburban interpretation on hippie grunge.

I can't wait to make this baggy(!) cropped(!) tie-dyed(!!) t-shirt into something cute.  Impossible you say?  We shall see!
I remember wearing this shirt with denim cutoffs on my youth group's trip to Disneyland.

And what about this size XXL batik babydoll top (that I wore when I was about 115 lbs)?
Why was everything so baggy in the '90's?

I left the red square-neck satin semi-formal minidress with chunky black ankle-strap shoes there.  Miss Mixer, are you out there?  I know you had the same one once!

So many possibilities!  The purple linen beret!  The purple embroidered hippie blouse!  The purple fleece waist-length stocking hat!  The purple satin empire-waist dress!  Do we sense a theme here?

Anyway, stay tuned to see what I come up with.

Saturday, September 10, 2011

Repurposing again--Tunic to Toddler Dress!

I've been on a "sewing for myself" kick, and I figured it was about time to pull out a repurposing project for the kiddo that I've been meaning to get to.  It was the perfect time for this dress, because the color and style are perfect for fall, but it's a gauzy, lightweight fabric that keeps the girl cool since Oregon's summer has finally started this week.

I started with this short-sleeved tunic that I picked up on Target on clearance for less than five bucks, and basically made it into a smaller version of itself (with a less plunging neckline).


I loved the color, the shimmery gold pinstripes, and the cotton woven trim, and at first I thought I would turn it into a crossover neckline, but once I started measuring, it seemed like the simplest solution was the best one in this case--I just shrunk the dimensions so that it would fit my girl.

I started by taking off the sleeves:

In this case, I was careful!
I used a seam ripper instead of scissors because I knew I wanted to reuse the sleeves (and keep the gathered top intact).

I put the dress on the girl at this point to get the straps and length right, and I wanted to make sure it would fit over her head.  I didn't feel like putting in any closures if I didn't have to!  I did separate the trim pieces from each other (so they cross over, but the neckline pulls open a little further) but I don't think it was necessary.

Seeing it like this, I considered making it a bubble dress, but didn't have quite enough fabric.

Um, Mom, I think you left a few pins in here...
Next was deciding where to cut the armholes, using a dress she currently wears as a template:

I wanted the new dress to be longer than the template.

After the armholes were cut, I sewed the front and back pieces of the dress together (right sides together).

Then I cut the original sleeves down to fit the new armholes, and with the sleeve inside out sewed from the cuff to the armpit, backstitching at each end.

The pins are actually too narrow in this picture--I recommend using a
sleeve from a shirt/dress (non-stretchy) that currently fits as a template.  I had to widen these after she tried it on!
I turned the sleeves right side out and stuck them inside the dress (so that the right sides are together).  Then I pinned the sleeve opening into the dress.   In this case, because the trim sits on top, I attached the sleeves starting where the trim meets the blue fabric at the seam, then sewed around the armpit, then stopped when I reached the trim on the other side.  After partially attaching both sleeves, I switched the thread in my machine to the off-white and topstitched the trim to the gathered part of the sleeves.

OK, I confess--I actually didn't do that.  I just stitched it all the way around, then realized that the trim wasn't sitting on top, so I had to rip out the seam along the trim and reattach with the trim on top.  That's the way I SHOULD have done it :P

See where the trim looks tucked in at the shoulders?  Don't worry, I fixed it :)
Oh, and I hemmed it.  I did remember that part.  I even ironed it under before folding and ironing the hem, so that there aren't raw edges hanging out on the inside--how professional of me!

So here's the part where I show you all the adorable pictures of the girl wearing the finished dress:

Look at me!  My dress is so cute!

Are you still here with that camera?

Uh-uh.  I said no more pictures.

At least when she runs away, I get a shot of the back.

Wait a second, what's that under there?
Yes indeed, I did make a diaper cover out of the leftover fabric!
I couldn't resist using what was left to make this little diaper cover--I looked at this tutorial, but I basically winged it to make the amount of leftover fabric I had work.

I love the repurposed dresses--I get all the credit for making a dress with only about half the work, and I don't have to follow a pattern!

Friday, September 2, 2011

My Own Amy Butler Birdie Sling Bag

I mentioned when I posted about the bag I made for my friend's birthday (an Amy Butler Birdie Sling) back in July that I started out by making myself a guinea pig bag.  Well, that guinea pig is finally finished!  It performed admirably on this morning's library trip--plenty of room for the diaper wallet, general purse stuff, and library books.

I think of this as my transitional diaper bag.

And the lining (with my stuff already inside):

Not to repeat myself too much from the first time I posted about this pattern, but I still think that while I really do like the end result of this bag, I'm not sure it was worth the time and energy it took to make it.  If I hadn't already had this one halfway complete, I wouldn't have made a second one.  Still, now that it's done I'm glad I have it!

But I probably can't carry it when I'm wearing this dress, can I?

Yeah, that's the same fabric.  Because the pattern calls for
SO MUCH MORE than you actually need for the bag!