Sunday, May 24, 2015

Sleeveless Washi Dress with simple mods

I made another Washi Dress from Made by Rae's great pattern!  When I posted it on instagram for Me Made May, I got a few comments about the proportions so I thought I'd share the modifications I made to the pattern to get this shape.


The original Washi pattern has an empire waistline.  I like it sometimes, but depending on the fabric that I'm using that cut can have a maternity look on me, especially since I have a long torso.  So the main modification I made to the pattern was to add a little length to the bottom of the front bodice.  I also tinkered with the neckline a bit, which I will show you below.


By extending the bodice just a little bit, the seam hits in a very flattering place--just above my natural waistline.  At the fold, your bodice should be 1.5" longer than the pattern.  Since the pattern curves a bit, the outer edge (side seam) of the bodice will be 1.25" longer than the pattern--just follow the curve of the original pattern.  What I actually did was cut a size small, but with a size XL length, which adds the amount of length above.

Forgot to get any pictures of the back though!
You have to remember to add those inches to the back panel of the dress as well, and move your shirring on the back down slightly.  I started my shirring about 1/2 inch lower than in the original pattern, and added one extra line of shirring at the bottom so that the shirring ends at the same spot as the bodice seam in front.

You don't have to adjust the bust darts--it really is just a simple matter of adding that little bit of length to the bodice.  The shirring in the back gives it a lovely fit.  If you go much longer than I did though, the torso portion of the bodice will start to pull and wrinkle.  I tried with a less forgiving fabric--I got a wrinkled bodice whenever I sat down.  If you want an even lower waistline you will probably have to make additional adjustments to the pattern.


This particular fabric that I used is slightly crinkly, so it has a little bit of stretch.  I usually make a medium in the Washi dress, using the same bodice adjustments described above, but this time I made a small to allow for the stretch.  I find it really comfortable and flattering--if you can find a woven with a bit of stretch, it works well to size down for a more fitted look!

A closer look at the fabric--another one of my 100-yen-per meter finds in Tokyo,
meaning this dress cost me about $2 to make.

For the neckline on this dress, I used the pattern neckline as a guide but cut it a bit lower and wider.  The depth of my neckline went right to the line of the signature "U" cutout in the Washi neckline, and then I curved it out beyond the pattern neckline but made sure the shoulder straps stayed the same width.  Here's a picture of how my adjusted neckline (the blue line) looks compared to the original pattern:


There you have it!  Hopefully these adjustments will give you some more options with the Washi!

Monday, May 18, 2015

Random Never-blogged gifts

Looking through photos I found several little projects that I gave as gifts but never blogged about.  Thought you might be interested in seeing them!  I'll have to do another post like this soon--I just tucked some very special baby gifts in the mail so I'll tell you about those once they have been received!

1.  This cute little purse, made from the free tutorial from Seven Layer Studio for one of Little Sister's friends:


2.  A Totoro stuffie, for our little friend's first birthday (along with a bib/apron that I didn't manage to photograph).  I used this free pattern, but using the stretchy knit I had on hand made him pretty lumpy.  I recommend using something more like the felt in the tutorial!


Oh, and I don't think I ever blogged about the pajamas they have on in those photos either--bonus!

3.  I made 10 of these reversible fat quarter aprons as a custom order for a friend who used them as favors for her daughter's cooking theme birthday party--fun idea!

Little Sister was not happy about modeling this, so her grumpy face is cropped out ;P

4.  I made this purse with leather trim to donate to a school fundraiser.  First time sewing with leather, and it was pretty easy!

Adapted from the free Phoebe bag pattern


5.  Mother/daughter birthday outfits--my friend and her daughter have birthdays two days apart, so how could I resist?


The top is the Fun Summer Tee from iCandy Handmade, except that I added a woven insert for the shoulders.   The printed fabric is a Nani Iro double gauze--sooooo nice!  The stripe is a 100 yen per meter find.

And the dress is this free Caravan Dress patter from Dotta.  Since I used the same woven for this skirt, I cut the back pattern piece in half instead of having the same fabric top and bottom.


I thought it would look cute to have this little inverted pleat in the back instead of a gather.


Update--I finally got a photo of these lovely ladies wearing the outfits I sent!  How cute are they?


6.  A skirt from the fabric that my friend picked out when she visited in November--I finally got it made in April!  I'm terrible!  It's a Milkmaid Skirt, from this free Crafterhours tutorial.


It works better as a spring skirt anyway, right?  She wouldn't have been wearing it in the winter...


7.  The scarf I included with my friend's skirt as an apology for taking so long on her skirt ;)  Dimensions from this Imagine Gnats Circle Scarf Tutorial.


8.  Oh wow--this one is old!  I made this dog sweater out of a thrifted sweater sleeve as a joke for my parents' dog after my dad sent me a link to a similar idea.


Modeled by Maddie Dog:


Saturday, May 16, 2015

Me Made May 2015: The Halfway Point

I meant to post weekly updates of my Me Made May wardrobe, but our trip to Hawaii in the first week threw me off a bit.  I've been posting to Instagram daily, but I was using my US phone in Hawaii and not all of the pictures made it into my photo stream now that I'm using my Japanese phone again....WOW sorry for that boring explanation.  Anyway, I've got all the pics now, and I'm proud to report that at this point (16 days in) I haven't repeated myself yet, and I only had one cheater day on vacation where I wore RTW (I was still carrying a bag I made).

Here's how I'm doing so far!

Day 1:  A Ruby Top from Made by Rae, the first thing I sewed when I moved to Japan.  I definitely like it better belted but I have worn it loose with with skinny jeans before.


Day 2:  An adapted Sorbetto Tank from Colette Patterns--I left out the front pleat and attempted a crossover back.  I like the effect but the fit is off, and the crossover pulls funny.  The fabric is from Ikea.  Never blogged this one, although I did take some pics at one point!

Day 3:  An adapted Scoop Top from Skirt as Top, sewn from a Girl Charlee burnout cotton that I got in a bargain box.  It was in big pieces but there was writing on it, so I made the back in two panels, which I actually really like!  Almost like I planned it.  Also never blogged this shirt, but I wear it a fair bit.  Oh, and I made the skirt too--upcycled it from a larger thrifted skirt--and I actually did blog about it here.

Day 4:  Hawaii!   Isn't nice how my dress coordinates with the plumeria lei?  It's the Giselle Dress from Kate and Rose Patterns, sewn from a lovely Art Gallery Fabrics voile.


Day 5:  Looking more relaxed already in my Nani Iro double gauze dress, a mash-up of the Bess Top and Alder Skirt, both from Imagine Gnats.  I was really happy with the way the pictures came out when I blogged about this one!


Day 6:  Every time we go on a trip, I find myself wishing I had a little bag to carry just the things I want at my fingertips so I don't have to dig through the giant backpack full of kid stuff just to get my phone.  Because of COURSE I'm still also carrying the giant backpack of kid stuff.  But I finally made my little bag before this trip, and I carried it every day.  This particular day though, it was the only me-made item on my person.


Day 7:  a self-drafted cap-sleeve tee (the first of three made from this same pattern that I've worn this month!)  This one is also made from a Girl Charlee knit.


Day 8:  Oooops, I guess I missed another day as well--it's hard when you're mostly just wearing a swimsuit all day!  I was still carrying my little bag, and I DID put the inseam pockets into this RTW dress, so that counts, right?


Day 9:  I still can't get the photos off of my US phone for this one!  Don't know why the rest of my pics ended up in my photo stream, but not these.  So here's a family portrait from the "real camera"--I was wearing my most straightforward Sorbetto Tank for the plane ride home.


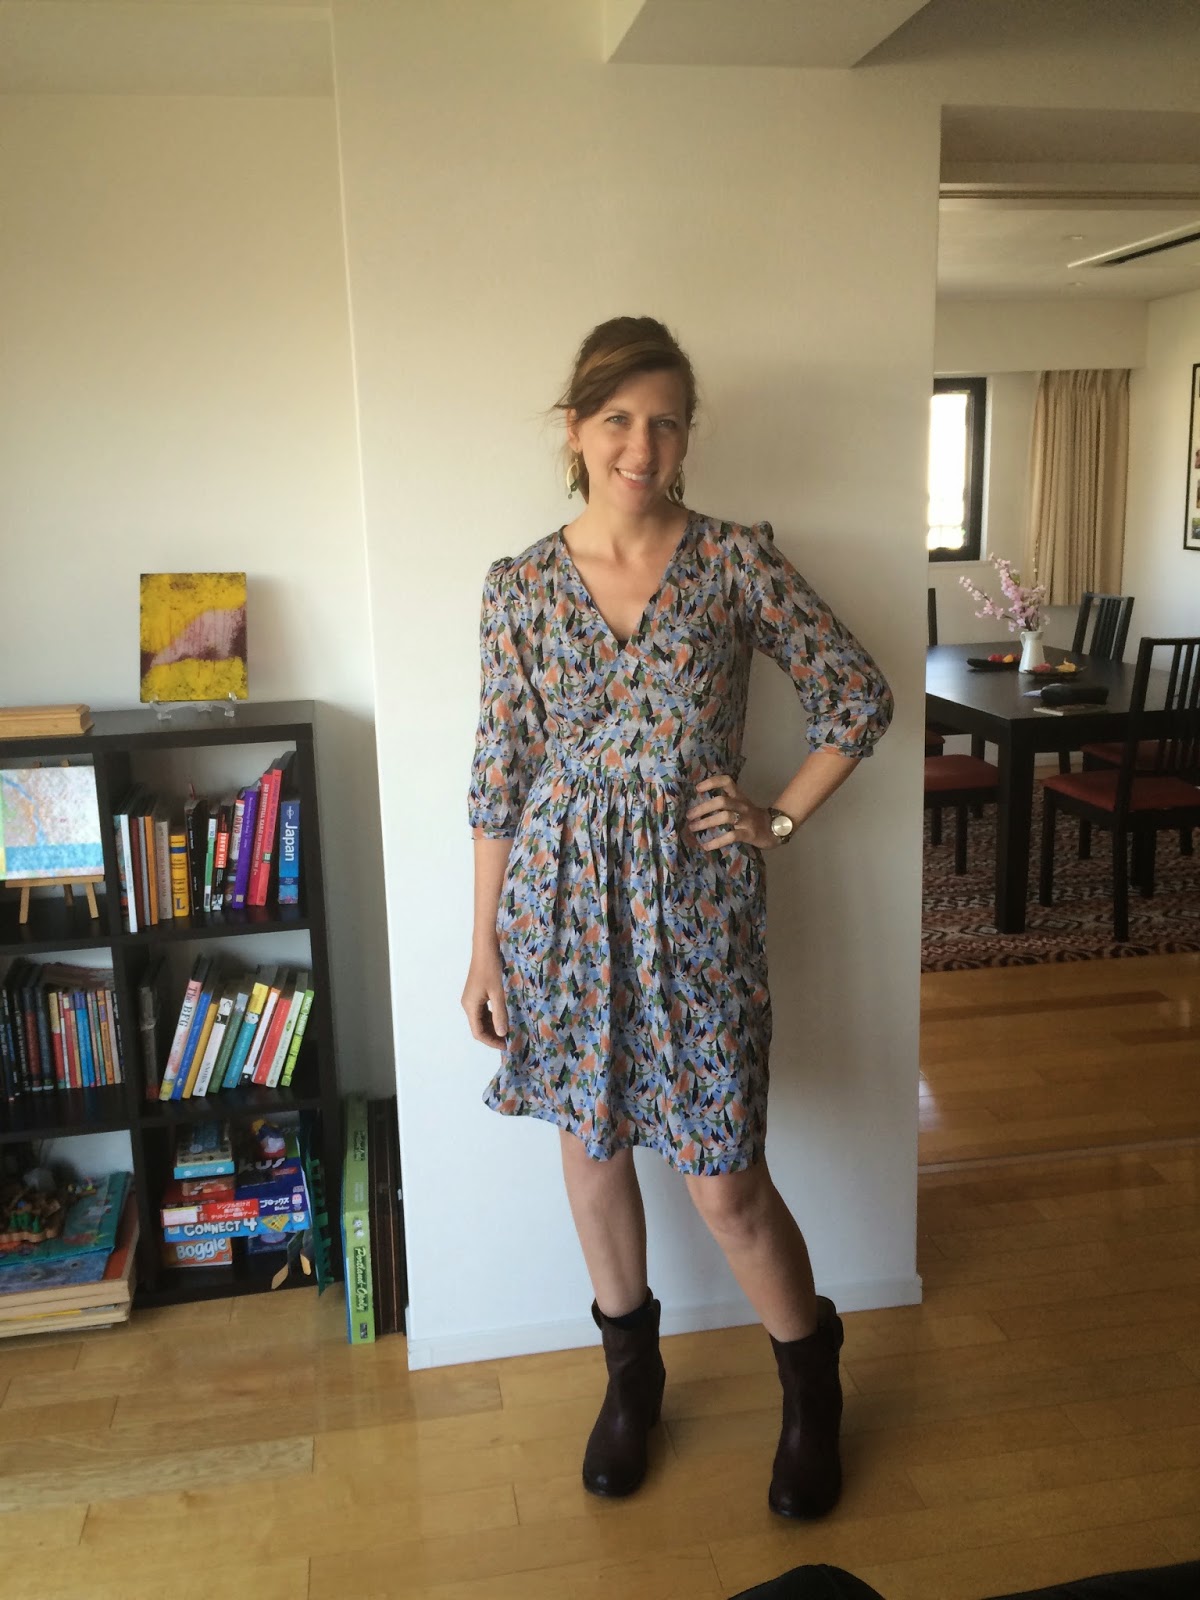
Day 10:  Back in Tokyo...it could be worse, I guess! This Giselle Dress that I made as a muslin for the one I wore on Day 4 came out a little shorter than I am comfortable with, and I've been wearing it with leggings but it was too hot for that, so I was about to hem my slip so it wouldn't show, but I realized...maybe I should just let out the hem on the dress instead?  So early in the morning (jet lag plus 4:30 sunrise) I lengthened this dress and now I will wear it lots more!


Day 11:  A field trip to the petting zoo with 5-year-olds seemed like a good day to pull out this cheerful Plantain Tee with Melody Miller accents, right?  I love this top, even if the elbow patches are a little higher than my actual elbows.


Day 12:  Comfy mashup of the Sunny Swing tee and a Plantain Tee, with a double-gauze panel.


Day 13: Trying to take a picture that shows the back and front of this tee (another Scoop Top, this time inspired by an Anthropologie shirt) resulted in an awkward pose, according to my brother.


Day 14: This jersey dress has been a favorite since I made it.  Hopefully this wasn't the last time I will ever wear it--I forgot to bring my apron when I went to my son's class to work on a painting project that day and I'm not sure the spots are going to come out!


Day 15:  That brings us to today, but...it's May 16th.  I seem to have lost a day in there somewhere.  I blame crossing the international date line twice and hence wearing a couple of outfits for 36 hours or so.  This is the third version of the same self-drafted cap sleeve pattern that I've worn this month (the others are the orange dress above and the top on Day 7.)


No repeats wasn't part of my original goal for this month, but since I've gotten this far I might just see if I can do it.  It's pretty obvious that my sewing comfort zone is tops and dresses--I have a few skirts, but nothing I've made recently, so maybe sewing for my lower half is a challenge I need to take on.  In the mean time, if you see me sweating in long sleeves when it's 80 degrees out, you'll know I've run out of summer clothes!  So far, I haven't made anything new this month, but I do have a couple of things I'd really like to get to--maybe avoiding repeats will be the inspiration I need to finish those projects!

Friday, May 15, 2015

Project Run and Play May Challenge: The Summer Chevrons Shirt

I got a lot of input from Little Sister for this month's Project Run and Play challenge.  When I saw this month's inspiration pattern, the Summer Chevrons Shirt from Crafty Cupboard, I had a definite idea of what she would want.  So I showed her the pattern and asked her opinion, and she surprised me on almost every turn.


Except fabric choice--we were in total agreement on this awesome be-ribboned octopus print from Cosmo Textile Company Japan.

I found the turquoise bow print as an accent--risky, since it wasn't pink or purple, but she went for it!

First of all, I wrongly assumed she would want me to turn the pattern into a dress.  Nope, just a shirt please!  Secondly, I thought she would want me to leave the sleeves off so it was a tank top.  Wrong again--she requested sleeves, please!  I did change them a little--I attached them backwards (gathering the curved edge instead of the straight edge), making them more of a flutter sleeve instead of a cap.  I mostly did it because I'm lazy--the print went right up to the selvedge on the fabric, so I could avoid hemming the sleeve by using the straight selvedge for the edge!

I love the mustard flat piping made from bias tape!  I used the same bias tape to finish the armholes.
Finally, I thought she would like the elastic waistband in the original pattern, but she wanted me to leave it out.  I was worried that the top would look too boxy without the waistband, but I think she was right--it looks just as cute without it!

We were in agreement on the closure though. I had been saving this lace-edge zipper for a while, and she kept asking me to put it into different garments.  And finally I had one that worked!  She could easily wear this top with the zipper in the back too, but when it's in the front she can easily put the top on (and take it off) by herself, so that's a huge bonus for both of us.

Back or front?  You decide!
I used this method from See Kate Sew to attach the embellished zipper to the top of the garment.  I left a gap front and center when I attached the yoke lining so that I could slip the top of the zipper in-between the two layers after attaching it, which worked out well--I closed it up when I topstitched all the way around the neckline.  I'm not sure how the raw edges on the back of the zipper are going to hold up though--I might tweak a little if I use this method for the zipper again.  I treated them with fray-check, and Little Sister says the zipper is a little itchy, so I might try adding a flap on the inside or something?  Or maybe the fray-check will soften up after washing.

**Update!**
After reading some commenter's suggestions, I covered the itchy raw edges behind the zipper with strips of the soft knit fabric I used for her shorts!  The top is saved!


**Ok, back to the rest of the post.**

I made the skirt with the yoke fabric and mustard bias tape like the top, but added some lavender chambray for the pocket panels.  I was worried that it would be tooooo matchy, and that without the waistband in the top the gathered skirt would be too bulky with the top.  But actually, I think it works just fine together!


But it also is a great piece to mix with other tops, and she loves the big pockets.


A closer look at the skirt

Just in case the top and skirt didn't work together though, I made a quick pair of knit shorts from some soft pink stripe I got for 100 yen a meter (about 82 cents!).  I shortened the Lazy Days Lounge Pants pattern and made the cuffs a little bigger since they'd go around her knees instead of ankles, but simplified it as well--no pockets and just a simple elastic waist.


They're kind of funny, but I based them on a pair of shorts she loves that I made by shortening a pair of hand-me-down leggings that were too big but with a hole in the knee.  And they are a hit!


She didn't want to turn the top around for pictures, but you get the idea--this would be just as cute in the front.

So there you go!  My (well, our) submission for May's Project Run and Play!  I'll let you know if I make the top ten this time (fingers crossed!)