Tuesday, February 10, 2015

School Day Knit Jumper

When I saw this month's Project Run and Play inspiration pattern, I knew instantly what I would make.


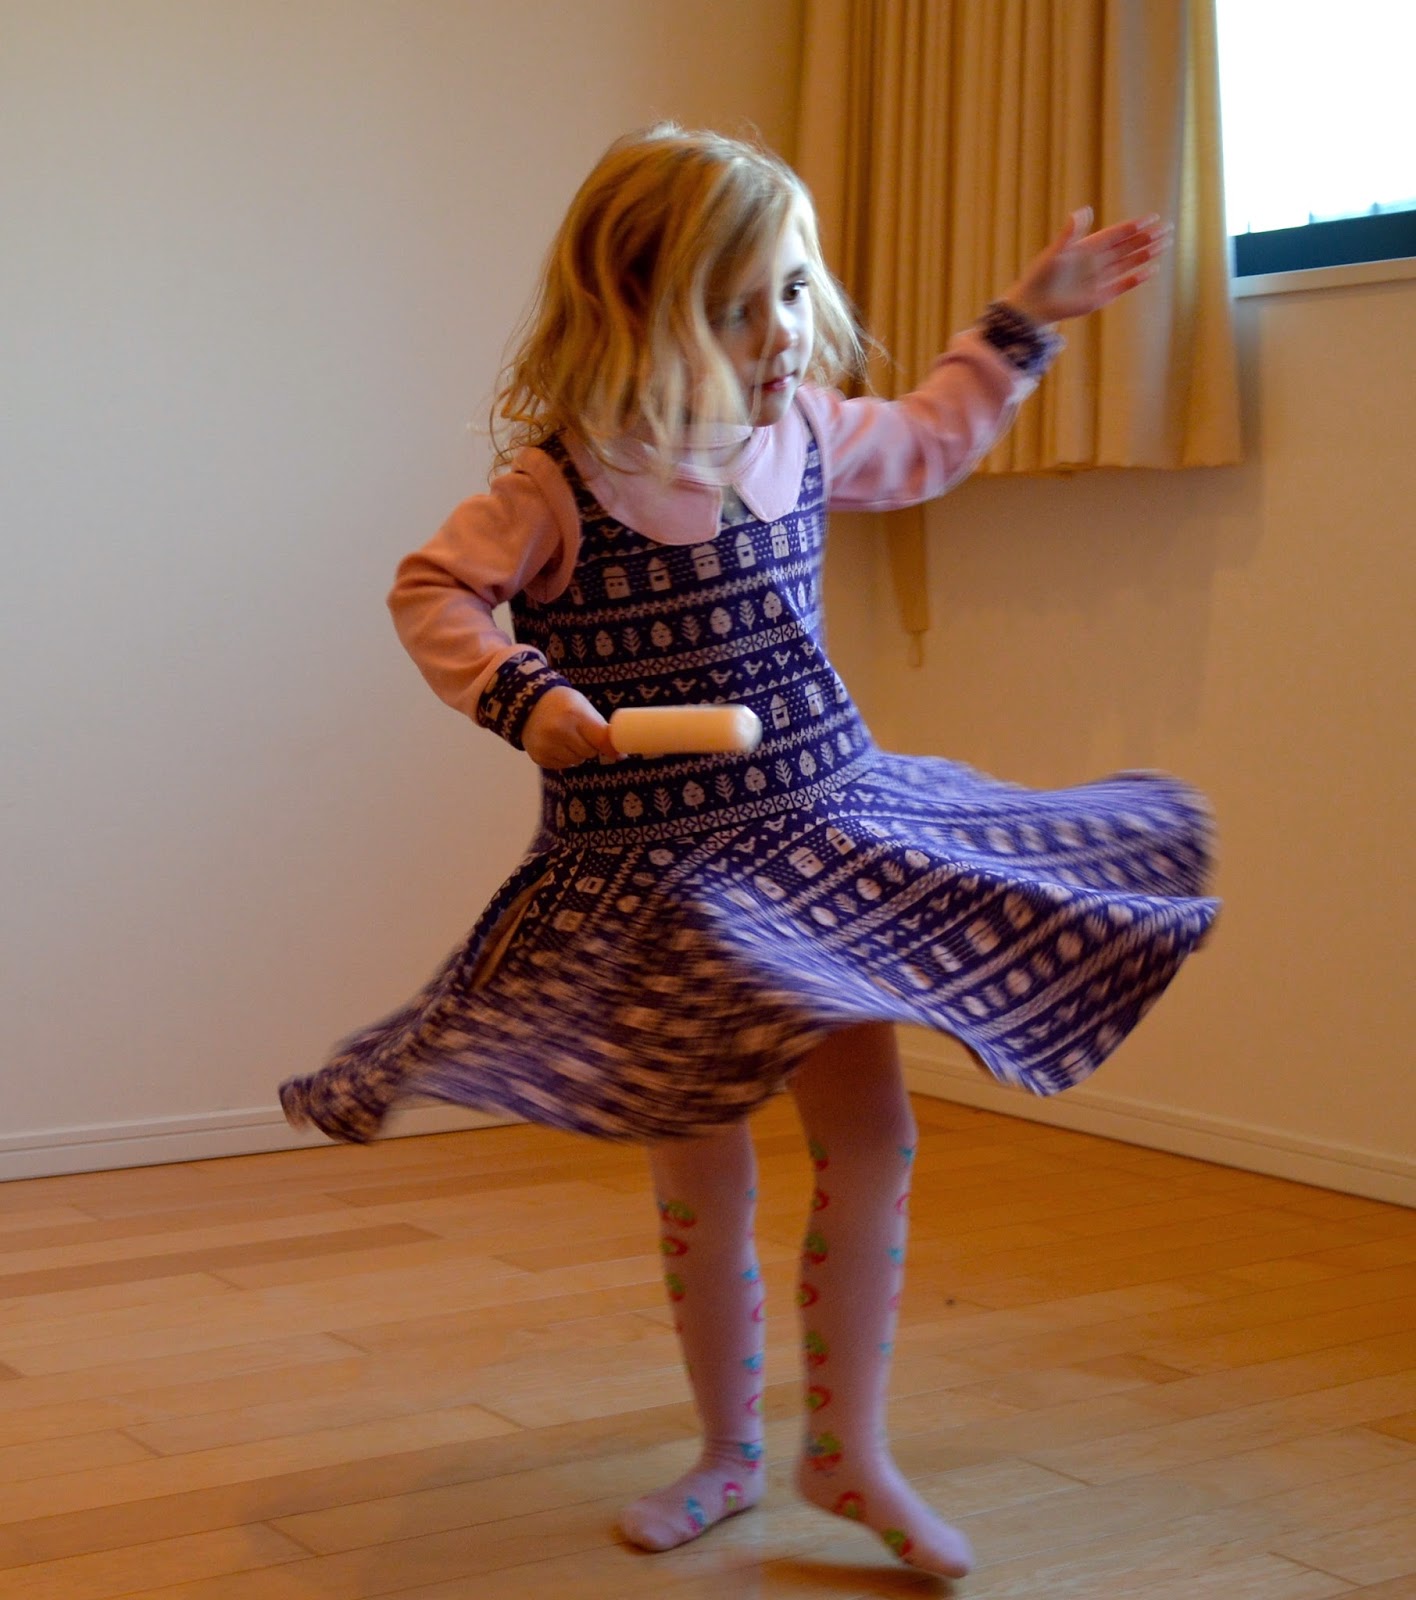
I had this great knit fabric that I had been wanting to make a dress out of.  And last week, I tried a circle skirt for the first time and was really happy with the results (one of which was endless twirling from Little Sister).  So I had already been planning to make a dress with a circle skirt from the fabric, and Living With Punks' free Mademoiselle muscle tee pattern just happened to be in a size 4/5T--perfect for the bodice for my almost 5-year-old!


I'm not sure what you call this kind of knit fabric, where the design is woven in rather than printed on.  Intarsia?   But it's really soft and really cute, and it's pink and purple so I knew Little Sister would like it even without asking her.  And the underside is solid pink, so it peeks out of the circle skirt kind of like a lining when she is twirling.

With hands in her pockets!

The pink back side of the fabric also adds a little thickness, which gives it a nice sturdiness for a dress/jumper that I am hoping will work for multiple seasons. I had looked at it a few times without buying it while fabric shopping in Nippori, but when it was on sale for 580 yen per meter (about $5) rather than the 980 that it had been, I couldn't resist any longer.  I bought a similar knit for the boy in blue and white too--stay tuned for what I make out of that!

Making the dress from the free pattern was a pretty easy adaptation.  For the bodice, I used the pattern as-is (well, I slightly raised the neckline in the front because Little Sister likes her tops right up to her neck).  I cut the top about 6 inches shorter than the pattern.  To make the skirt, I used the circle skirt calculation method found at Made (thanks Dana!), but rather than using her waist measurement, I used the bottom of my bodice to determine my radius.

I like the way a striped print falls on a circle skirt.
Since my print was directional, I cut my circle in two pieces, front and back, so that the print wasn't upside down on one side.  And as long as I had side seams, of course I put in side-seam pockets!  What dress isn't made better with pockets, I ask you?

I think this was my only shot where the pockets were visible!

I sewed the bodice together just like in Living With Punks' directions, and I sewed the skirt together with the pockets (here's a great tutorial for that from Simple Simon & Co), then just sewed the two together, turning the skirt inside out and upside down, then slipping the finished right-side-out bodice inside it and lining up the raw edges.  I used a zig-zag stitch for stretch where I joined them, making sure not to let them pull or stretch as I sewed.  I just used a plain straight stitch for hemming the skirt, since with all that fabric it didn't need to stretch.  Last time I made a circle skirt, I avoided hemming by adding an underlayer, but this time I had to do it.  Luckily since it was a knit I was able to stretch around the curves enough for the hem to lay flat.

Little Sister's favorite thing about school--the library!

The back view--here she is returning her books from last week.

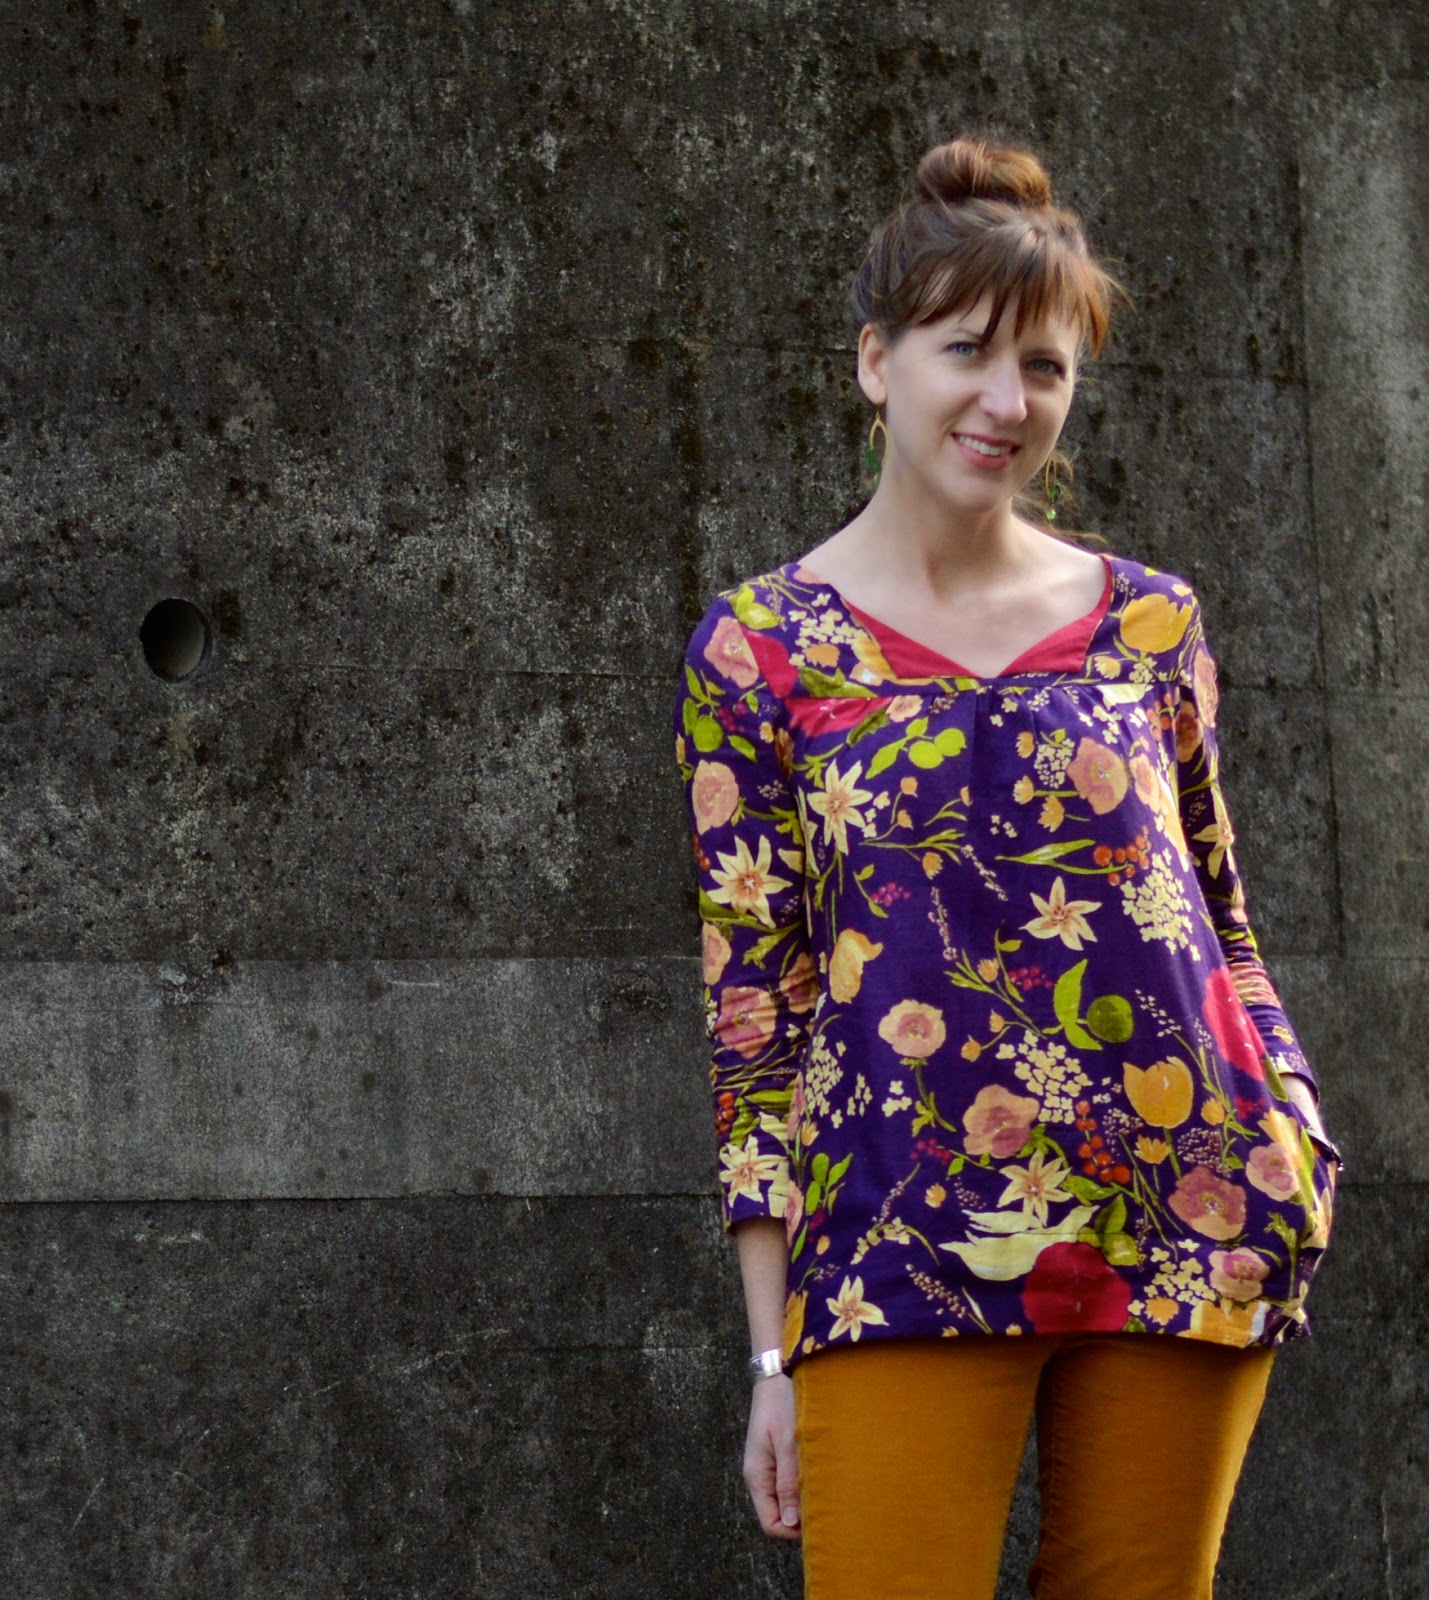
Since it's still really cold here in Tokyo, and it won't be sleeveless dress weather for several more months, I decided to make a long-sleeved tee to go underneath the jumper to turn it into a year-round outfit.  I went back and forth over making a plain tee so that it could go with lots of things, or use the print fabric as an accent.  In the end, I couldn't resist adding the long cuffs in the print as an accent to the solid pink--it makes the shirt more fun when worn on its own as well!  The cuffs can be folded up, like they are now, or left long for when she grows.


 I'm not super happy with the way the two necklines line up, but it's fine I guess.  I used the Mademoiselle muscle tee for the bodice on the long-sleeved tee as well, but I slimmed it down a bit to fit underneath the dress better, and I raised the neckline again here too.  Oh, also I used a slightly different method (I learned it from this tutorial from Kitschy Coo) to bind the neckline (and the armholes on the dress)--it's my own personal favorite for knits because I love how nicely finished this kind of binding looks on the inside, but it does result in a thicker binding.  I attached all of my bindings using a double needle, and I was SO CAREFUL.  It turned out nice!  It's amazing that when I take my time things really do turn out better.

So, these aren't the best quality photos, but it's hard to get a clear shot of a girl who just wants to twirl!  And the fact that she can't stand still in this dress tells me it's a winner.


With her bribery popsicle


So that's my submission for this month's Project Run and Play challenge, the Mademoiselle Muscle Tee!  I'll let you know when voting opens--until then!


Sunday, February 8, 2015

Convertible Messenger Bag

Sometimes, I really impress myself.  I am not the first person to think of this, but that doesn't make it any less cool--for The Boy's birthday, I made him a messenger bag that converts to a backpack.


This idea was born because I am sick of toting my own stuff plus the two kids' stuff all over Tokyo.  But when you are using trains as your main mode of transportation, if you think you might want a snack or a drink or an activity at some point during the day, you've got to carry it with you--no stashing it in the back seat of the car for when you need it!  

Now, The Boy can carry his own stuff, and when he wants a snack, he can get it himself.  When he wants to read his book on the train, he can pull it out.  Fostering independence!  And freeing myself from some of the constant barrage of questions while we are on an outing..."Mom, can I have a snack? Mom, where's my book?  Mom, did you bring my sunglasses?"  

The best part of this bag though, in my opinion, is that it can be carried as a traditional cross-body messenger bag...

Oops--ignore the safety pins, I hadn't installed the sliders for the adjustible length on the strap yet!

OR you can slip the straps towards the back and carry it as a backpack!


I had the idea, so did a search to try and figure out how to make this work, and saw lots of good ideas online.  None were exactly like what I ended up doing, which was to add fabric loops with D rings at the bottom and top edges of the back of the bag, then attaching one long strap with sliders on both ends to adjust the length depending on how the bag is being carried (this tutorial was a good resource for the adjustable strap, but I made mine adjustable on both ends).  I looked at this tutorial from Hillmade to figure out my dimensions (I made mine slightly bigger based on the repeat of my fabric)--it worked well for inserting the loops for the D-rings since it had a separate strip for the bottom and sides of the bag, as compared to the patterns that use one front panel and one back panel and then box the corners.  But I did make the flap a separate piece, both to conserve my printed fabric and also to create a seam for inserting the loops for the top D-rings.

I also put lots of pockets in--two under the messenger flap, one big one on the inside, and a small zipper pocket on the flap (first time I've done a zipper pocket--thanks, Vanilla Joy, for the great tutorial!)


I also added reflective tape as a decorative and safety element on the front flap.


The one thing I think I will need to add now that I've seen the bag in action is some sort of chest strap for when it's being used as a backpack.  Because the straps are set fairly wide apart to allow it to be both types of bag, it can have a tendency to slip off The Boy's shoulders. 

I'm now planning to make another one of these, for myself this time!  I love this concept.  If you'd like to see it as a tutorial, let me know and I can be more deliberate with my steps next time around!

Oh, and I'm linked up with this week's Sew and Show over at Straight Grain!  I'm #55, if you feel like clicking through :)


Friday, February 6, 2015

New Skirts for the Girl!

Little Sister has been wanting to wear skirts and tees lately, and I keep buying fabric with the intention of making skirts for her.  But somehow, they keep getting pushed down the priority list--maybe because I always think of skirts being such a quick and easy project, that I always choose to tackle the bigger things when I've got the time.  But I finally whipped a few out, motivated by finding some new tees on clearance, since I wanted her to have some fun new skirts to wear with them.  And you know what?  They were a quick and easy project, and totally rewarding!

First I made a really basic skirt--just a hemmed rectangle with an elastic casing for the waist--out of a fantastic fabric, and it is so cute!

Yay for new skirts!
 This was leftover from my Washi dress, made from Melody Miller's Rubystar fabric.  The border print is so cool!  This has been one of my favorite Nippori finds to date, at 380 yen per meter (and it's extra wide fabric).

I kept the selvage visible inside the hem, that's how much I love this fabric.
 The thing that took the longest with this skirt was getting the elastic to lay flat inside the casing.  Once I had it straightened out, I stitched the elastic to the top of the casing to keep it from getting twisted in the future (from this Oliver & S tutorial.)


Next, I sewed her a circle skirt. I've been meaning to do this forEVER, as she loves to twirl, and she loves skirts, and...it was just a no-brainer.  I was hesitating a bit because I wasn't looking forward to pressing and hemming all the way around a circle, but once I decided to make the skirt two layers to avoid hemming, I got right to work!


I got the idea from this reversible circle skirt tutorial from You and Mie, but I didn't want to use bias tape for the hem, so I sewed my two layers together around the HEM and left the waistband open.  Then I attached the elastic waistband like in Dana's simple circle skirt tutorial from Made.

Having a dongo snack

One difference though, I added pockets.  And because I'm lazy, I used the skirt lining for the back of my pockets rather than cutting two pocket pieces for each side.

You can sort of see the stitch line where I sewed down the pockets above.
 I wanted the lining to show for the pocket bags, and since the lining fabric was the same on both sides it worked out!


So I am officially on the circle skirt bandwagon now--I love these, and will be making more!  I actually have one planned for my next project RIGHT NOW!  Especially now that I've done all of the circle skirt math--gotta put that to use before she grows and I have to figure out a new waist radius!

Tuesday, February 3, 2015

Split-Yoke Ruby Top!

I made another Ruby Top that I adapted from Made By Rae's great pattern!  I used this fantastic Nani Iro Fuccra Rakuen double gauze (the same stuff I used on Little Sister's bubble dress), and added long sleeves so I could wear it right now.


I also linked this up to this week's Sew and Show over at Straight Grain ( --if you didn't already come from there, click that link and then click back to me (I'm #13)--the post with the most click-throughs wins!

This is the fourth version of the Ruby Top that I have made, including one straightforward sleeveless one, a sleeveless dress version with a lined bodice, and another long-sleeved double-gauze top.  I love the comfort of the Ruby, but I feel like a lower neckline is more flattering on me.  When I made the other long-sleeved top, I just cut a deeper scoop for the neck, and I really liked it.  But this time I wanted to try something different.

Did I mention it has pockets?

I kind of feel like a crazy person in this outfit, but in a good way.  So colorful!

It was really simple to open up the neckline by adding a split yoke.  I tacked my flaps down so that it would stay open, but that's entirely optional.  Here's how I did it, and kept a nice finish on the inside too!  And by the way, this would work on any top that has a yoke, although if you are using a knit you would probably want to add some sort of stabilizer.

I started out by cutting out my pieces according to Rae's video tutorial about making a lined yoke for the Ruby.  Pretty much, these are the directions you are going to follow with a slight adjustment for the split yoke.

-You will cut out 4 yoke pieces instead of 2--a front and a back from your outer fabric, and a front and a back from your lining.  One extra step--press the front pieces (outer and lining) in half so you have a nice crisp fold line right in the middle.  OH, and I almost forgot to tell you (because I actually forgot to do it)--it's a good time to press the bottom 3/8ths of an inch of the lining up, to make it easier to sew the lining down later.

-Just like in the tutorial, you will sew your outer pieces together at the shoulder then do the same for your lining pieces.  Then you will lay them out, right sides together, and prepare to sew them together around the neck opening.

-Here's where it's a little different--instead of sewing all the way around the neck, you are going to make a slit right in the center of the front piece, where you made that fold with your iron.

There's about an inch between the bottom of the stitch line and the bottom of the yoke.

I just sewed right next to the fold down one side and up the other.  Make sure to leave at least an inch to the bottom of your yoke so you have enough fabric to fold under to have a nice clean lining.

When you are cutting into the curves of the neckline, go ahead and cut right down the fold in the front center as well.  When you get about 1/2 inch from the bottom, cut two little angles towards the corners of your seam so that it will lay nicely when you turn it the right way.

Little snips at the bottom of the split yoke

Now, I added sleeves to mine, so I didn't finish the armholes at this point, but if you are making a sleeveless top you can follow Rae's tutorial on the lovely finished armholes that I linked to above.  If you are adding sleeves, this is when you would turn the yoke right side out and press it.

You can leave it like this, and it will flop open...

Or you can press and tack the flaps down, which is what I did.
Once everything is nicely pressed on the outside, you can attach the body of the top.  Then press the raw edges up under the bodice.  If you didn't press the bottom edge of the lining under earlier, do it now--that's what I had to do.


Then pull the bottom edge of the lining over the raw edges of your gathers, and hand-sew across the seam.  Such a nice finish on the inside!


I originally intended to make this more of a tunic length, so I put pockets into the side seams.  But when I put it on, it looked really unflattering, so I shortened it quite a bit.

Yay for pockets!
To keep the pockets from hanging out the bottom of the new shorter length (which is still a few inches longer than the pattern for the Ruby Top), I tucked my pockets inside my wide hem, then didn't hem across where the pockets were.  Don't know if that makes sense; maybe this picture will help?


I just hand-stitched the hem to the back part of the pockets so that I didn't sew the pockets closed.  Worked out well!

Here's how the back turned out:


And this was my test shot--it was cooooold out so I didn't want to lose the layers until I had to!  But I wanted to show you how this awesome jacket I got for Christmas makes every outfit look way cooler.

I love my jacket!
Now you're ready to go out on the town with Lady Gaga!

At the Tokyo Madame Tussaud's--we were visiting Legoland next door ;)
I do have a question though--I need a recommendation for a slimmish long sleeve pattern for wovens.  I have used the washi long-sleeve pattern, and it's wider than what I want, but I haven't been able to modify it to my liking.  I tried a different long sleeve from a Simplicity pattern I've never used before, but it came out way too small--you can probably see the wrinkling in the sleeves above, and this is after I'd altered it as much as I could!  I didn't have enough of the fabric to cut all new sleeves.  So anyway, if anyone out there has a woven long sleeve pattern to recommend, let me know!