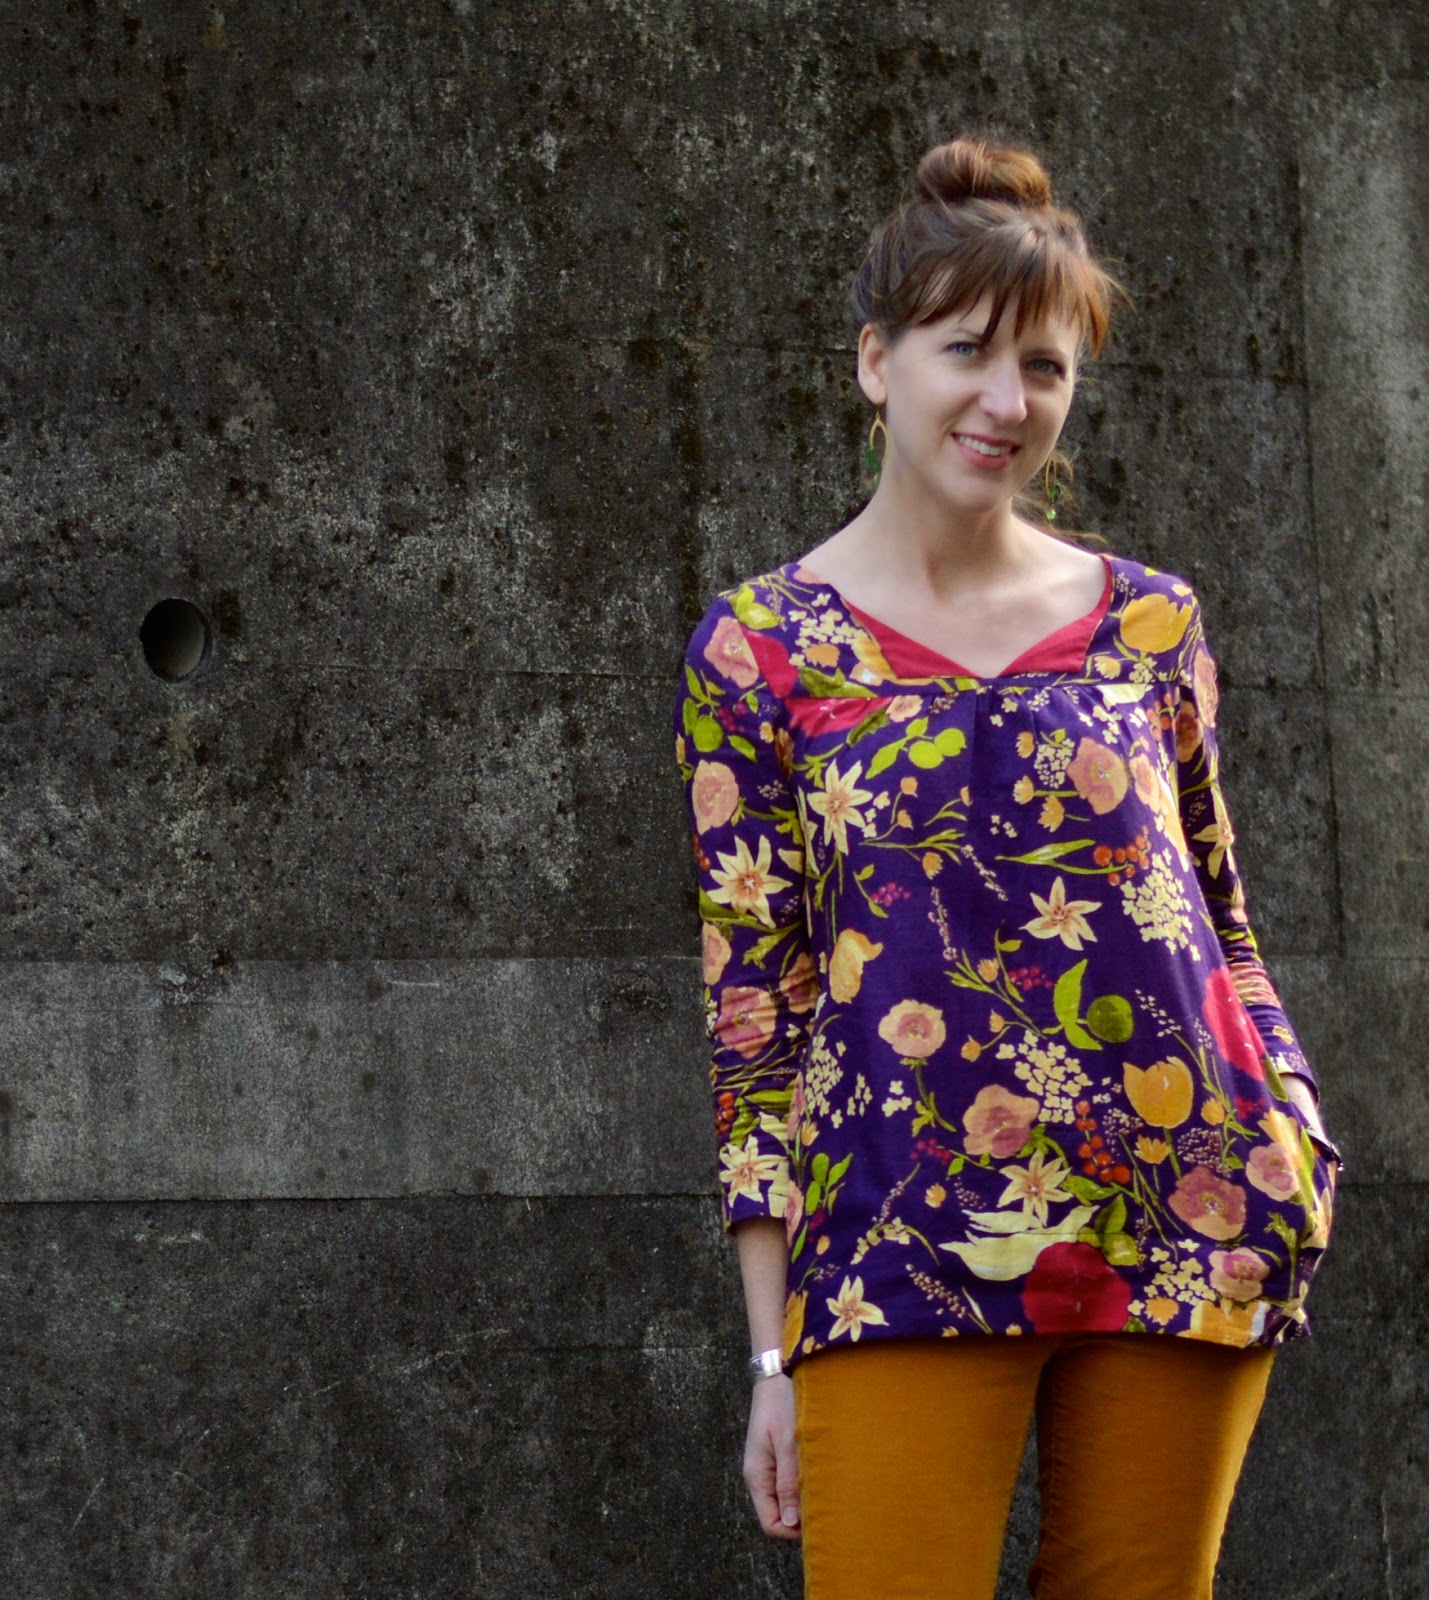
I also linked this up to this week's Sew and Show over at Straight Grain ( --if you didn't already come from there, click that link and then click back to me (I'm #13)--the post with the most click-throughs wins!
This is the fourth version of the Ruby Top that I have made, including one straightforward sleeveless one, a sleeveless dress version with a lined bodice, and another long-sleeved double-gauze top. I love the comfort of the Ruby, but I feel like a lower neckline is more flattering on me. When I made the other long-sleeved top, I just cut a deeper scoop for the neck, and I really liked it. But this time I wanted to try something different.
 |
| Did I mention it has pockets? |
 |
| I kind of feel like a crazy person in this outfit, but in a good way. So colorful! |
It was really simple to open up the neckline by adding a split yoke. I tacked my flaps down so that it would stay open, but that's entirely optional. Here's how I did it, and kept a nice finish on the inside too! And by the way, this would work on any top that has a yoke, although if you are using a knit you would probably want to add some sort of stabilizer.
I started out by cutting out my pieces according to Rae's video tutorial about making a lined yoke for the Ruby. Pretty much, these are the directions you are going to follow with a slight adjustment for the split yoke.
-You will cut out 4 yoke pieces instead of 2--a front and a back from your outer fabric, and a front and a back from your lining. One extra step--press the front pieces (outer and lining) in half so you have a nice crisp fold line right in the middle. OH, and I almost forgot to tell you (because I actually forgot to do it)--it's a good time to press the bottom 3/8ths of an inch of the lining up, to make it easier to sew the lining down later.
-Just like in the tutorial, you will sew your outer pieces together at the shoulder then do the same for your lining pieces. Then you will lay them out, right sides together, and prepare to sew them together around the neck opening.
-Here's where it's a little different--instead of sewing all the way around the neck, you are going to make a slit right in the center of the front piece, where you made that fold with your iron.
 |
| There's about an inch between the bottom of the stitch line and the bottom of the yoke. |
I just sewed right next to the fold down one side and up the other. Make sure to leave at least an inch to the bottom of your yoke so you have enough fabric to fold under to have a nice clean lining.
When you are cutting into the curves of the neckline, go ahead and cut right down the fold in the front center as well. When you get about 1/2 inch from the bottom, cut two little angles towards the corners of your seam so that it will lay nicely when you turn it the right way.
 |
| Little snips at the bottom of the split yoke |
Now, I added sleeves to mine, so I didn't finish the armholes at this point, but if you are making a sleeveless top you can follow Rae's tutorial on the lovely finished armholes that I linked to above. If you are adding sleeves, this is when you would turn the yoke right side out and press it.
 |
| You can leave it like this, and it will flop open... |
 |
| Or you can press and tack the flaps down, which is what I did. |
Then pull the bottom edge of the lining over the raw edges of your gathers, and hand-sew across the seam. Such a nice finish on the inside!
I originally intended to make this more of a tunic length, so I put pockets into the side seams. But when I put it on, it looked really unflattering, so I shortened it quite a bit.
 |
| Yay for pockets! |
Here's how the back turned out:
And this was my test shot--it was cooooold out so I didn't want to lose the layers until I had to! But I wanted to show you how this awesome jacket I got for Christmas makes every outfit look way cooler.
 |
| I love my jacket! |
 |
| At the Tokyo Madame Tussaud's--we were visiting Legoland next door ;) |


Lovely top! The color fits you as well as it fits your daughter in her bubble dress. Oh and the pockets, I love them!
ReplyDeleteGreat colors! But sorry, no help with a woven top pattern.
ReplyDeleteBeautiful top, I love the whole outfit!
ReplyDeleteIt's beautiful! I love the Archer top by Grainline, but I don't know if that's the kind of long sleeve woven top you had in mind or not.
ReplyDeleteYou know, I probably wouldn't make a button-up (irrational fear of buttonholes here), but the sleeves do look like what I have in mind! Maybe I should go for it for the sleeves and brave the buttons eventually! Thanks for the rec.
DeleteLOVE it!! :)
ReplyDelete