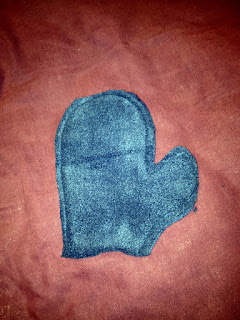
Kids outgrow socks so fast. Or they wear through the toes and heels. And most of the time, the socks just get thrown out. But every once in a while, there's a pair of socks that are too cute to get rid of. And I thought that the tops of socks would make nice snug little wrist cuffs for some easy fleece mittens. This is a super quick and easy project (as long as you cut out the fleece in the right size. As I did not the first time around.) The mittens you see here are my second attempt at this project.
I started with some navy blue fleece and these two pairs of socks. You could totally upcycle old fleece pants or something for the mitten part of these, then they'd be totally free!
These were the favorite socks I had saved to figure out something to do with. I had some plain pairs too, which I will be attaching to patterned fleece for the boy's preschool hat and mitten drive! When I get around to making some hats, I'll show you those too. Maybe they'll coordinate--but since I'll be upcycling I don't want to get ahead of myself.
The most difficult part of this project is cutting the mitten part out to the right size. I had my kids hold their fingers together loosely and stick their thumbs way out, then I traced around their hands loosely. Then I cut the paper out even bigger. Then I cut the fleece even bigger than that. Can you tell that the first time I tried, the mittens came out way too small?

I didn't even pin the fronts and the backs together, since the fleece stays put pretty well; I just ran them through the machine with a tiny seam allowance, since fleece doesn't fray. Then I trimmed off any wide parts in the seams, flipped them right-side-out and made the kids try them on, then proceeded.
I flipped the mittens back inside out and trimmed the wrist so that the mitten ends right under the palm of the hand. The sock will form the rest, so you don't want the fleece getting in the way.
Decide how long you want the cuffs on your mittens to be, and cut off the rest of the sock. I left the stripey ones a little longer because I can fold them over if I want to, and the skiiers a bit shorter since they can't be folded.
Then, leaving your mitten wrong-side out, slip the right-side-out sock inside the mitten so that the raw edges line up. I didn't pin this either (and I am usually a religious pinner) because the sock fits right inside, and you are going to stretch the sock to fit the mitten anyway.
 |
| Ready to put the sock in |
 |
| See the raw edge poking out? I just left it that way so you could see it-- when I was ready to sew, I lined the two raw edges up so they were flush. |
And that's it! Turn them right side out, and you're done!
The gloves are really easy to pull on (the boy can easily do it himself), and the snug cuffs make them stay put when you're pulling a coat on over the top of them.
 |
| Peekaboo was by far the best way to get them to show off my handiwork. |


No comments:
Post a Comment
Note: Only a member of this blog may post a comment.