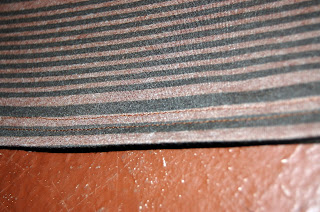
There was a time when I bought clothes for my husband. Sometimes I tried to buy things with a pattern on them, or a different fit than he usually wore, in an attempt to style him up a bit. These things ended up either going back to the store, or more likely, sitting in his closet gathering dust. One such item was this striped t-shirt. Daring, I know.
I always liked something about this shirt, so I never got rid of it. I finally was inspired to make something for The Boy out of it! I'm going to attempt a tutorial here, since I couldn't find exactly the method that I ended up using online. I did reference a few "big tee to fitted tee" tutorials, but I did mine a bit differently. |
| Shirt, unworn by husband. |
I didn't feel like making a pattern, so I just used one of The Boy's t-shirts as a template for this project.
I usually try to reuse the hems on things that I repurpose, but this time around I thought that the neckline was the bigger challenge. The head-hole was actually only a tiny bit bigger on the big shirt, so I just decided to keep the top of the shirt intact. However, the shoulders (and the rest of the shirt) needed to be narrower, so I just cut the sleeves off to reuse them, and cut the shirt up the sides. That way, I didn't have to resew the neckline or shoulder seams.
Then I went to my template shirt to figure out how big to make it. I eyeballed the curve for the sleeve opening based on the template shirt on one side, then folded the new shirt in half to make sure I cut the curve the same shape on the other side.
Next, I folded one of the sleeves I cut from the original shirt in half. I wanted to reuse the shirtsleeve hem in this case, so I lined it up with the template to figure out how big to make the sleeve.
Again, I used the first piece that I cut out to line up and cut the other sleeve piece, so they would match.
Aaaand we're done with the template shirt now. Next, I stitched the body of the shirt up the sides (inside out, of course) and also folded the sleeve pieces in half (inside out as well) and sewed a seam up the bottom. Next was attaching the sleeves. Now that I've attached sleeves several times, this process makes sense to me, but it's a hard one to describe and always seems a bit confusing. Here's what you do:
1. Turn the body of the shirt inside out.
2. Turn the sleeve RIGHT-side out.
3. Place the sleeve inside of the body of the shirt, lining up the raw edges of the opening. The cuff of the sleeve points towards the middle of the shirt, and the right-sides of the fabric are together.
4. Then pin those raw edges together and sew around the armhole on the machine!
Now, since this is a t-shirt, I wasn't planning to iron the seams flat (I know, I know...lazy!) but then I realized I needed to iron the hem, so I went ahead and ironed the seams flat too.
For the hem, I folded the raw edge up once and ironed it, and then again, so it would be nicely finished on the inside.
Then, I hemmed the bottom. You could just sew one seam, but I like to do two, especially on knit pieces, because it mimics the look of a "real" t-shirt seam. I don't have a serger (or even a double needle), but I like the way this looks, and it's easy to keep the lines straight just by keeping your original seam lined up with the sewing machine foot.
So there we go! All done, right?
Except not, because I thought it would be fun to make an applique out of some of the scrap fabric. I used the backside, and a contrast thread in a zig-zag for fun.
So now, all done, right?
Well, I still can't leave quite well enough alone, so I decided to trim out the neckline in the zig-zag too. I'm really happy with the way it looks, for an easy embellishment.
And now, for real, the finished product. I wonder if I'll be able to get the boy to wear it?


I had found another tut for doing this a while back and I CAN"T FIND IT ANYWHERE(this was before I was a pinner)! But this one will work for me! thanks for posting! I'll be your newest follower!
ReplyDeleteThanks! I made this a tutorial because I had to piece together instructions from a few different places to do it--glad it was helpful!
Delete