 |
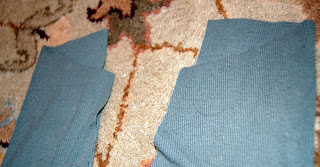
| Before, and after. |
Seriously, who didn't have one of these turtlenecks in 1994? Oh, you didn't? Then congratulations, for you were far cooler than me, my friend.
Believe it or not, I had been actively searching for leggings in this olive green color, to no avail. Well, since I didn't want to spend an arm and a leg for them. So I knew when I spotted this old turtleneck, I could re-use the sleeves for some quick and easy leggings. I seriously finished this project in about 20 minutes.
There are several tutorials online for easy leggings. I followed this one (sort of), but I skipped the pattern-making step. Here's my quick step-by-step (sorry for the lack of pictures), you can refer to the internets for a more comprehensive tutorial.
1. Choose a pair of leggings that fit well, turn inside out, and lay flat on top of the shirt sleeve with the hem lined up with the bottom of the shirt and the fold of the pants lined up to the fold of the sleeve.
 |
| Hmmm, I guess you don't really NEED to turn inside out, it just feels more official that way. |
2. Cut around one leg of the leggings (you'll have to guess a little at the seam since your template is still attached to the other leg), leaving a seam allowance on the cut side. At the top, leave extra (about an inch) to sew your casing for the elastic waistband.
3. Once you've cut out the first leg, lay that piece on the other sleeve of your shirt and cut the other one the same way (that way they'll be exactly the same, whereas if you cut around the template again it might come out a little differently).
4. Cut the waistband down a bit in the front on both sides (optional, but I like the fit better when I do this).
 |
| Lay the legs out before doing this, so you don't accidentally lower the front on one side and the back on the other. |
5. From this point on, I had two pieces of fabric cut out, so I did exactly what the tutorial I linked to above says (minus the double needle). Basically, pin and sew from the waistband to the crotch front and then back, then pin the legs closed and sew up the inside of one leg and down the other. Then fold the waistband over to the inside and sew the casing, leaving an inch or so to thread your elastic through, sew the elastic together, and close up the casing. But really--go to the tutorial. It's actually explained in such a way that you won't mess it up :)
 |
| I forgot I had a different color of thread in my bobbin, hence the unintentional contrast stitching at the waistband. Oh well, you never see that part. |
These are so fun to make, and easy, and perfect for fall. And bigger shirts are great to make wider-leg pants for little guys and gals too. I've done this before out of sweater sleeves, which are so cozy! (I think that post has a link to another tutorial option for this project). And I still have a bunch of ribbed fabric left over from the body of the shirt--maybe I'll even make something for the boy! I'd love to hear about it if you make your little one a pair.
 |
| Ta da! |

Beth, I'm not surprised this is your 51st post - you are prolific with the blog posts, my friend. I'm loving it, too, so keep. it. coming. 20 minutes and a free pair of leggings doesn't get any better! These fit her perfectly, too. Love the pictures of her in this - learning more about backgrounds? They look fantastic! XOXO
ReplyDelete