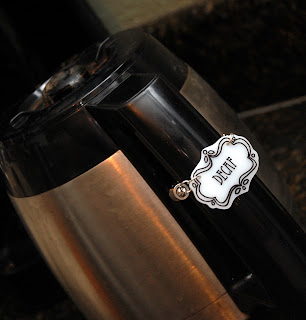
My mom likes to entertain. She entertains people who drink decaf coffee, and she entertains people who drink regular coffee--often at the same time! Don't worry, she has two identical stainless steel carafes that she can brew into...but how will her guests know which one is which?
Enter the decorative coffee pot tags.
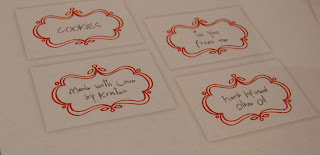
I read that you don't want to use a design that's too precise, because it might come out a little askew and drive you crazy. Now, I'm not the type to be driven crazy by something like that, but I'm also the type that likes a design that's not too precise anyway. I found these free printable labels from Domestifluff and made them a little bigger before printing them out (since shrinky dinks end up somewhere around 20% of their original size).
Then I traced the design onto my shrink plastic with a sharpie. You can also see from this photo how big the design was in relation to my sharpie. I took no measurements--I printed out one copy, thought it looked too small, and printed out another one, planning to try it out then redo it if it came out too small. This was not a huge investment--I paid a whopping $3.00 for a 6-pack of shrink plastic sheets, and I could probably have fit at least 8 of this design on a sheet if I was being careful about placement.
I also decided to print out my lettering to trace, rather than trusting my own handwriting. I chose a font called Eccentric, which you can find on this free font site (as well as a zillion others, I'm sure, this is just the first one that came up when I googled the font. I don't remember where I downloaded it. And I just now noticed that it is the same font I used in my header. I guess I like it, or something.)
After cutting out the design, I used a slightly-smaller-than-normal hole punch to make the holes for my jump rings to go through. I'm sorry, I don't know what size it is--it turned up in a box of office supplies I got from my grandpa and just looked like it would be about right. And it did work perfectly.
Now, this part I don't remember from my childhood shrinky dinks. The package directions say to lay a piece of parchment over the top of the piece so that it doesn't stick to itself when it curls up. Practical, I'm sure, but it does take away some of the fun of watching it cook. But it didn't stick to itself, so it works.
And here's how big it was when it came out of the oven about three minutes later! That's the same sharpie; I wouldn't try to trick you.
So I went on and did my second tag, and uh-oh--it came out a totally different size! I thought maybe there was some variation since I did them separately, so I'd better try again and cook them both at the same time.
But then I realized that I had just traced the smaller design that I had deemed too small by mistake (the font being the same size on both pieces was my clue). So I made one more in each size, so I have a set too. Not that I have two matching coffee pots, but I still like the idea.
Anyway, once that was all squared away, I attached these little jewelry clasps I bought. I think they were $1.29 each. I wanted the magnetic ones so that you could just pull them off and on rather than having to do a clasp every time you wanted to attach it.
These worked well because they had the lobster clasps to adjust the length, but once you set the length you could just open and close it using the magnet.
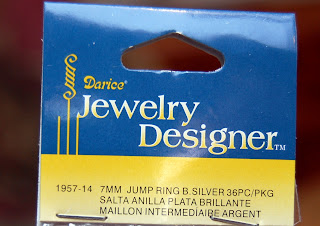
I also bought these little 7mm jump rings. They were on the big end of the jump ring spectrum available at Joann's Fabrics.
ANYWAY, depending on what kind of attachment mechanism you end up using this might be different, but I just put a jump ring in each hole (I don't even have any pliers, I just used my fingers. RAWR I am strong). One of them I closed right up, and to the other I attached one end of the magnetic clasp.
Then I closed it up. This step definitely needed a photo because I'm sure you would never have figured out that you needed to do that.
You just attach the lobster clasp at the end of the chain extender to the jump ring, and then hook the lobster clasp at the end of the magnetic clasp to the length of chain that's right for your coffee pot.
Now you're ready to put out two coffee pots and not confuse anybody. Although now that I think of it, my mom probably needs a "Half Decaf" tag too.


No comments:
Post a Comment
Note: Only a member of this blog may post a comment.