

Thanks to the wonders of Nippori Fabric Town, I was able to get the fabrics I needed for Tinkerbell's costume (dress plus winter fairy coat and trim) for about $4. I had to spend a little more to get the great french terry I used for Peter Pan's pants and hat (I spent $6), and I bought a pre-made green mens' shirt for his tunic.

I'll do a quick run-down of the Peter Pan costume, since it was pretty straightforward, then I will share a little more about how I made the Tinkerbell dress and winter gear. Isn't it nice that Tinkerbell has some stories where she gets bundled up, so I can make my daughter put on a coat and she'll still be in costume?
 |
| Winter fairy photobombed by Peter Pan |

I used my modified Hosh Pants pattern that I have used previously to make pajama pants for these Peter Pan Pants (I like to call them the Peter Pants). I wanted them to be slim, since Peter wears leggings, but I wanted The Boy to possibly get use out of them as sweats after Halloween, so I didn't go full legging.
 |
| Flying |


I had fun with Tinkerbell's dress. I cobbled together ideas from a few different tutorials to come up with a shirred back tank dress with a double square circle skirt, and I think it worked great!
 |
| Very twirly |
If you want to do something similar, I recommend adapting this free shirred back sundress bodice tutorial and adding this circle skirt (another free tutorial) to it--the points from the double square are perfect for mimicking Tinkerbell's leaves, I think!
 |
| Shirred back |
If I were Tinkerbell though, I might be a little chilly walking around in October, so I thought I'd try to make a winter fairy jacket. I was so excited to find this quilted fabric (it's the same on the front and the back) for only $4 a meter! And I only used half of it making this cute little coat!

I self-drafted the pattern using a t-shirt pattern. I did french seams on the sides and shoulders since there's no lining; the fabric is double-sided so I wanted the inside to look nice and finished and also lay flat and feel comfortable.
 |
| The front and back dip down a bit to mimic the jagged leaf hem on Tinkerbell's coat. |

I couldn't find any good green knit fabric to make leggings for her (or a shirt for Peter Pan for that matter), so I bought a pack of Rit dye in Kelly green and dyed a pair of white leggings out of our drawer for the winter wear. Amazingly, they came out exactly the same color as the dress! I would have liked them to be lighter, but at least they don't clash terribly! I added some more of the velvet ribbon at the hem.

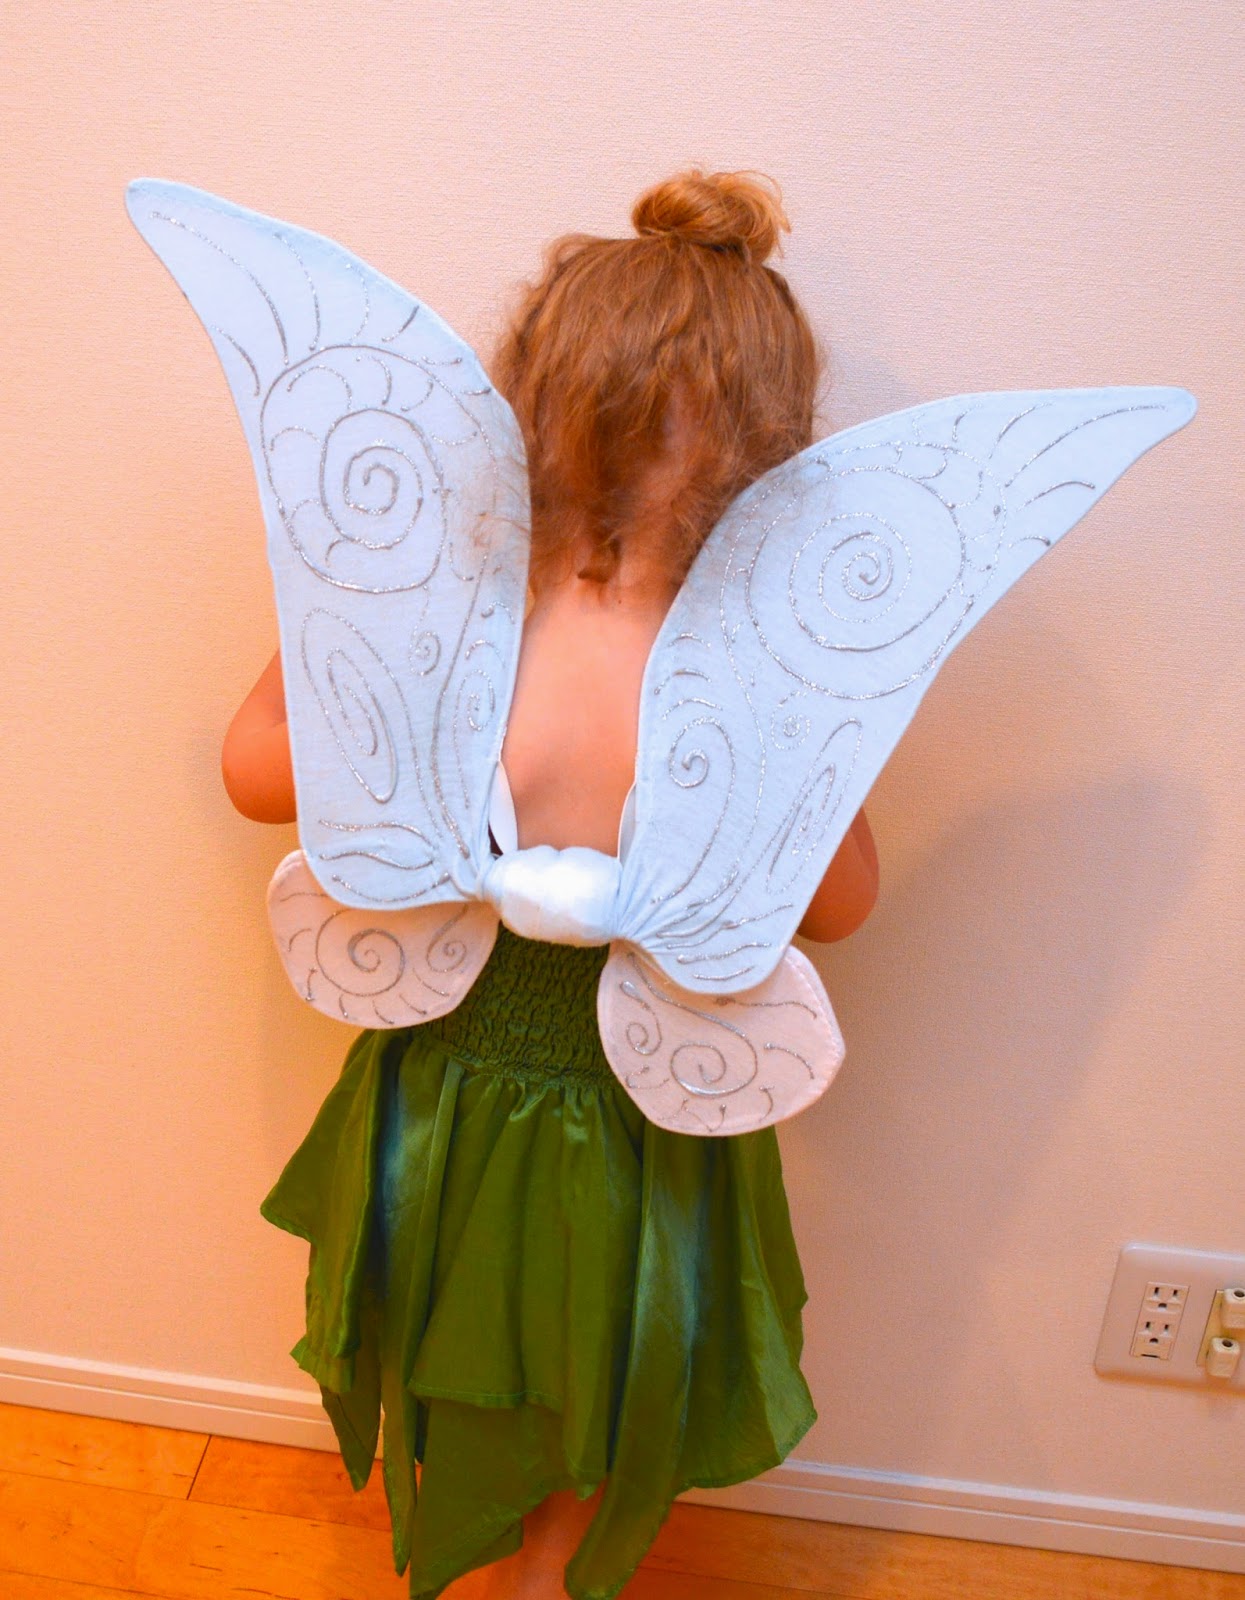
The dye match was even more amazing because I actually bought the dye for turning a white shirt green for Peter Pan. But I couldn't read the fabric content of the white tee I bought, and while the leggings came out very green, the shirt came out a soft baby blue. Not great for Peter Pan, but it was perfect for Tinkerbell's wings! I had planned to buy the fairy wings but couldn't find any (except for fancy expensive ones for adult costumes), so I followed this tutorial to make our own, adapting the shape for Tinkerbell. And I didn't have any white tights, so I improvised with 100 yen store t-shirts--both the one I accidentally dyed light blue and a plain white one.
And finally, I couldn't forget Tinkerbell's shoes! Luckily these little white fabric shoes are easy to find in Japan--they are used as indoor shoes for little kids at school usually. But they were a great blank canvas for fabric paint and a pom-pom.

If you've stuck with me this far, you get a reward--the silly pictures we took of these costumes! I would have loved to get out in the park for some fun outdoorsy shots, but it's been rainy and they get to wear the costumes to school tomorrow and I was afraid they'll get ruined before I got a chance to get good photos if I didn't just go for it. These guys were so funny anyway.
 |
| Sneakerbell |

 |
| Telling secrets |
 |
| Toot noises: always funny. |
Oh Beth, these are such cute costumes! I love that you made a jacket for Tinkerbell, you are one smart Mom. I just posted my last costume for this year.
ReplyDeletehttp://xoxograndma.blogspot.com
What a great job you did! I love how you made a jacket for tinkerbell too! Very practical:)
ReplyDeleteThanks for linking up to my link party!