Showing posts with label boys. Show all posts

Wednesday, October 12, 2016

Last Year's Halloween Costumes--Minions

Last year, we had fun making/adapting our own halloween costumes, but I never got around to posting them.  I intended to take some good pictures but never did it, and here we are a year later with still no post about what ended up being a really fun set of costumes.

So, here's the rundown:  The kids wanted to be minions.


Thrift store overalls (luckily found in close-enough sizes), thrift store yellow turtlenecks (adult sizes that I cut down), goggles made from empty duct tape rolls and those rounded masks you wear to keep from breathing in dust, and stocking caps ordered on Amazon.

And then the most amazing thing happened.  We were eating an early dinner, getting ready to go trick-or-treating, when we joked about how great it would be if the hubs had a Gru costume.

Then we realized...it wouldn't take much.  He had a black wool car coat and scarf.  He had a pair of pants that he bought in Tokyo not realizing he had accidentally purchased very skinny skinny jeans.  I stuffed a long, narrow decorative pillow into his jacket's shoulders, and Voila...


Is that amazing or what??

Since hubby had not originally planned to wear a costume, I planned my outfit separately and therefore don't fit in at all, but that's ok.  I was Kiki from Kiki's Delivery Service, a charming Miyazaki movie that you should watch this Halloween season if you've never seen it!


So that's it!  This year, we're not doing homemade costumes (sniff)...the kids wanted to be characters from Harry Potter, and it just didn't make sense to make Gryffindor robes when I could buy them so easily.  But there will be some surprises in store (if I get around to posting them before next year!)

Thursday, September 17, 2015

Upcycled T-Shirt

I got a new serger this weekend, which is so exciting!  It has gotten me in the mood to sew knits, so I went digging through my "to upcycle" box and found a mens t-shirt with a fun red stripe woven into it.

The Boy's turn for something new for school!

I found the original shirt in a free box in my neighborhood ages ago, and I didn't get around to making it into anything before we moved to Tokyo.  Now that we are back, I was ready to cut it up!

The Boy just learned to whistle.  Can't stop won't stop.

I wish I had taken a picture of the shirt before I sewed it into it's new form.  The side seams were SO crooked!  If I had owned that shirt it would have driven me crazy. I had planned on just folding the shirt front and back in half, lining up the side seams, and cutting out my new pieces, but lining up the side seams proved impossible so I cut the original shirt into pieces along all of the seams.


Turned out, because of the steep angle of the side seams, I wasn't able to fit my pattern pieces onto the fabric.  But I didn't give up!  I pulled another old t-shirt out of my upcycle bin and cut some black pieces to fill in the gaps.  I was using the existing hem on the red shirt, but since I had to hem the black patch at the bottom, I decided to use contrasting red thread in my double needle just for fun.

The patches could still use a pressing though!

I also used the ribbed neckband from the black t-shirt to create a new neckband for this shirt, bringing  more of the black into the look.

I think the angled blocks add a fun element to the shirt!  My son said the triangles are cool, so that's all the endorsement I need.


He's so sweet--he wore the shirt to school the next day since I made it for him.  I used one of his existing t-shirts to make the pattern--he's so long and lean in the torso, so I love being able to make shirts that fit right!  Seems like a lot of RTW shirts are too wide and short.

He's wishing he never taught Little Sister about the art of the photobomb.
I'm really looking forward to my shipment of fabric arriving from Japan--there are so many awesome knits in there along with everything else, and now that I've got an awesome serger I am so excited to start turning them into things!  

Wednesday, August 26, 2015

Sashiko Embroidered Double Gauze Shirts

Oh, I am so excited about this post!


This month's Project Run and Play theme was handwork, something I typically don't do.  BUT one of the last things I did before leaving Tokyo was to sign up for a sashiko embroidery class.  It was such a fun experience--a friend and I did it together, and it really felt like sitting in on a sewing circle with several Japanese ladies.  Most of the people in the class were repeat customers, bringing their ongoing projects back to work on them with some company.  I started a great embroidered panel (that I've since finished; not sure what I'm going to do with it yet!) while getting tips on the technique from the woman teaching the class.

Just getting started!

Making progress--a great project for sitting on the patio with a  friend!

Those of you in Tokyo, I recommend it--the class is on the first Thursday of the month at the Blue and White Store in Azabu-Juban!

In any case, my new sashiko skills were fresh in my mind when the ladies behind Frances Suzanne posted their challenge for Project Run and Play this month.  So while a couple of months ago I probably would have passed on this one, I actually had some excellent inspiration.


Unfortunately, the timing was a little difficult--on August 9th, we left Tokyo after living there for 15 months, so I sold my machine and packed up all of my fabric and kissed it goodbye until our shipment arrives in Portland in October.  But I held out a special piece of double gauze from Kokka--it's called Ihme Chamber, and when I visited the Kokka showroom in Tokyo I got to see the original watercolor for this print hanging on the wall!

So cool!

The display of the different colorways

I thought it would be perfect with my sashiko accents to make a really special item for returning to school this fall.  I was planning on making a top for The Boy, but Little Sister really wanted to get in on the action too, and so I made one for her as well.

Little Sister's top is the Norah Dress/Tunic pattern from Mouse House Creations, and
The Boy has the Prepster Pullover from Blank Slate Patterns.
I apologize in advance, but this is going to be a pretty long post since I used new patterns for both The Boy and Little Sister's tops, and I want to tell you about how they went together.  The pictures are really cute though--you should scroll through just for those! ;)

Both tops have the same sashiko embroidery detail on the pockets and the back yoke.

The Boy's shirt is the Prepster Pullover from Blank Slate Patterns in size 8, with some extra length (instead of doing a standard folded under hem, I just did a bias facing so I didn't lose any length from the cut pattern piece).  Otherwise I made the pattern exactly as written, and I really liked it!  I was nervous about doing the placket (I've never done one before), but it came out perfectly and the method was ingenious and very simple!  It made me want to start putting plackets on all the things.

About to start 2nd grade!
My only complaint is that size 8 is the largest size, and I just bought the pattern--I wish there were more sizes so that it would last me longer!  My guy is 7 and a half and slim, and the size 8 fits really well in the body but I did add length as I mentioned--but he is tall for his age (and long of torso, which he gets from me).  I have to say, it was nice to start with the short sleeved version since the long sleeves do involve a lot more steps--although I wonder if the long sleeves will need extra length for him too?  The size chart doesn't give a shoulder-to-wrist measurement, just chest, waist, and hip, so you have to kind of guess on lengths.

I got the free printable sashiko embroidery pattern from the tutorial posted by Jo of Dotta on Imagine Gnats.  There are lots to choose from--I'm excited to try more of them!  I printed the pattern out at 100% and it was a perfect fit on my pocket pattern piece for the Prepster Pullover.


I can't remember now where I found this tip, but it worked so well--I traced the sashiko pattern on to a piece of the thinnest fusible interfacing I could find, then ironed it to the backside of my fabric.  Then I had the design right there on the back!

I love all the little characters in this print--there's a cow, a swan, a fox, a frowny bird,
and of course the little guy poking his head out of a garbage can...

The embroidery on the back yoke was kind of an afterthought--as I was putting it together I thought that some extra detail would look nice there, but I had already partially sewn things together and didn't want to attach interfacing.  So I just traced the pattern with an air erasable marker and worked quickly!  I'm so glad I added it back there--I think it makes a huge difference.


I had originally planned to make a dress for Little Sister.  I just bought the Norah pattern when it was a Friday Fiver (yay!) and showed all of the cute options for collars and sleeves to Little Sister.  She chose short sleeves, and she adamantly did NOT want any kind of collar.   I made a mental plan to make the short sleeved dress with a  center panel of sashiko embroidery down the front, and had my fabrics all cut and prepped for that, but...

Starting Kindergarten!

She really wanted a shirt, not a dress, since she wanted hers to be a close match to her brother's.  She also vetoed the center panel (thankfully I hadn't started embroidering yet, or she would have been out of luck) in favor of a pocket like Big Brother's.  I re-cut the front to put that big tree front and center for the tunic length with no embroidered center panel.  Then she wanted a button placket too, but I didn't have enough fabric to cut another front panel out and I wasn't going to chop the focal point tree in half, so we compromised on the red bias tape neckline instead of the clean neckline with lining.  Honestly, even though I would have loved to do a few things differently design-wise on this dress, it's so worth it to listen to her input because then we end up with a garment that she will actually wear.  It's not worth it to make a dress my way that sits in the closet because I ignored what she wanted!

Turns out the pocket placement is PERFECT--she keeps putting things in there!
I used the same pocket pattern from the Prepster Pullover pattern.
 I did line the back yoke using the same method as in the Prepster Pullover, so it's nice and clean on the inside.  And of course she got the back yoke embroidery as well!


I love the fit on this top--I was worried that the sleeves might be too full, but they are just right.  I did french seams since I was using double gauze, so that did take the side seams in a tiny bit more.  My kids are opposites in sizing--the 7-year-old is almost too big for the size 8, and the 5-year-old is almost too small for the size 4!

Oh, and speaking of fit, since I added the embroidery, I shortened the opening in the back of the tunic.  But I shortened it too much--oops!  I had to widen the neckline slightly so that Little Sister's head could fit through.  But all's well that ends well!

Back to school
There was something so soothing about doing the embroidery.  First of all, the project was so portable!  We have been enjoying being back in our Portland house with a big front porch where we watch the neighbors go by, and it felt pretty idyllic to watch the kids eat ice cream on the porch swing while I sat and embroidered and drank craft beer.  It's also a great thing to do while watching a movie (although you may miss some key visual effects while you're looking at your stitching).  The longer I sew, the further down the path of special details and nice finishes I go--I'm working on being less slapdash and instant-gratification oriented, and this handwork inspiration project was really very enjoyable, and I love the results.

Can you tell we enjoyed our photo shoot today?

Thursday, April 30, 2015

Matching Map Tops

Who says I can only make matching outfits for my daughter and me?


My husband would probably die if my son and I decided to wear these shirts at the same time, but sometimes the fabric I find appeals to both me and Little Sister, and other times, not as often, it appeals to me and The Boy!


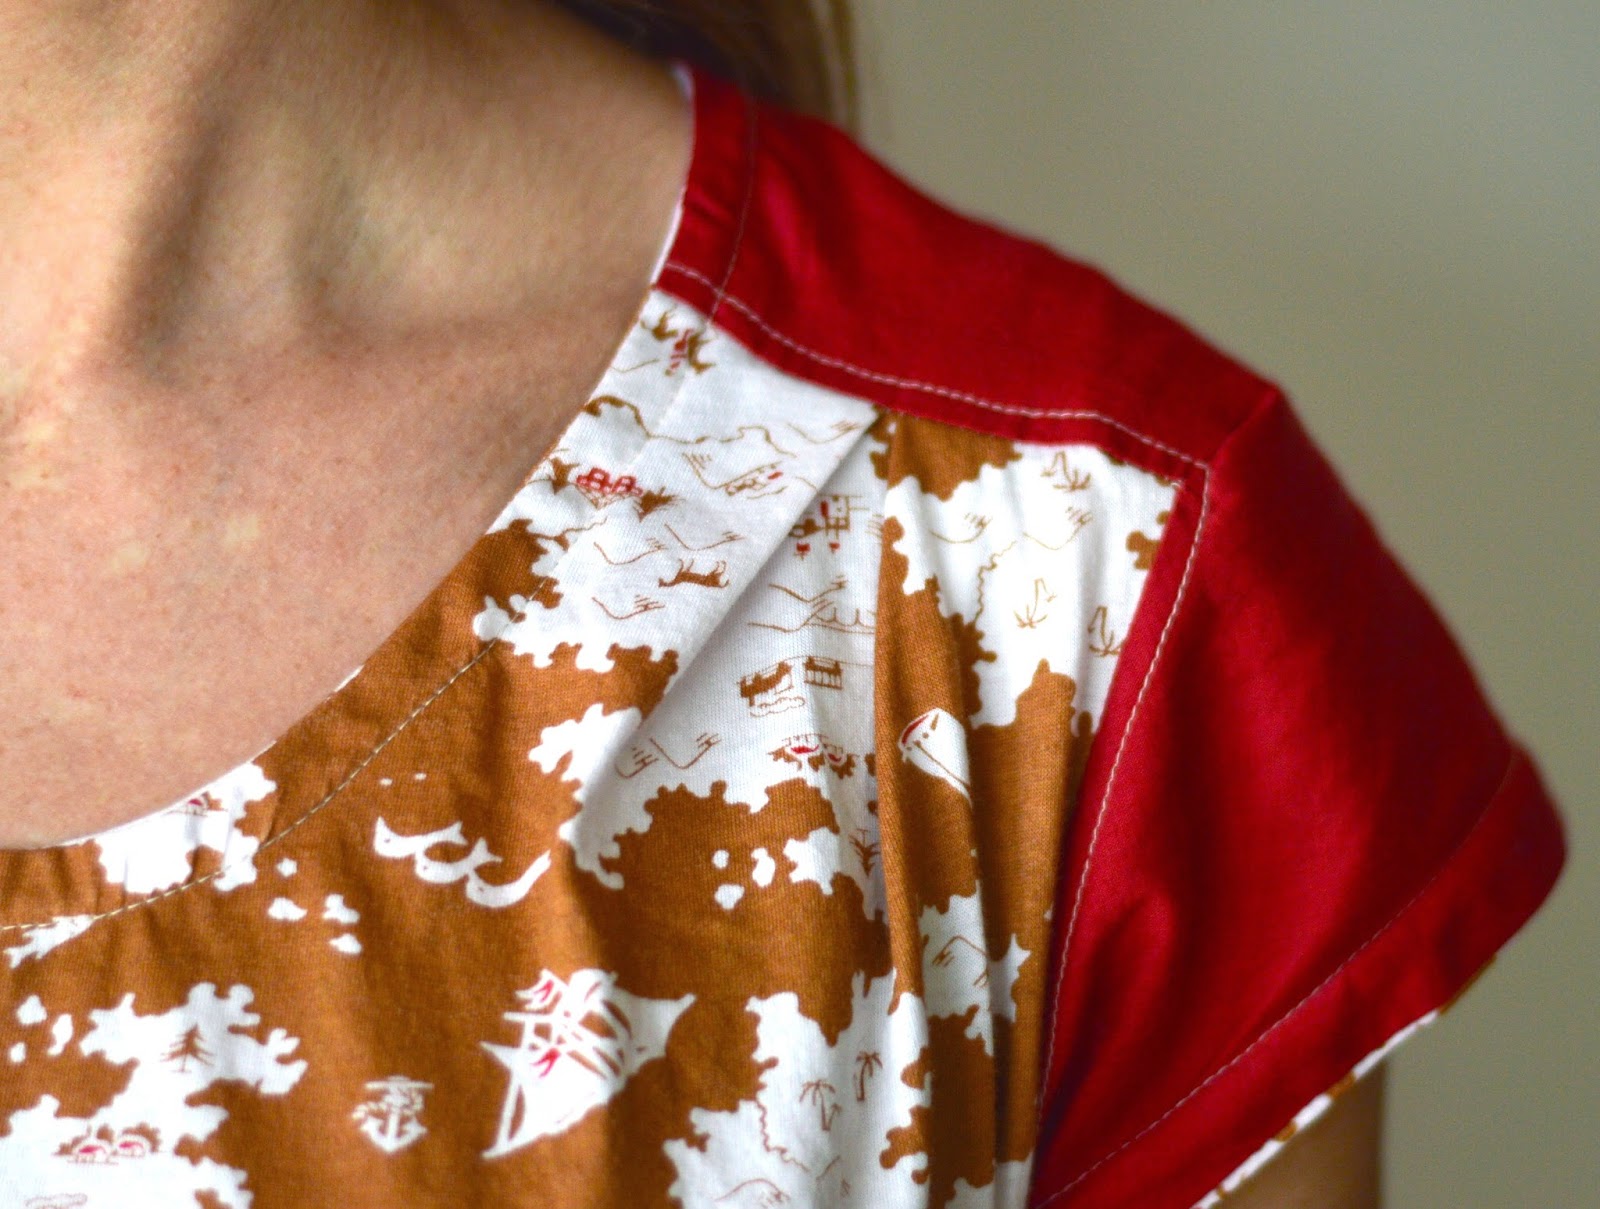
This fabric was another of my 100 yen per meter finds, so I used it to make a Bess Top from Imagine Gnats.  This is the tunic length with the lower neckline.  I sized down from what my measurements said and I'm happy that I did--it turned out figure-flattering without being tight.  The map print on the front is a knit fabric, although not a very stretchy one, and the back is a lightweight woven.


I love being able to use two fabrics on this pattern!  I had a little trouble turning the corner on my shoulder detail (can you see that little pleat at the corner?) but when I made this pattern a second time I followed the directions more closely and it came out just right.


It didn't turn out to be the best day for a photo session but I managed to get a few shots to show you.  The Bess Top is definitely a pattern I can see myself making multiple times!

The Boy's shirt is just a self-drafted tee based on a shirt that fits him well.  The sleeves, pocket, and binding are from an Old Navy shirt of mine that had gotten stained.

This is the temple that's next door to our house.
I make his tops long and narrow, like him.  Gotta keep the top of those pants covered!  Being able to adjust the proportions on a basic tee is definitely a benefit of being a sewing mom.


So this post is probably the only time you'll see us both wearing our shirts, but it's enough for me to know that we have them!

Sunday, April 19, 2015

Lucky #7 Pajamas

I haven't been able to get photos of most of my recent sewing projects other than the quick selfies I've been posting to Instagram, so I was looking through my iPhoto albums to see what projects I hadn't managed to blog about yet.


I made this pair of pajamas for The Boy's 7th birthday, which was in January.  Every time I saw him wearing the pajamas I made for him for his 6th birthday, I was cringing at his bare ankles and belly hanging out, promising myself I would get him some new pj's sewn up.  As a matter of fact, I don't think I ever blogged about those old pajamas either!  I just dug around and found some pics of one of the pairs I made but have no photo evidence of the cute moose pj's.  At least I can show you the Rebel Alliance pj's I made from a clearance Target men's t-shirt and scraps of black and neon green tees from my upcycling pile:

So, I may have been cutting it close on size even when they were new...

I'm experimenting with putting in a jump so that more posts appear on my main page--read the rest after you click, and let me know if you love/hate having a jump!

Sunday, February 8, 2015

Convertible Messenger Bag

Sometimes, I really impress myself.  I am not the first person to think of this, but that doesn't make it any less cool--for The Boy's birthday, I made him a messenger bag that converts to a backpack.


This idea was born because I am sick of toting my own stuff plus the two kids' stuff all over Tokyo.  But when you are using trains as your main mode of transportation, if you think you might want a snack or a drink or an activity at some point during the day, you've got to carry it with you--no stashing it in the back seat of the car for when you need it!  

Now, The Boy can carry his own stuff, and when he wants a snack, he can get it himself.  When he wants to read his book on the train, he can pull it out.  Fostering independence!  And freeing myself from some of the constant barrage of questions while we are on an outing..."Mom, can I have a snack? Mom, where's my book?  Mom, did you bring my sunglasses?"  

The best part of this bag though, in my opinion, is that it can be carried as a traditional cross-body messenger bag...

Oops--ignore the safety pins, I hadn't installed the sliders for the adjustible length on the strap yet!

OR you can slip the straps towards the back and carry it as a backpack!


I had the idea, so did a search to try and figure out how to make this work, and saw lots of good ideas online.  None were exactly like what I ended up doing, which was to add fabric loops with D rings at the bottom and top edges of the back of the bag, then attaching one long strap with sliders on both ends to adjust the length depending on how the bag is being carried (this tutorial was a good resource for the adjustable strap, but I made mine adjustable on both ends).  I looked at this tutorial from Hillmade to figure out my dimensions (I made mine slightly bigger based on the repeat of my fabric)--it worked well for inserting the loops for the D-rings since it had a separate strip for the bottom and sides of the bag, as compared to the patterns that use one front panel and one back panel and then box the corners.  But I did make the flap a separate piece, both to conserve my printed fabric and also to create a seam for inserting the loops for the top D-rings.

I also put lots of pockets in--two under the messenger flap, one big one on the inside, and a small zipper pocket on the flap (first time I've done a zipper pocket--thanks, Vanilla Joy, for the great tutorial!)


I also added reflective tape as a decorative and safety element on the front flap.


The one thing I think I will need to add now that I've seen the bag in action is some sort of chest strap for when it's being used as a backpack.  Because the straps are set fairly wide apart to allow it to be both types of bag, it can have a tendency to slip off The Boy's shoulders. 

I'm now planning to make another one of these, for myself this time!  I love this concept.  If you'd like to see it as a tutorial, let me know and I can be more deliberate with my steps next time around!

Oh, and I'm linked up with this week's Sew and Show over at Straight Grain!  I'm #55, if you feel like clicking through :)


Thursday, October 23, 2014

Halloween 2014: Peter Pan and Tinkerbell

I don't know how it happened, but the kids came up with the idea all on their own to be Peter Pan and Tinkerbell for Halloween this year!  I thought our themed costume days were over once they started having their own opinions, but somehow it worked out!  I went and bought fabric before they could change their minds, because at our house once Mom has bought the fabric, there is no more costume indecision.


Thanks to the wonders of Nippori Fabric Town, I was able to get the fabrics I needed for Tinkerbell's costume (dress plus winter fairy coat and trim) for about $4.  I had to spend a little more to get the great french terry I used for Peter Pan's pants and hat (I spent $6), and I bought a pre-made green mens' shirt for his tunic.


I'll do a quick run-down of the Peter Pan costume, since it was pretty straightforward, then I will share a little more about how I made the Tinkerbell dress and winter gear.  Isn't it nice that Tinkerbell has some stories where she gets bundled up, so I can make my daughter put on a coat and she'll still be in costume?

Winter fairy photobombed by Peter Pan
Like I said, the Peter Pan tunic is just a men's t-shirt.  I cut jagged lines along the sleeves and hem, and cut off the neck binding and cut a small slit straight down to mimic Peter Pan's collar.  That made the neckline pretty wide, so after The Boy tried it on I added a couple of angled seams from the neckline to the top of the shoulder to make the neck opening smaller.  Done!


I used my modified Hosh Pants pattern that I have used previously to make pajama pants for these Peter Pan Pants (I like to call them the Peter Pants).  I wanted them to be slim, since Peter wears leggings, but I wanted The Boy to possibly get use out of them as sweats after Halloween, so I didn't go full legging.

Flying
He had a belt from last year's Luke Skywalker costume that worked well--he can carry his Pixie Dust in there!  For the hat I mostly followed this tutorial, and I used this one for the boots using leftover fabric from my denim challenge outfit from Project Run and Play.


I had fun with Tinkerbell's dress.  I cobbled together ideas from a few different tutorials to come up with a shirred back tank dress with a double square circle skirt, and I think it worked great!

Very twirly

If you want to do something similar, I recommend adapting this free shirred back sundress bodice tutorial and adding this circle skirt (another free tutorial) to it--the points from the double square are perfect for mimicking Tinkerbell's leaves, I think!

Shirred back
I was only planning to buy a meter of fabric, and when the woman cut it for me it turned out there was a little over 1.5 meters on the bolt left, so she just gave me all of it for the price of one meter--which was only $1! (well, 100 yen).  And I was lucky she did, because I used almost all of it once I decided to make the double skirt.  Since I used a woven (a silky satiny stuff, which was not as difficult to work with as I feared it might be), I hemmed the skirt layers, which wasn't a big deal time wise.  I lined the bodice since the fabric was pretty thin, and I also added a layer of thin interfacing to the front of the bodice.

If I were Tinkerbell though, I might be a little chilly walking around in October, so I thought I'd try to make a winter fairy jacket.  I was so excited to find this quilted fabric (it's the same on the front and the back) for only $4 a meter!  And I only used half of it making this cute little coat!


I self-drafted the pattern using a t-shirt pattern.  I did french seams on the sides and shoulders since there's no lining; the fabric is double-sided so I wanted the inside to look nice and finished and also lay flat and feel comfortable.

The front and back dip down a bit to mimic the jagged leaf hem on Tinkerbell's coat.
The white crushed velvet trim came in a wide ribbon, so I just attached it like bias tape all the way around and as cuffs on the sleeves.  And I used a magnetic clasp to hold it closed!  The green quilted fabric is silky and has pin dots on it, and I've told Little Sister that she can use it as a jacket even after Halloween--I'm pretty proud of how it turned out!


I couldn't find any good green knit fabric to make leggings for her (or a shirt for Peter Pan for that matter), so I bought a pack of Rit dye in Kelly green and dyed a pair of white leggings out of our drawer for the winter wear.  Amazingly, they came out exactly the same color as the dress!  I would have liked them to be lighter, but at least they don't clash terribly!  I added some more of the velvet ribbon at the hem.


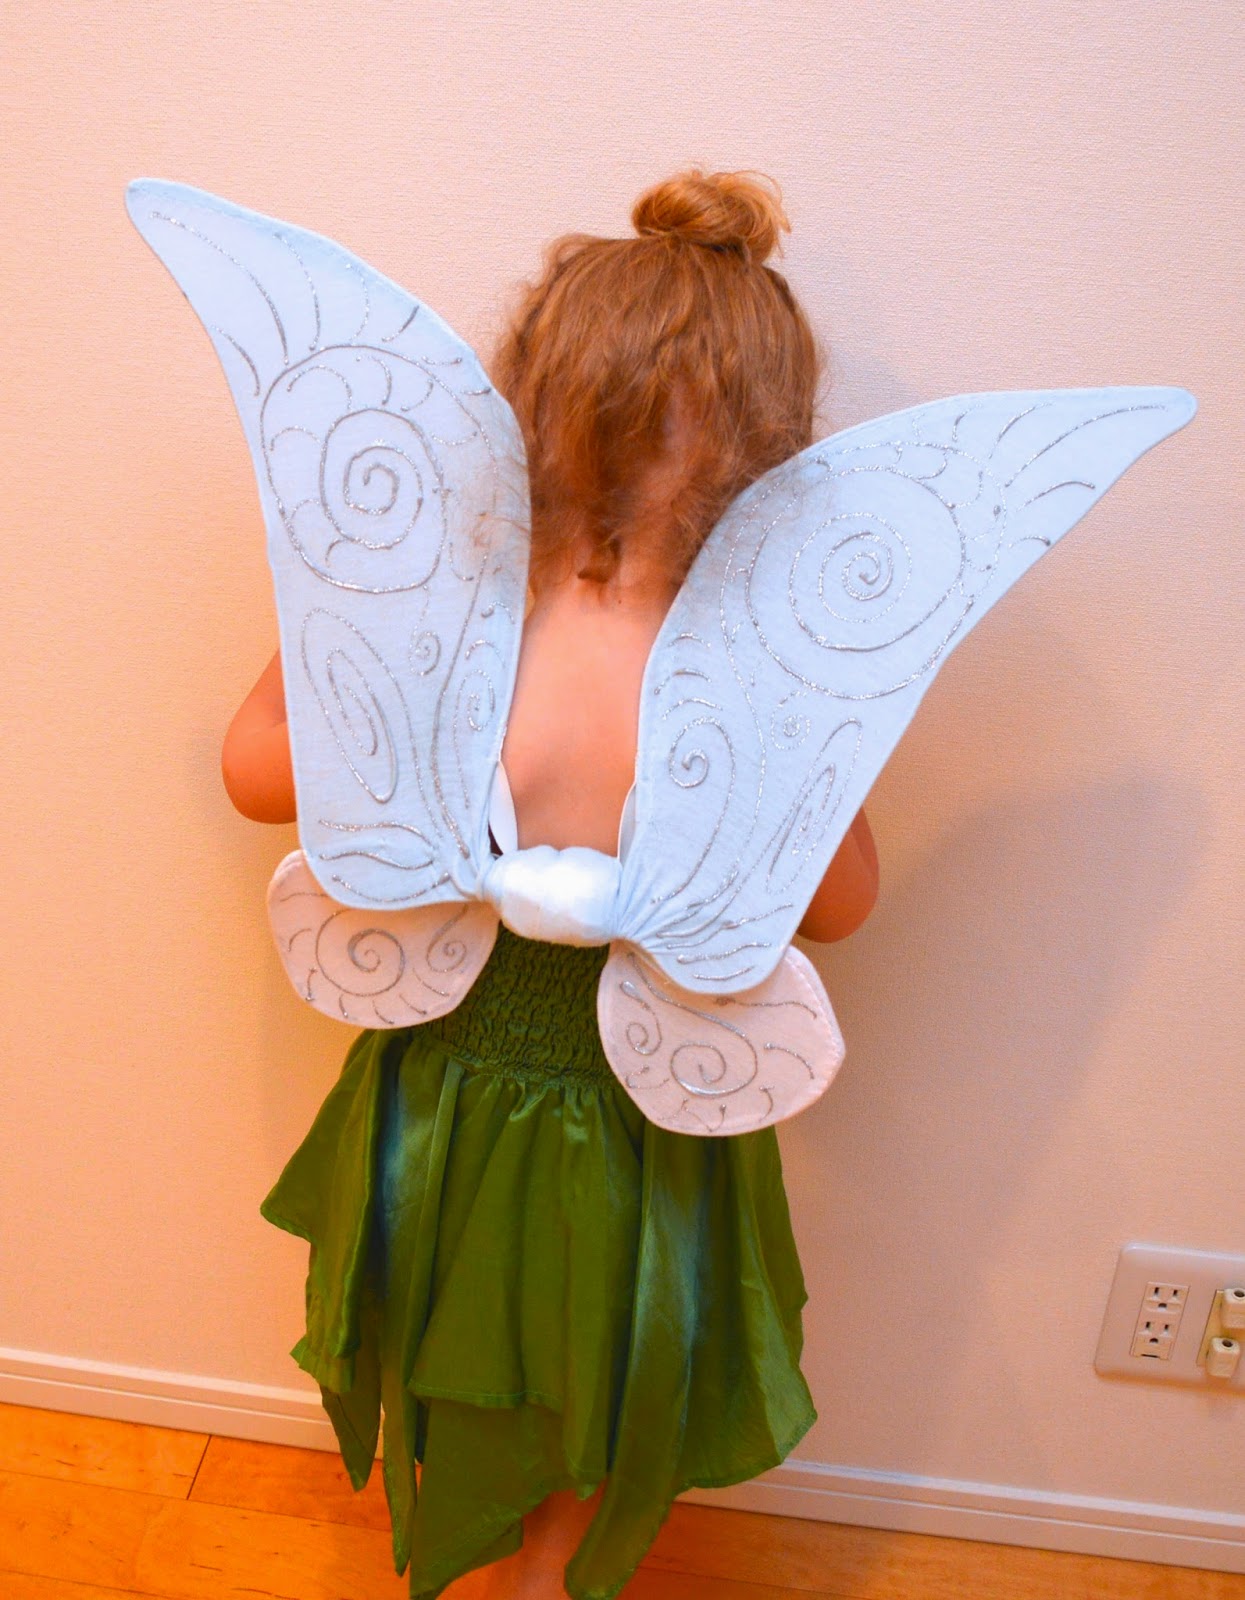
The dye match was even more amazing because I actually bought the dye for turning a white shirt green for Peter Pan.  But I couldn't read the fabric content of the white tee I bought, and while the leggings came out very green, the shirt came out a soft baby blue.  Not great for Peter Pan, but it was perfect for Tinkerbell's wings!  I had planned to buy the fairy wings but couldn't find any (except for fancy expensive ones for adult costumes), so I followed this tutorial to make our own, adapting the shape for Tinkerbell.  And I didn't have any white tights, so I improvised with 100 yen store t-shirts--both the one I accidentally dyed light blue and a plain white one.


And finally, I couldn't forget Tinkerbell's shoes!  Luckily these little white fabric shoes are easy to find in Japan--they are used as indoor shoes for little kids at school usually.  But they were a great blank canvas for fabric paint and a pom-pom.


If you've stuck with me this far, you get a reward--the silly pictures we took of these costumes! I would have loved to get out in the park for some fun outdoorsy shots, but it's been rainy and they get to wear the costumes to school tomorrow and I was afraid they'll get ruined before I got a chance to get good photos if I didn't just go for it.  These guys were so funny anyway.

Sneakerbell


Telling secrets

Toot noises: always funny.
Oh!  And we will be visiting Tokyo's unique Disney theme park, Disney Sea, on the day before Halloween!  So the kids will be able to wear their costumes to the park and be a part of the Disney Halloween fun.