Showing posts with label games. Show all posts

Wednesday, April 2, 2014

The DIY Frozen Birthday

Honestly, this year with our preparations to move overseas, I was so ready to go buy licensed merchandise for a birthday party and call it a day.  HOWEVER, my daughter, like every other girl in the known universe, is obsessed with Frozen, and therefore there is no merchandise available (at regular retail prices, that is--if you want to pay quadruple markup on Amazon, you have lots of options!).  Luckily, Frozen is a pretty good theme to DIY--even in March, when all of the snowflakes and winter scenes have long been absent from the clearance shelves.

How's that for repurposing Rapunzel's wig from Halloween?


Here are the elements we used to put together a really fun party--I'll go through them for inspiration for anyone else out there trying to put something like this together without spending an arm and a leg or too many hours of their lives!

I almost forgot to include the invitation--I was so proud of it!  I was able to put it together using PicMonkey--I love this photo-editing site so much.  Then I had them printed at Costco (5x7's are something like 30 cents each) and put them in our leftover Christmas card envelopes.  For the ice castle background I used a free download of desktop wallpaper that I found online.


I got some hilarious feedback on the invitation--some girls displayed them in their rooms, some sisters were even fighting over who got to keep it!  Little Sister has hers pinned to the wall by her bed.


Decor:  Primarily, we used snowflakes.  The kids cut out some, and I cut out lots (what can I say; I'm faster!  And I actually love cutting out snowflakes.)


We used them to decorate our main snack table/focal point:


Background is a light blue plastic dollar tree tablecloth.  It was really see-through, but once the snowflakes were on it wasn't too distracting.  I also cut a piece off that was just the right size to cover our kitchen table, where we put the grown up drinks.

Some of the snowflakes were decorated with free printable Frozen images (free printable party kit available for download from Homeketeers)--I printed them on computer paper and the kids glued them down.  We used printables from this kit for other elements of the party too.


We added some tulle (an 8-yard roll from Dollar Tree, I only used a little) and more snowflakes to our dining room light, and strung some snowflakes in the window of our front door too, to add to the atmosphere:

I thought I'd find more uses for the tulle, but this was about it.


Gift Bags:  We also used snowflakes to turn our plain colored party bags (10-pack from Dollar Tree) into Frozen theme bags--Snowflake + picture of a character (or two) + name I printed out from the computer.

Carrots = Olaf's nose.  Ice cream is frozen, so that works too, right?

Our gift bags included ice-cream shaped bubbles (3/$1 at Dollar Tree), a carrot straw (5/$1 at Dollar Tree--easter seasonal stuff, or a snowman's nose?  You decide.), some glittery snowflake stickers ($2 for 30 stickers on Amazon, each kid got 6 stickers, so 40 cents per kid), a little tiara (59 cents at Party City) and a sucker that reminded me of an icicle (3/$1 at Party City, we attached the Frozen tag). The boys got a sparkly pencil (10/$1 at Dollar Tree) with a Frozen label instead of the tiara.  Oh, I also didn't buy enough of the ice cream bubbles and then they ran out, so I supplemented with bubbles in a carrot-shaped bottle--inspired by Olaf's nose.
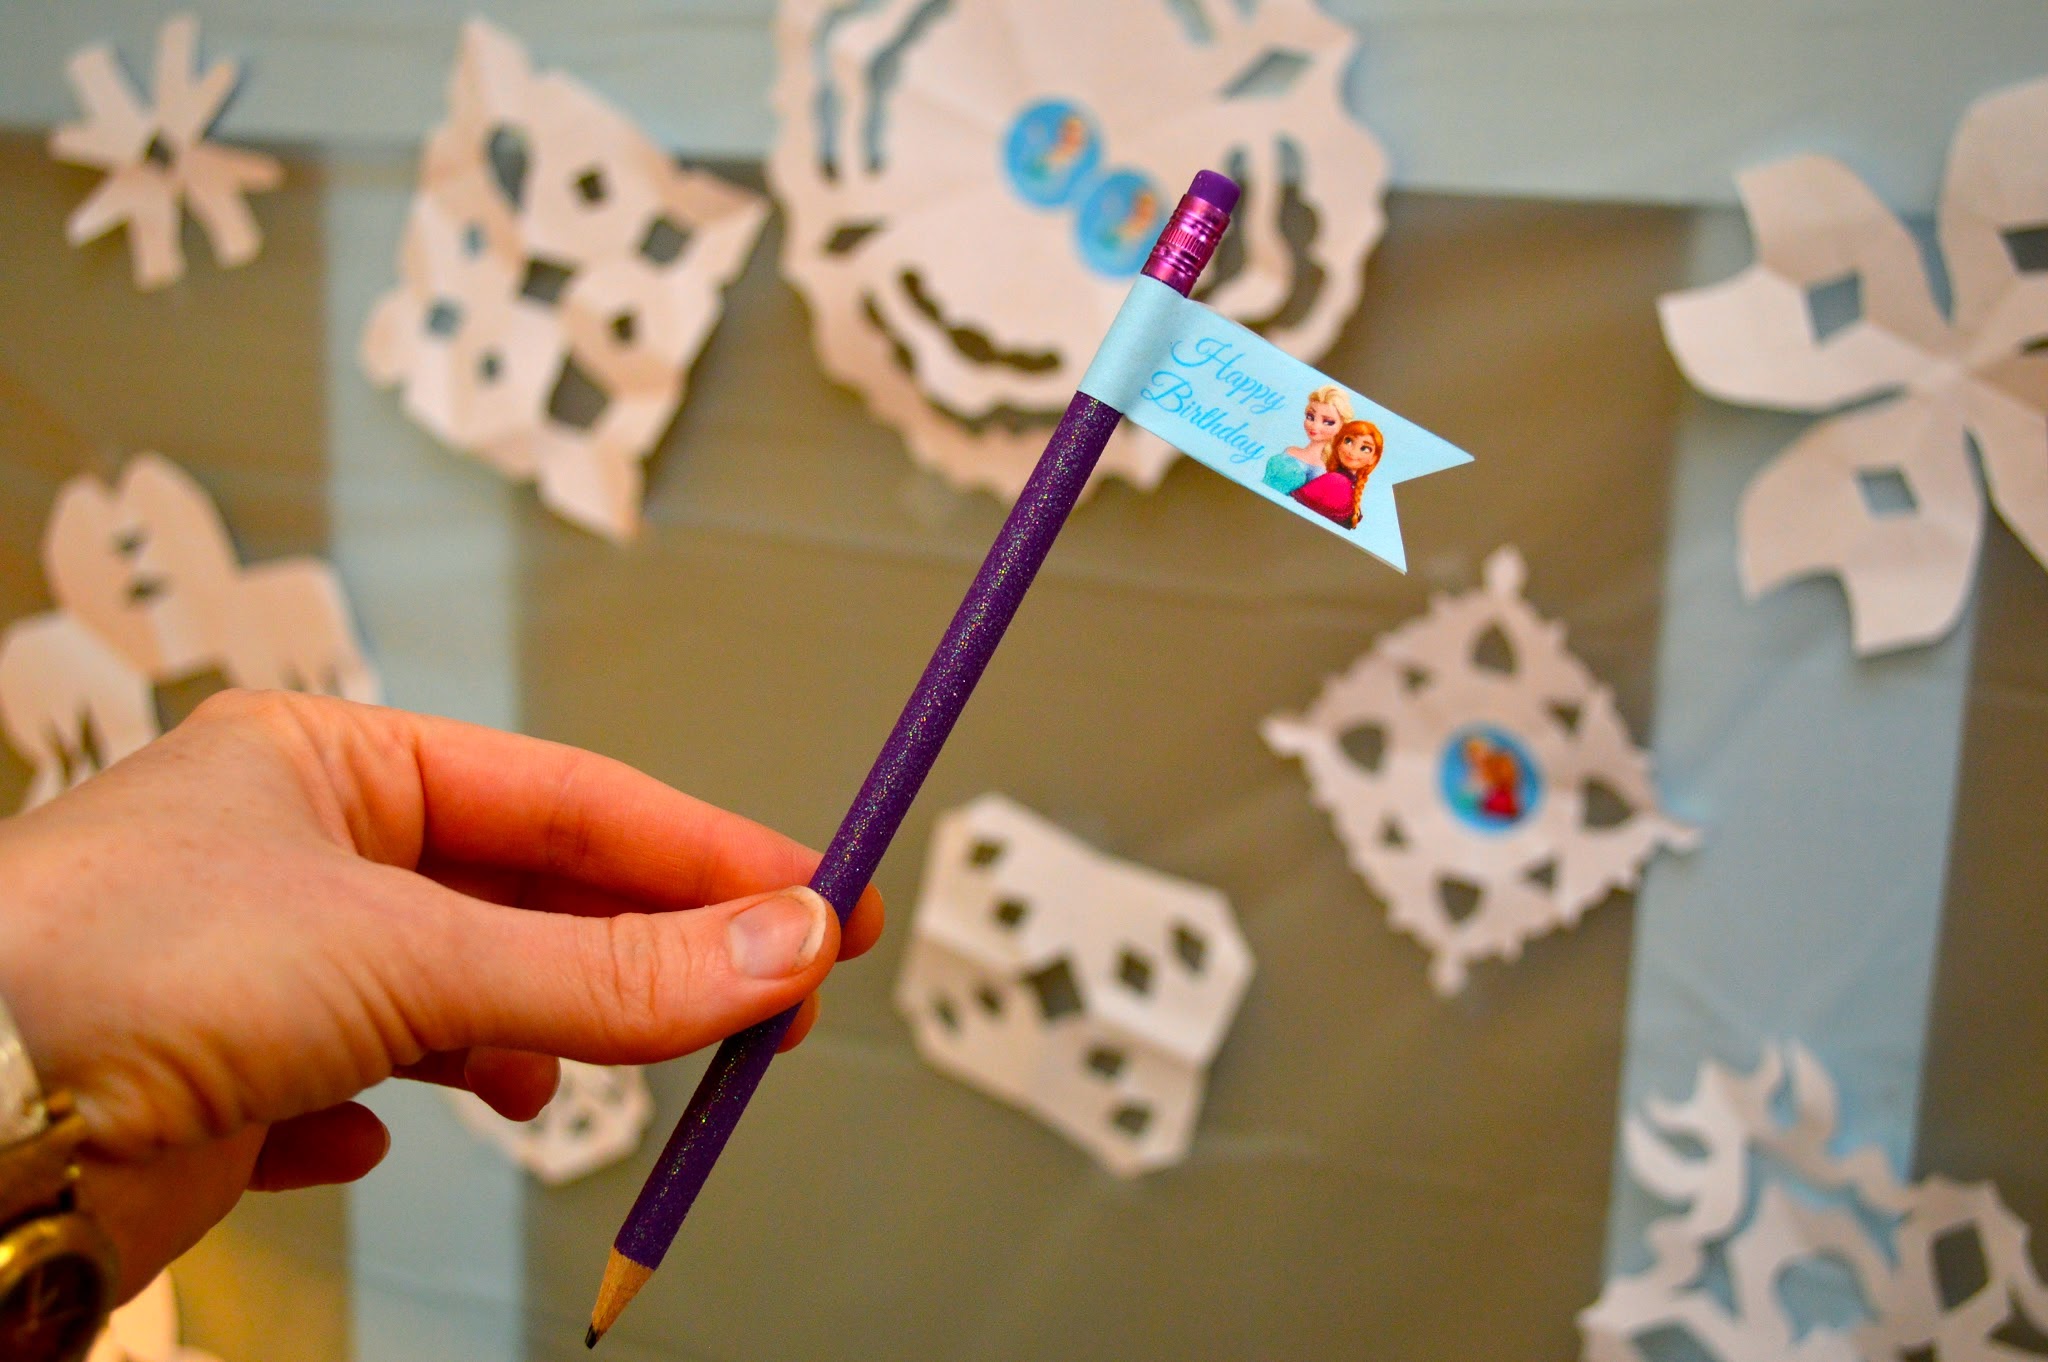
Sparkly pencil with printable straw flag

Prizes for the games (all from Dollar Tree)

Food:  The main course was an ice cream cake from Baskin Robbins:


The birthday girl got to sample flavors and she chose chocolate chip mint with chocolate cake, which was yummy.  I was totally impressed with their decorations!  We provided the snowflake sprinkles and the paper Elsa and Anna, which I printed and cut from this website.  The assembly was pretty painstaking--I don't know that I would have done it in hindsight, but they did turn out cool and they were dramatic on the cake.  I stood them on bamboo skewers--make sure not to put them too close to the candle!

For our other snacks, we had


Snowman Noses (baby carrots) and Snowflake Apples (sliced into circles then cut with a cookie cutter--this was the one snack that was more labor-intensive than it should have been, but they were a big hit).


Reindeer Chow (some sort of trail-mixy stuff from Costco) and Icicle Sticks (pretzel sticks coated in white chocolate bark)

And Snowball Snacks (Pirate's Booty)

Didn't anyone ever tell us not to eat yellow snow?

We labeled the water bottles "Melted Ice" and our juice boxes were "Arendelle Punch."  I used the free printable straw tags from this free Frozen Printable Party Pack and wrote the kids' names on them to keep boxes from getting mixed up.

I made labels for all of the foods using images I found online--the kids got a kick out of looking at all the pictures.

And finally, our activities:

I printed out a bunch of Frozen coloring pages for the kids to do as everyone was arriving--the girls were totally into it.  Don't know how that would have gone over at a boy party, but MY boy was into it.  At least the pictures of Olaf.  And I don't know what I was thinking printing out equal numbers of both Anna and Elsa--I had to print extra Elsas twice to keep the peace.  Coloring happened again at the end of the party as people were leaving.


We played Pin the Nose on Olaf (pretty self-explanatory):


an Icecube balancing game (each kid had a partner and a spoon, I gave one partner an ice cube and they had to walk it to their partner, transfer it, and the partner came back the other way.)


I liked it, and it was really cute to see the concentration on the kids' faces, but it wasn't the kid favorite.  Maybe with an outdoor party this would have worked better, but it was really rainy and soggy here that day.

And Cold Snowball, our version of Hot Potato.

Down to the final four

What worked out really well was that we were using the Frozen soundtrack for the music (obviously), and as kids got "out" of the game, they joined a sing/dance-along to the music while the other kids finished the game.  We ended up adding another round of JUST sing and dance-along at the end.


I also had a bunch of white balloons that I was planning to blow up to play "keep your snowball off the ground" in the backyard, but it was too muddy.  Particularly when the guest of honor had this outfit to keep clean:

Her auntie bought it before Christmas!  Lucky thing, since they've been sold out for months I guess.  Pretty fantastic birthday present.

We had so much fun, and Little Sister was totally delighted when the girls called her Elsa when she arrived at school this week.  None of the preparation I did felt like too much to me--it was all pretty simple and affordable, and I was having fun doing it, and the kids enjoyed it, so it was a win.  I know they would have enjoyed themselves even without the food labels and theme activities etc, but I get a kick out of coming up with that stuff in a manageable way, so we went for it.


Tuesday, February 26, 2013

5th Birthday: The Racecar Party

My oldest turned five.  FIVE!  That is full-on big kid territory.  As I've done a few birthday parties now, I am learning some things about myself as it relates to birthday party preparations.

1.  I am cheap
2.  I am lazy
3.  I am overwhelmed by the party setups I see on Pinterest.

While the full-on theme parties look amazing, I can't help but wonder how much the actual kids (both the birthday kid and the party-goers) appreciate all the work and expense goes into a party like that.  I'm sure the adults are all duly impressed, but...is the party for them, or for the kids?   I feel like the kids have just as much fun at a party that flows well and is well-organized, regardless of the tablescape.  I know for some people, decorating for the party is really fun and they love figuring out all of the little details, but for me...well, I think those parties look so fabulous in pictures, but when I start thinking about what is actually involved and what I would have to do to create it, I have to stop because if I got into it I'm pretty sure my head would explode.

Here are a few things that I have done to keep myself sane with the party prep:
  • Keep the decorations to one main party area.  In my case, this is the living/dining room, the first area you see when you enter the house.  Even though the kids will spend time in the kitchen, basement, and bathroom, I don't bother decorating those.  I subscribe to this same theory with my holiday decorating.
Our main party area

This became the food table.  Beverages were in the kitchen.
  • Reuse party decorations.  We have had the same basic Happy Birthday banner for years now, and have been slowly making our way through the same two colors of streamers (red and purple) party after party.  I also supplement the printed Happy Birthday plates/cups/napkins with leftover solid plates/cups/napkins from parties gone by.
  • Maximize Dollar Tree purchases, especially if they happen to have party stuff that matches your theme.  Unfortunately for me, I didn't buy up racecar party stuff when they had it a couple of months ago, because I was worried that my guy would change his mind before the invitations went out, and when I went back for it there were only a couple of racecar items left, but the few posters and cellophane goody bags I was able to get are nicely supplemented by plain colored plates and cups.  Racecar stuff for the goody bag is pretty easy to come by--I was able to fill the racecar-printed goody bags for less than $1 each--Hot Wheels stickers, a die-cast racecar, a plastic top (not racecar related), a Tootsie Roll Pop, and a pack of Sixlets.  
Goody bag contents--cars were in a 4-pk at dollar store, stickers were from a book of 300 Hot Wheels stickers so a $1 book was cut into favors for all the kids.  The bags were a Dollar Tree 24-pack or something like that.  Suckers were a 10-pack, and the Sixlets (reminded me of traffic lights) came in a big bag for $1, plenty for everybody.
  • Note--Dollar Tree's return policy is exchange only.  I SHOULD have just bought the dang racecar stuff, then traded it in for something else if the boy changed his mind.  Now that the girl tells me she wants a Mermaid party when she turns 3 in two months, I have been buying mermaid/underwater stuff there when I see it and holding on to the receipt so that I can return it if necessary later.
  • Have the kids make decorations and games.  No, they will not look like a professional party planner decorated your house, but the kids love to feel involved and giving them some poster paper and markers and letting them go at it gets them out of your hair for a while.  
He didn't want to color anything in.

Pin the car on the racetrack--the envelope to the left has little paper racecars in it. The boy colored each one a different color and wrote a party-goer's name on it, so when they play the game they know which car belonged to each kid.
  • I have also had the kids decorate brown paper bags for the goody bags when I couldn't find cheap ones that fit the theme.  Printing out coloring sheets then cutting out and gluing the images to the bags is an easy way to do it--that also works for wall decor.
  • Have a couple of games that kids can do when they feel like it--we like "Pin the _____ on the _____" (with the blanks filled in to fit your theme--"Pin the racecar on the track", "Pin the owl in the tree,"  etc.)  
The Boy posing by the game after the kids had played it
And of course, the special racecar shirt I appliqued for him

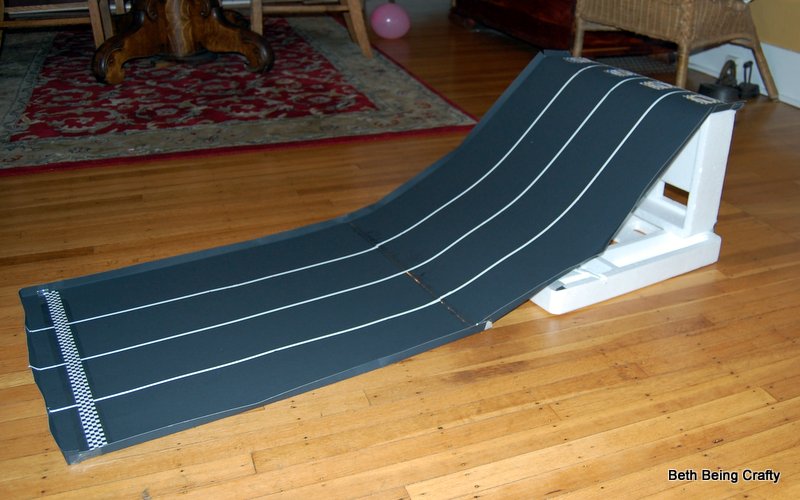
  • For the racecar party we made a ramp for the kids to race cars down--the cars that we put in their goody bags.  Some detail about the ramp:  I made it out of two sheets of black posterboard (Dollar Tree--2/$1), some styrofoam packaging that we hadn't thrown out yet (no room in the garbage--here in Portland we only get pickup every other week so sometimes it's hard to get rid of everything!), and duct tape.  I used whiteout tape to make the lane lines (bought at Dollar Tree), and some printable checkerboard and hot wheels images that I found here (also used it for the cake) to decorate it.  The whole thing cost me $2.  The kids LOVED racing cars down it!  They also found other things to race down the ramp--princess figurines, rubber balls, etc.)

Edges are folded up to keep cars on the ramp (somewhat)


Ooh, pretty.
It was not very sturdy, but I was amazed that it not only held up for the whole party, but is as a matter of fact STILL residing in our basement where it is frequently used by the kids and slept on by the cats, about a month later.

I should have written the kids' names on their racecars--we only had 4 different colors, so it was hard to keep track of which car belonged to whom.

  • We did have one game for kids to play all at once--a Racecar bingo that I found at Dollar Tree. But the kids were so happy just playing with the ramp, the pin-the-racecar poster, and the toys around our house that we never got around to playing the bingo game.  But good to have it in my back pocket.
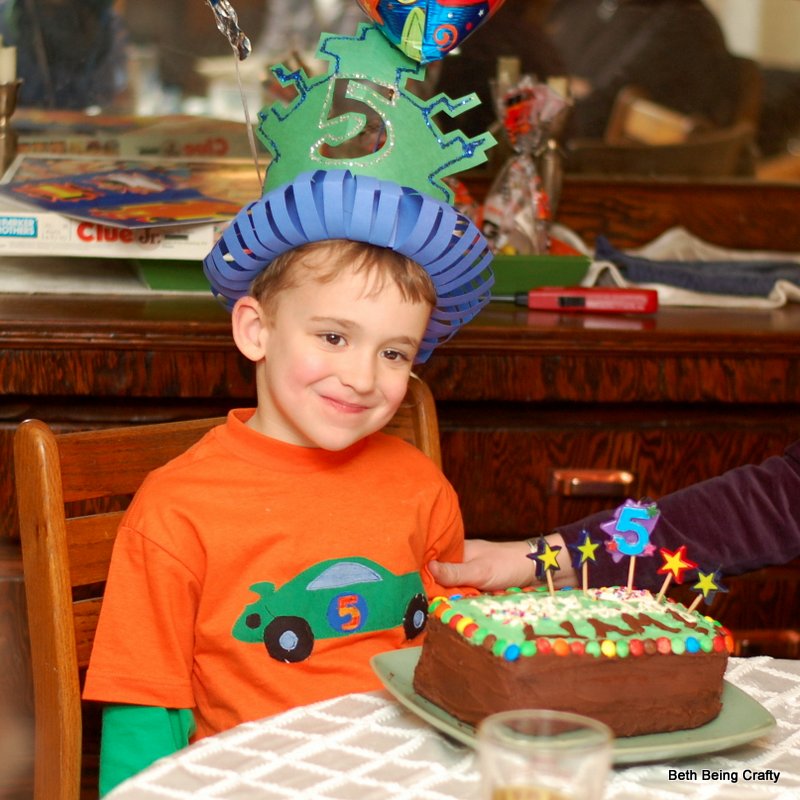
  • The cake.  Well, this is such a personal decision.  I LOVE cake.  Make that, I love GOOD cake. But as I've mentioned, I'm cheap.  For a few years, we ordered beautiful cakes from a fantastic bakery and I loved them.  But they were not cheap.  So then I ordered grocery store cakes with cute decorations that fit our theme, and they were cheap...but they did not taste good.  So I've started making my own cakes.  To me, taste and cost is more important than decoration.  I would love to just do cupcakes, and put little toothpicks with flags in them that fit the theme (this is one way those Pinterest theme parties are helpful to me--free printables!  I would skip flagging the straws, silverware, napkins, etc--but flags for the cupcakes seems a lot easier than decorating cupcakes or a cake.)  But my kids so far have always wanted cakes, not cupcakes.  And cakes are harder to decorate, in my opinion.  So I just look at pictures online to get an idea and try to do something simple.  This year, I made 2 box cakes (doctored up to taste better according to this blog post--I really think it did work to make the cake more rich and from-scratch tasting) in 9x13 pans, and using this fantastic frosting from Smitten Kitchen.
I searched Pinterest for racecar cakes and got several ideas, and this is my version.

I wanted small cars--these were in an 8-pk at Dollar Tree. The trophy also came from there.

The Happy Birthday candles were $2.50 at Walmart. This was a nice purchase because I didn't have to worry about my writing, and they saved room for the racetrack.

A better view of the checkerboard finish line, taped to a couple of toothpicks.
A decorating note--I made my 5 by putting chocolate frosting in a baggie with a big corner cut off, then squeezed out the shape on top of the green frosting, and spread it flat with a knife into the 5 shape that I wanted.  


Then I topped that with crushed chocolate cookies to make the road.  Then, obviously, edged the road and the top of the cake with M&M's.  This cake was HUGE!  We had 8 kids at the party, and probably 14 adults.  Since hardly any adults seem to eat cake these days (with ME being the obvious exception, and a few others), we had over half the cake left over!  This worked out well, because I just cut the leftover into a rectangle, wrapped it in saran wrap and foil, and stuck it in the freezer.  Then a week later I pulled it out, scraped the old racetrack decorations off the top, made a little fresh frosting, and served it again for our family party!  Still tasted great.

Recycled birthday cake

Nobody seemed to mind.

  • Keep the DIY's simple.  I did go a little more all-out with last year's owl party, because it was harder to find inexpensive owl stuff for favors and games at that point, but I made sure to choose projects that would be fairly quick AND fun for me to make.  But I still do prefer to go Dollar Tree when possible, because it's obviously easier and usually cheaper than doing it myself.
  • Invitations:  I love photo invitations.  I have never figured out my Photoshop software, so until I take a class I have found many ways to make do.  My new favorite to make custom photo invitations is www.picmonkey.com.  So awesome.  I have been using them for everything--valentines, party invitations, display cards for my headbands, marketing postcards.  I love it, and it's so user-friendly, and I've yet to upgrade from the free service.  However, I had not yet discovered them when I made The Boy's party invitation, so here's what I did (I could have done ALL of this invitation creation on picmonkey. I'll show you how Little Sister's party invitation turns out so you can see what I do there):
    • Took him to the mall to ride in a "racecar" for 75 cents (I also had to let his sister do a ride, so that's an extra 75 cents) and took photos of him "driving"
    • Emailed the photo to myself so I could access it on my phone
    • Chose a decorative template from RedStamp (a cool free app to make photo e-cards that are also printable when you email it to yourself) but left the text area blank--there wasn't enough room to give all the party info.  The RedStamp part is the bunting, which kind of reminded me of something you'd see at a road race, I guess...
    • Uploaded THAT saved image to Phonto (another free app that has lots of options for adding text to photos), where I could add the translucent banner across the photo
    • Emailed THAT image to myself so that I could add party info text on my home computer (I used Picasa, Google's free photo editing software)--that's the red and blue text at the bottom.
    • Uploaded the finished invitation to Costco, where I had them printed as 5x7's for 39 cents each, and mailed them out using leftover Christmas card envelopes.  Total cost for 10 invitations:  $5.40 plus stamps (including our racecar rides).  
I can't resist the cheesy age-related rhymes!

  • I also made him a "special" breakfast before school on his actual birthday.  I spread nutella on a toaster waffle, laid down a layer of banana slices, then topped it with another toaster waffle and wrote "5" on top with frosting and added candles.  Looked like a cute little breakfast birthday cake for very little effort!


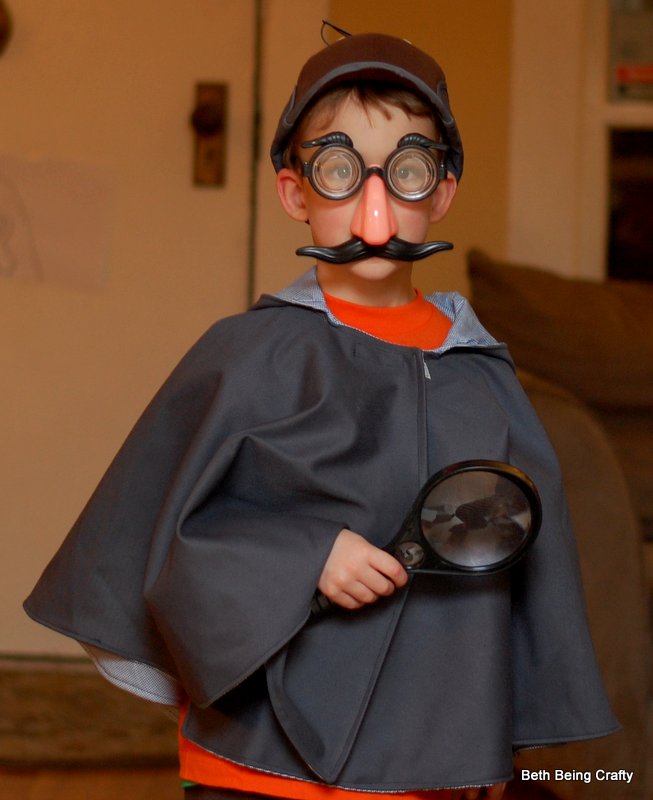
  • I have to make a note about the gift I made for him.  I did a separate post about it, but here's the Sleuth costume:
With accessories
Click here for the full post about the costume.


Finally, we STILL haven't gotten to it yet (BAD!  BAD host!), but I printed out these free Thank You cards for Liam to work on.  I like how they match the bunting on the invitation.

Freebie from 74 Lime Lane

WHEW that ended up being a long post!  Guess that explains why it took me a month to get around to finishing it.  

Monday, December 19, 2011

Photo Memory Card Game

I was trying to think of an age-appropriate game for a two-year-old that I could make myself, and what I landed on was those matching memory cards that can be used in any number of ways.  I decided to personalize the project by using photos of our family and the recipient's family for the matching images, creating a total of 16 cards (4 members in each family X 2 of each photo).

Here we all are!

Supplies you will need for this project:

-Thin cardboard
-16 Photos (2 of each of 8 images)
-Scissors
-Decorative Paper
-Mod Podge (or Elmer's Glue and water)
-Craft Brush
-Electrical Tape

I started with cardboard scraps that I cut from a composition book.  This board was the perfect thickness--easy to cut with scissors, but sturdy enough to hold up to the decoupage and hopefully two-year-old playtime.  Luckily this composition book was filled with graph paper, so I used a few sheets of that to do my measuring.  I figured out the largest squares I could cut out of the front and back cover in order to get sixteen squares (9.5 blocks on the graph paper, if you're curious).  You can make these any size you like--2.5 inches seems about right.  Cereal boxes might be a good board to use too, but any cardboard scraps you have will probably work.


I printed out a set of 4 by 6 photos that I had cropped so that the people's heads were all close to the same size.  Then I cut a window into a sheet of paper that was the same size as my squares.  That way I could line up the face right where I wanted it.

Peekaboo!
I have the hardest time cutting straight, so I fit a blank square into the hole in my "window" once I knew where I wanted it to go:


Then lifted off the piece with the window cut in it so that I could just cut around the remaining square.  I cut both photos at the same time--risky, I know, but it worked out OK.

Where are you?

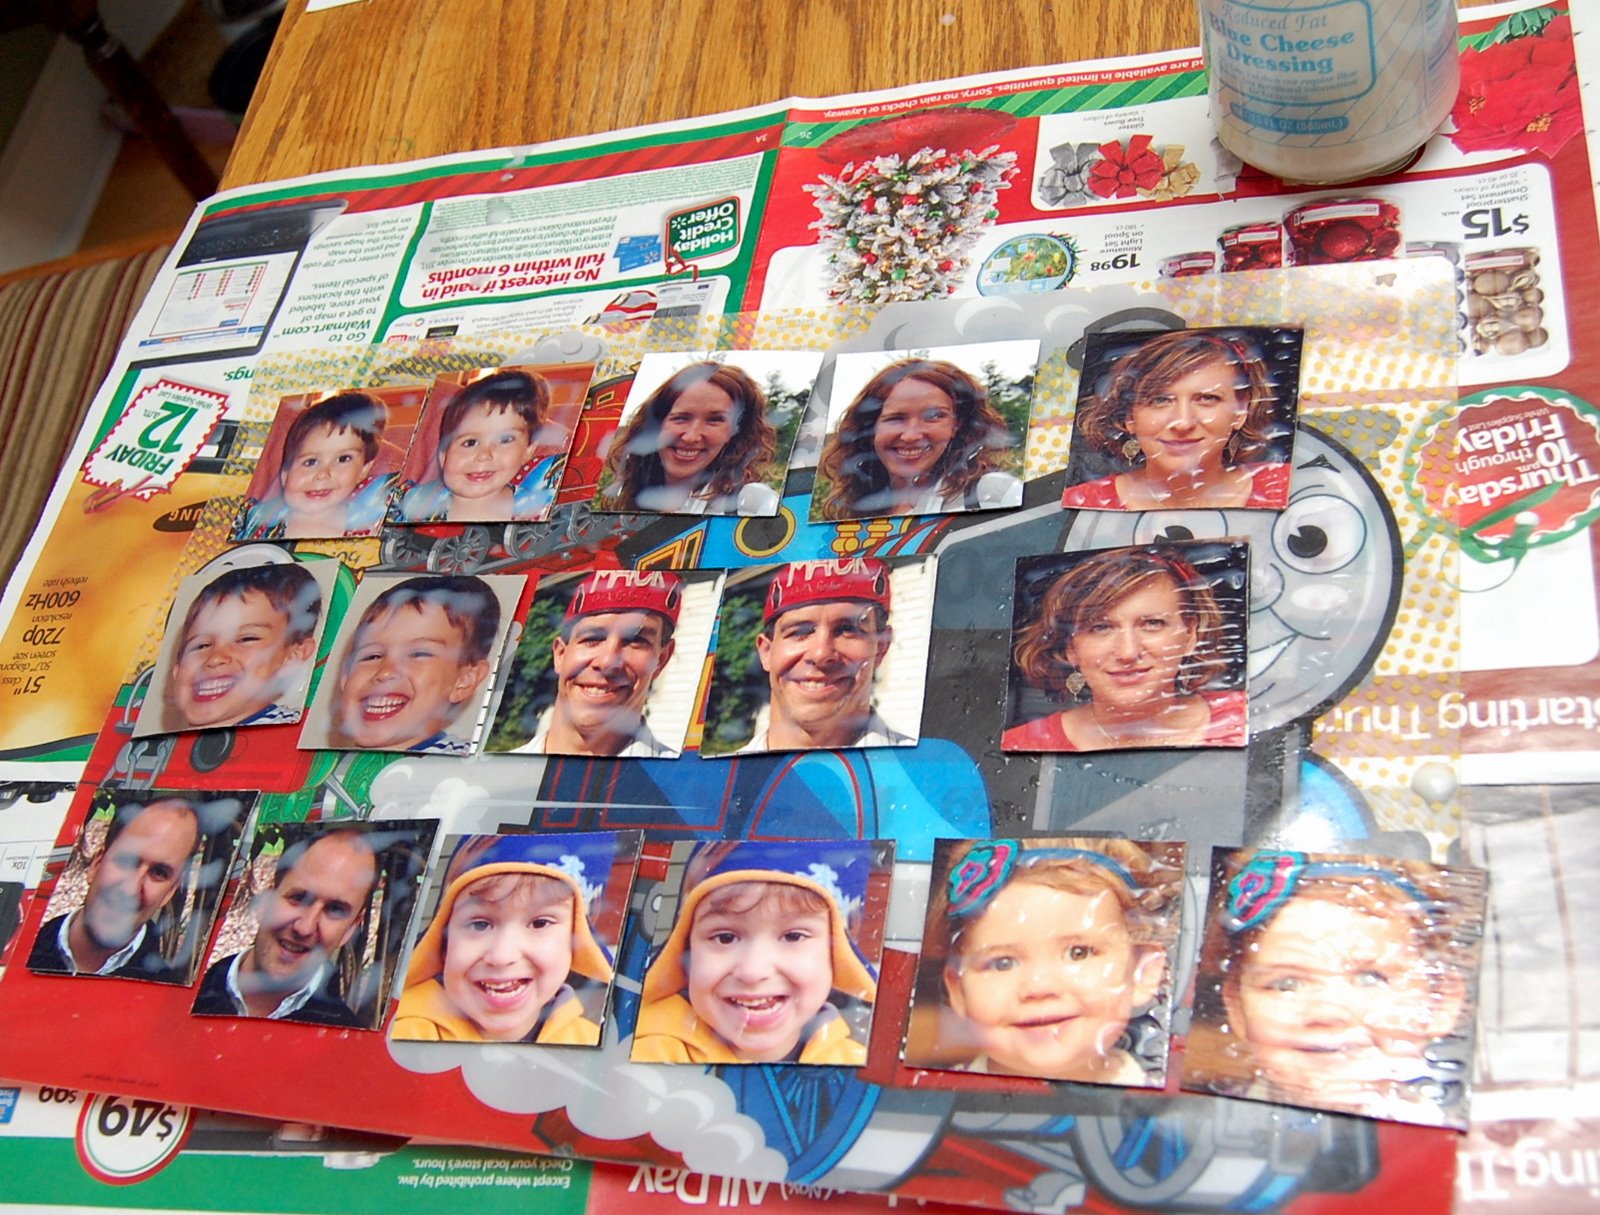
Once I had all the photos cut out, I spread out my cardboard squares (on the totally required Thomas the Tank Engine place mat) and spread a thin layer of homemade Mod Podge on each using a foam craft brush. Really, you only need a thin layer.


Then I laid the photos on top of the squares and applied a layer of mod podge again.  This layer can (and should) be REALLY thin, as it will not only dry more quickly but it will look better on the photos.

Homemade Mod Podge in the jar (no blue cheese dressing required for this project)
I've heard that you're not supposed to decoupage on top of photos, and I understand why (it definitely changes the look, and if you get a bubble then the layer can peel right off in places), but since these were going to spend a lot of time face-down (literally!  ha!)  I thought the extra layer of protection for the photos would be nice.

I had cut out 16 squares of wrapping paper for the back sides.  It is important to choose a relatively small repeating pattern, so that the kiddo can't memorize which card is which by the pattern on the back!  You want the backside to look as uniform as possible.

Once the photos were dry (I did mine before bed then left them to dry overnight), I flipped them and applied the mod podge to the back.  Then I placed my wrapping paper on, and painted on one more thin layer of mod podge.  Once those babies are dry (the wrapping paper dried MUCH more quickly than the photos), you're on to the next step!

Oh, if you get bubbles like what you see below, just carefully lift the paper and pull it to straighten before laying back down again.  I just used my thumb to smooth out the paper after laying it back down.


I originally planned to use a paint pen to decorate the edges, but then I had a genius idea--electrical tape!  It was perfect, because since it's slightly rubbery it was easy to stretch it across so that it grabbed tightly.

I started at a corner and cut one piece the length of the edge.  I chose to have a smaller "frame" on the photo side, so I didn't stick the tape right down the center.  Your choice, just try to keep it uniform so the backs all match.  I pulled the tape tight (see how it's stretched out?) then it was easy to stick down on the back with no overhang.

The recipient
Do the same with the other three sides, trimming particularly carefully on the last piece of tape.


Where did my gold stars go?  I swear they're still there.
In case you don't remember how to play Concentration--

Lay the cards out face down in a square formation.

Player one flips two cards over.  If they match, he keeps the cards and takes another turn.  If they don't, he flips them back over and it's the other player's turn.  Player two does the same thing.

Strategery note:  REMEMBER what cards you flip over, even when they don't match!

No match.
I intended to make a cute drawstring bag to put these in, but I ran out of time, so I just tucked them into a drawstring bag I already had. Fun little gift that travels well!


Posted by Picasa