Showing posts with label womens. Show all posts

Friday, July 15, 2016

Well Hello There! Tank + Skirt = Dress Combo

Let me get this out of the way:  It's been a while.

Clearly, I have not been blogging, but I'm trying not to let that bug me.  So what if I only blog every once in a while now?  Just because I have ignored the blog for the last 5 months or so doesn't mean that I'm not allowed to post when I DO feel like it, right?

It's just that I've been using Instagram (I'm bkcav, if you want to follow me there) to share my sewing lately, which has been more satisfying and engaging--I can immediately see what others are sewing, and there's such a huge active sewing community there.

But THIS project requires a few more words than what fits on an instagram photo, so I thought I'd accompany my instagram pic with an actual blog post to show off what I did here. I'm pretty pleased with myself!

First of all, I ordered a yard of this great rayon challis print with the intention of making a loose tank top (I've been perfecting my pattern for a while now--I started with the free Sorbetto Tank from Colette Patterns, and have tweaked and shifted and adjusted so many times that I'm not sure you can even count it any more!).


I was pleasantly surprised to get a bonus in the mail--I got the end of the bolt, so I got almost 2 yards of it instead of just one, but that meant I was faced with a dilemma--use the extra fabric to make a dress instead of a tank, or make the tank I originally had in mind and see what was left over?  I couldn't really let go of the tank, since that was what I pictured when I saw the fabric and I was anxious to use the tank pattern now that it was just how I wanted it, but I hated to waste the rest!


I have been doing a curved hemline on this tank pattern, but this time I wanted to try a vented side with straight hems on the front and back.  It was a nice break from the curves--I have been using bias tape to get curved hemlines to lay flat, and this time I could just fold, press, and hem the old-fashioned way!


Well, it turned out there was JUST enough to eke out a simple gathered skirt.  I did a rolled hem on my serger to avoid using fabric in the hem, and gave it an elastic waistband, both for ease and again to save fabric.  I was able to make pockets (OF COURSE) from the scraps around the tank top pieces.

I was ALWAYS going to give it pockets.
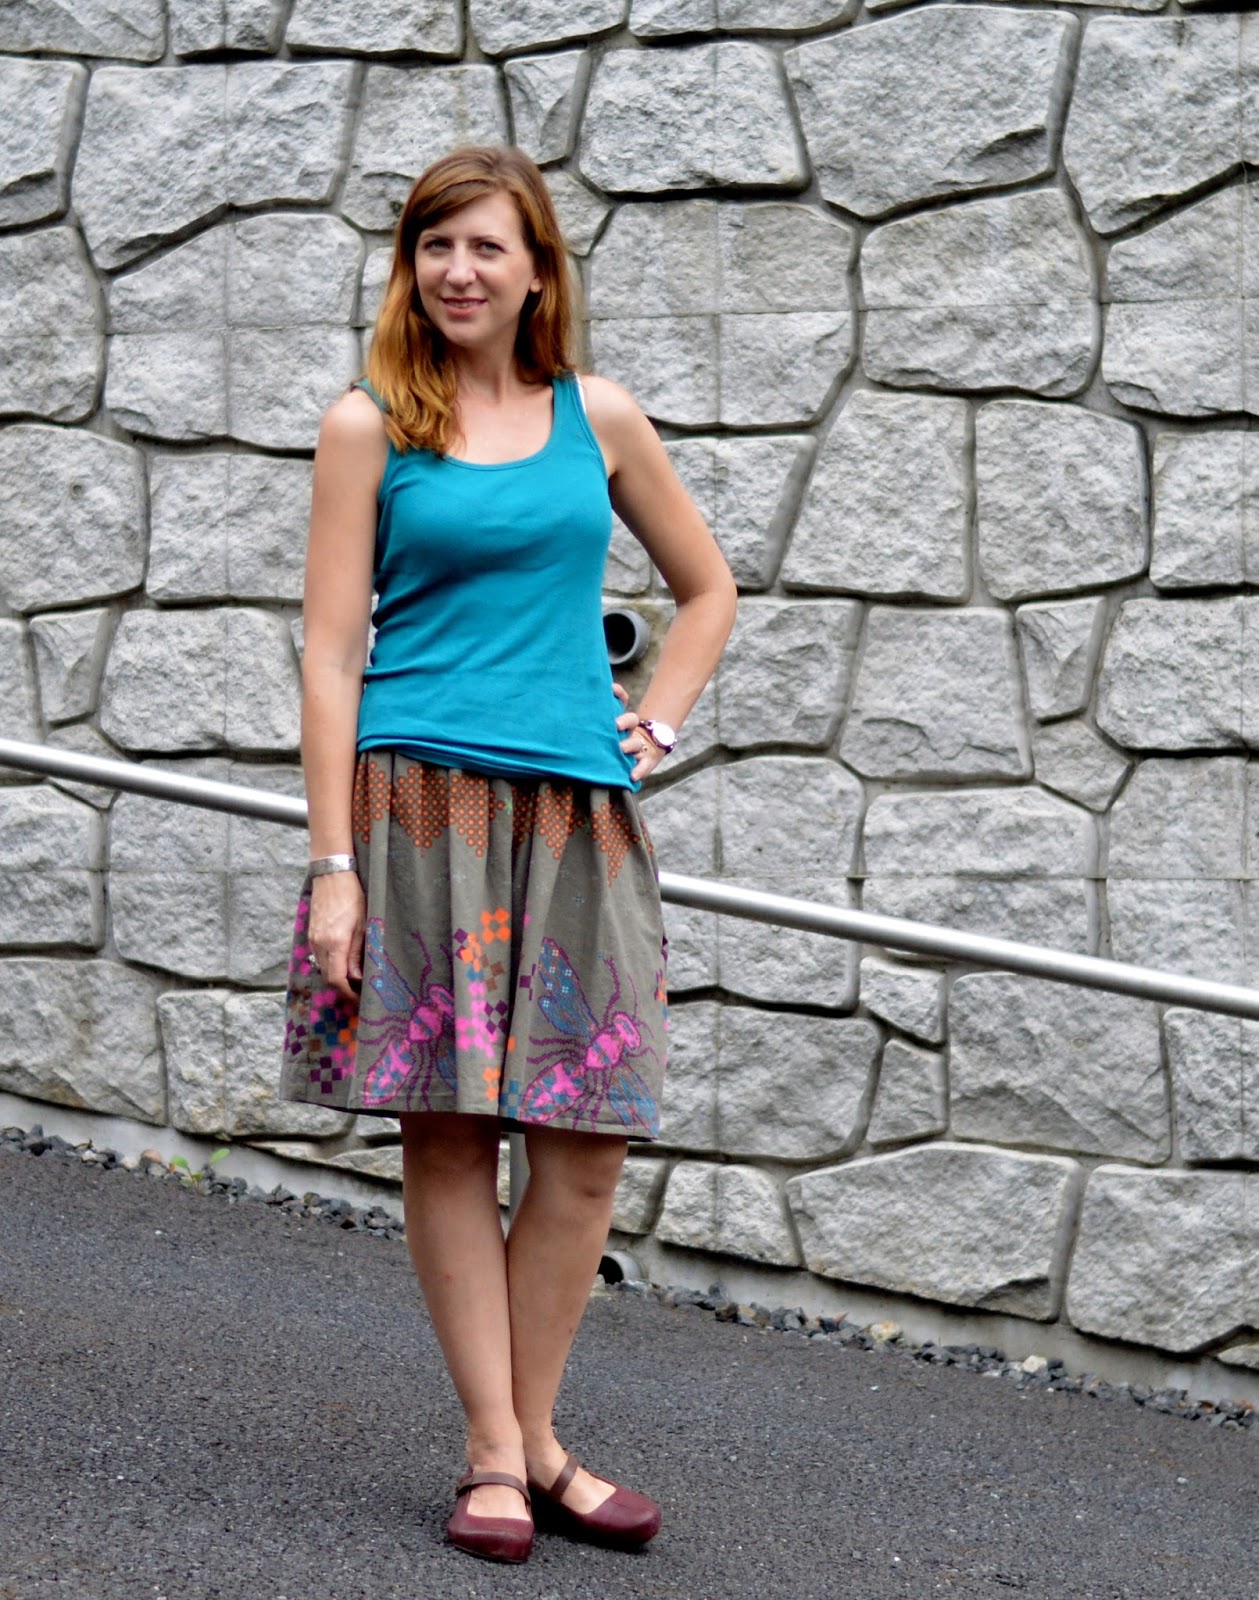
And now for the cool part--when I put the two together, it totally looks like a dress!

The skirt's elastic waistband gives it a belted-dress look.
And not only that, I have dress OPTIONS!  Depending on where I put the waistband, I can also get a dropped-waist more slouchy style:


Honestly, this is less my style, but it's still nice to play around with it!

And I could wear the top out over the skirt as well, giving it a layered look, although one that I probably won't wear.  Maybe with a belt--a sort of peplum idea?

Who can resist this kind of variety?  And I love the way it plays with my Totinette necklace too :)


Anyway, I have been sewing with rayon challis a LOT this summer--it's so nice and soft and drapey, and easy to sew with!  But it definitely wrinkles, which means a lot more ironing that I am used to.  But I think it's worth it, so far!

Tuesday, December 1, 2015

Another Natalie Top!

I decided I wanted to make myself something special for my birthday.  I had a piece of naniIro double gauze Mountain Views fabric that I got for about $6 a yard due to a small printing error, and I had been saving it for myself, so this seemed like just the thing!


I pulled the "it's my birthday" card and got my husband to take a break from work (he works from home) to snap some photos for me--unfortunately my camera battery AND backup battery were both dead!  So iPhone pics it is.

I love how subtle this print is.  From a distance, it looks like a basic off-white...


 but up close there are all of these lovely rolling shapes.


I played on the soft metallics in the print and used an antique gold for the button tabs, as well as the bias trim inside the collar and around the hem.  


I feel like the touches of gold dress it up just a bit, although the fabric and style is definitely casual.  I love the feel of double-gauze--it seems warm somehow in the winter, despite how airy it feels in the summer.  How does it do that?

Well, maybe not warm ENOUGH.
This pattern is the Natalie Top again, from Liola Patterns. I made a silky one before (which was just featured in this month's KnitPicks since the fabric was from Girl Charlee!), and just like that one I lengthened and curved the hem, so I needed the bias tape to finish the bottom.  This time I decided to leave out the front pleat, and I love the way the topstitching looks instead!  I was worried that the pleat would never lay flat in the double gauze.


I also adjusted the fit on the sleeves slightly--I needed to narrow them a bit between the armpit and elbow, but the bottom where they roll up was just right as long as I followed appropriate seam allowance guidelines!  Last time I made the rolled-up part just a bit too tight.


So, happy birthday to me!  I love wearing this top.  Now, back to work on the business--I've been ordering stuff wholesale willy-nilly, and working on the website, and I made business cards, and I even got my woven labels, so I'm ready to start making samples before I go check out manufacturers!  I'll try to post updates here as I make progress :)

Monday, October 19, 2015

Bicycle Print Natalie Top

I took a risk and ordered some of the "peach skin" fabric from Girl Charlee the last time they had a big sale, not really knowing what it was other than that it was 100% polyester, and this description from the website:  "Peach skin fabric has a soft brushed finish, does not wrinkle, and is perfect for dresses, top, and more!"


I loved the bicycle print, and I had been wanting to try a dressier top from a silky fabric.  The Natalie Top pattern from Liola Patterns looked like a perfect addition to my wardrobe, and I can't wait to sew it up again!


The fabric does have a nice drape and a cool finish, but it's honestly not my favorite.  It doesn't breathe very well (it is polyester, after all) and it's sometimes a little too clingy--like it feels like it's sticking to me.  But it doesn't wrinkle easily, which is nice, and it was easier to sew than I had feared it might be.


I had a little bit of trouble getting the pleat in front to lay down exactly right, but I love having the open neckline with the pleat rather than a button placket--I get so nervous doing buttons, which was one of the reasons this was the blouse pattern I chose. 


I can handle two little buttons that don't need to line up, however--I think the sleeve tabs are such a nice detail on this top!  And a fun way to incorporate a little more of a contrast fabric.  I used a scrap of painted silk that I had been holding on to from my husband's grandmother's stash, and I love how it plays off of the navy of the top.


I made the sleeves a smidge too tight, something I will correct
when I make this top again.
I added some length in the form of a curved hem on this pattern. I didn't think about it until I was ready to hem it, but that meant that for the hem to lay flat, I needed to do a bias hem facing rather than just the typical folded under hem.  


Luckily I had just enough of the scrap of silk to piece together a strip to go around the hemline.  It was touch-and-go, but I squeezed it out!


I'm planning to make another one of these tops out of some lovely silk that I picked up last week when I visited the Pendleton Woolen Mill store.  I can't believe I used to drive by that place every day on my way home from work and never went in there!  I also got some amazing wool to make a few pillow covers for our living room--they are going to be so luxurious!

Wednesday, August 19, 2015

Catch-up Time--a fun elastic-waist skirt!

Wow, moving from one country to another does not go well with blogging!  I have been out of it for a couple of weeks, what with getting ready to move back to our home in the US and then working through the settling-in process, and now I think I'm about ready to start catching up on blogging some of the projects I've finished in the last few months!

I'm taking baby steps--this first post will be a quick one on a simple elastic waist skirt I made.

Rainy day photo shoot!


I used the same proportions as when I made this double-gauze skirt, but I only had wide white elastic, and I didn't like the way it looked with the more muted color palette of this lovely Melody Miller print.  So I decided to make an easy encased elastic waistband this time, and I think it's a great look!

I bought everything they had at Tomato in Nippori when I found this
Melody Miller print for about $3.25 a yard!  I think I've got about 8 yards of it left.

The waistband gives the skirt a little bit more professionally finished look, I think, than the exposed elastic waistband, although I think those have their place as well!  Rather than just folding the fabric over to make a waistband, I cut one that was about 1.5 inches longer than my hip measurement.  This reduces bulk at the waist while still allowing me to make an easy pull-on skirt.  To figure the width, I just doubled the width of my elastic and added about an inch for seam allowances.

My classic pose!
I attached the waistband to the inside first, then topstitched it to the outside of the skirt so that there would be no raw edges on the inside.  I also did french seams on the sides, so everything is enclosed! These are the little things that I appreciate now as my sewing skills increase--my older garments with raw, fraying edges on the inside just aren't holding up as well as I'd like, plus they feel much more "homemade" rather than hand-crafted when the inside doesn't look nice!


When I wear this skirt, I usually push the gathers to the back so that I get a flatter front and more poof in the back.  Just personal preference!  And I also like the way it looks with an untucked top, although I definitely only wear full skirts with fitted tops, unlike many of the Japanese women I see walking around!  They can pull off head-to-toe loose garments, but they just look like sacks on me.


I had to finish this shoot quick, since I was really starting to get wet!


The people walking down this street thought I was crazy!

I've got a few more things to show you, hopefully soon!  I was pretty busy sewing things up before we left Tokyo since I knew it would be a few months before I saw all of my pretty fabric again.

Friday, July 17, 2015

Summer Outfit from Free Patterns!


I have been struggling with getting decent pictures lately, which makes me less motivated to get new things up on my blog.  For some reason, I just could NOT get the photos of this outfit in focus.  My least favorite thing about doing this blog is getting photos of myself--sometimes, using the remote is easy, but more often than not I just can't get the focus or exposure right when I don't have anything to focus on.  As I was going through these photos, I can see my facial expression getting more and more strained as I failed to get the shots I wanted, and of course I feel weird whenever people walk by.

BUT!  I will still share the outfit, because these are good patterns and you should try them out.

You get the idea.
First, the skirt.  This is the free Simple Summer Pleated Skirt pattern from Sew So Easy, and here are my thoughts about it.

1.  The pattern goes together easily and looks really professional.  Here's my back zip!  I really liked putting it together.

Pattern matching WHAT!
2.  The pattern suggests using a lightweight drapey fabric, and I concur.  I used a stiffer Japanese linen/cotton blend, and I'm not in love with the way it falls.  This pattern is not meant for a structured skirt.  You could, however, use a more structured fabric for the waistband but something with drape for the skirt.  I was thinking the structured fabric would give the skirt more of a pencil look, but it doesn't.  I'm thinking of trying Delia's pleated pencil skirt to get the effect I was going for here.

3.  The pattern runs big.  I cut out the appropriate waistband based on my measurements, and had to cut out over 3 inches altogether.  Be sure to test your waistband size before you attach it to the skirt.

4.  There are POCKETS!  Yay.

The top is the free Perfect Cap Sleeve Tee from iCandy Homemade.  I have made this top a few times before, and I love its simplicity.  The free pattern is a size medium, and it works well for a loose top on me.  This time though, I was going for a more fitted look, so I tried cutting this one smaller just by placing the pattern off the fold a little bit.  That was not the best way to do the fit adjustment because now I don't like the neckline quite as much and the sleeves fit a little weird (I added the sleeve bands, but that's not the problem), but it's still baggier than I want in the torso.  I will have to play around with resizing this pattern differently to get the fit I want.


This fabric is a slub knit from Girl Charlee.  It's almost see through but not quite--I can get away with it if I wear a nude bra.  Anyway, I like this outfit better with the shirt tucked in (NOT my usual M.O. but in this case...)


Anyway, there's an outfit I made lately and am moderately happy with but not excited.  It can't all be perfect!

Thursday, July 2, 2015

Sleeveless Out and About Dress

Another dress--my favorite thing to make!

This dress is a sleeveless version of the Out and About Dress from Sew Caroline.  I sewed up a 3/4 sleeve one from a thick knit a few months back, and knew I would need a sleeveless one for summer. When I found this lightweight knit for 100 yen per meter, it was time to give it a try!


I struggled a little bit with the sizing on this dress--as a matter of fact, it was an issue the last time I made it as well, but in that case I was using a more unfamiliar fabric and thought that was where the problems came from.  According to my measurements, I am between a medium and large for this pattern, leaning to the large.  I cut out the medium but used slightly smaller seam allowances than the 1/2 inch the pattern calls for...and it was really too big. 
 
frump-a-dump
First I thought I would try adding elastic to the waistline on the inside, maybe giving the top a loose, blousy look.  But it didn't really work; the whole bodice just seemed to pull to the back.

well hello there, munchkin.
I actually wore it out like this, with a belt, but decided by the end of the day that it was a no-go.

In the end, I had to remove the elastic and re-sew the side seams an inch further in on both sides (so removing almost 4 full inches from the bodice!)  Also (and this actually made the biggest difference, I think), I shortened the bodice by about 2 inches.  

That's better!
This was a problem I had the last time I made this dress too--the bodice just looks too long on me!  It doesn't look that way in the pattern photos, so I don't know why mine keeps coming out wrong.  It's also strange because I have a long torso--I am typically lengthening things, not shortening them, but I guess when it comes to a bodice seam line I just like mine a little north of the natural waist.  Looks like it's time to slice the bottom of off my bodice pattern pieces!

Other modifications: surprise surprise, I made the neckline a little bigger, as usual.  I also made the skirt panels about 3" narrower so that I could just use the whole width of my fabric.  The pattern calls for the skirt panels to be 30" wide, but my fabric was 54" wide so I just cut two 27" panels.


All that said, I really do like this dress and this pattern.  Now that I THINK I've got the fit dialed in, this dress should go together really quickly.  It's comfy and it's got great pockets and lots of sleeve and length options, so I'm glad it's a pattern that's in my repertoire.  

Oh, I also wanted to show you a close up of this fabric.  It's really light and soft, with a neat diagonal texture to it, and I like the way it looks on the neck and arm binding:


I'm sure that part of my fit problem was because the fabric is verrrrry stretchy, so I should have cut it smaller to account for that.  Ah well, you live, you learn!  It's pretty great to be able to buy fabric so cheaply so I'm not afraid to just mess around and try new patterns--if it didn't work out, I would only have been out about $2!  Plus my time, of course.

Tuesday, June 23, 2015

Nani Iro Pajama Shorts

I have to admit, I am not much of a shorts person.  But after seeing Shorts on the Line, hosted by Rachael at Imagine Gnats for the last few years, I've been thinking it might be fun to try making some.


Now, these are pj's, so it's still baby steps--I'm not ready to try making shorts to be worn in public yet.  But as pajamas go, these are maybe the best I've ever had.  As a matter of fact, I made two pairs--one to try out the pattern before cutting into my Nani Iro double gauze (it's Pocho Adzuki Bean, a dark eggplant color--love it!)


The first pair is made from double gauze printed in Japan.  I love this fun print and I have bought it in several different colors!


I used the free Bias Trim Shorts pattern from Melly Sews, and since I was using a woven instead of a knit, I followed her instructions from this tutorial, where she makes a pair out of a satiny fabric.  Basically I slit the pattern pieces in the middle and added another half-inch of width to both pieces.  She says to add a quarter of an inch, but I'm slightly larger than the measurements she gives for the pattern so I bumped it up a little extra.  I also added about .75 inch to the length just for the heck of it.

Just what you want to see, right? A couple of pictures of my butt.
Maybe this is the real reason why I don't sew more pants...

I made both pairs exactly the same way--I was so pleased with how the first pair came out that I didn't change a thing for the Nani Iro pair!

In addition to changing the sizing slightly, I also used single fold bias tape instead of double fold.  This was mostly for practical reasons--the bias tape I wanted to use just happened to be single fold!  For the first pair, I had a package of vintage bias tape in exactly the right color, and it was a little bit silky, not a basic cotton kind.  Nice for pajamas, right?


And for the second pair, I knew I wanted to use the bias tape I found at my local 100 yen store, made from traditional Japanese print fabric.  Unfortunately, it only came in 1 meter packs, and I couldn't find more than 2 packs of any one print.  The pattern calls for 3 meters, but after making the first pair I thought I might be able to fudge it, since some of the bias tape ends up hidden on the inside when you sew the side seams together.


This worked great--I used exactly one meter on each side of the shorts, and was able to hide the unfinished edges on the inside.  As a matter of fact, I cut the back pattern pieces so that the exposed edge was on the selvage, so there weren't any raw edges to speak of.

Here is the front and back pieces for one side, sewn together and with bias tape attached.
You can see the white selvage edge where I ran out of bias tape.

Here's how the inside looks when you use single fold bias tape instead of double.

The Nani Iro double gauze I used was a great deal--I found two .6 meter cuts of it for 360 yen each (about $3) since there was a little bit of a print error.  I don't know if you can tell, but some of the dots have a tiny dot of the background color on them.  I think it looks fine!

Pre-sewing it all together
And I still have enough left to make a pair of shorts for Little Sister (although I'll have to find a different bias tape to use on hers.)  I'm actually hoping more of this bias tape will turn up, because I'd love to make a bias-trimmed tank top to go with these.

One final shot, to show how they look proportionally.  It felt weird to have a whole post with no pictures of my face!