This is a story of how I turned a thrifted sweater into the cutest kids slippers I have ever seen. Well, the cutest I have ever made, at least. Well, actually, they're the only kids slippers I have ever made, but squee! They are so cute. And I will tell you how I made both kinds!
 |
| For the boy, and for the girl. |
I had been searching the local Goodwills for a while for the perfect 100% wool sweater to make slippers out of, but I had a really hard time finding one that was interesting (i.e. not a solid color), good for a girl AND a boy since I wanted to make two pairs of slippers out of it, thick enough, AND was the price I wanted to pay (so not $7-$10). I finally lucked out one day when I found this beauty in the plus-size section. It was the half-off color of the week, making it $3.50--right in my price range. So I took it home and felted (fulled?) it in the washing machine.
 |
| Help! The sweater ate my baby! |
To do this, I just washed the sweater on hot (my machine only has a hot/cold setting--I intended to take it out after the hot part ended, but I missed it and the entire cycle ended up running). I dried it in the dryer, and still needed to let it dry on the rack for another day. This sucker was DENSE.
After it finally dried out, I cut along the seams to make flat pieces.
 |
Hindsight--I wish I would have cut it apart before felting it, because the sleeves
had very permanent creases in them. |
Then I took a cheap disposable razor and shaved as much fuzz as I could off of the outside of the sweater. I didn't shave the inside because I think it makes the slippers extra snuggly.
This step is optional, but I do think (in person, if not in photos) that it makes the felted wool look a little cleaner, and helps the pattern to reappear a bit more.
 |
Can you tell which side has been shaved and which one hasn't?
Yeah, me neither. |
Then I had my genius idea.
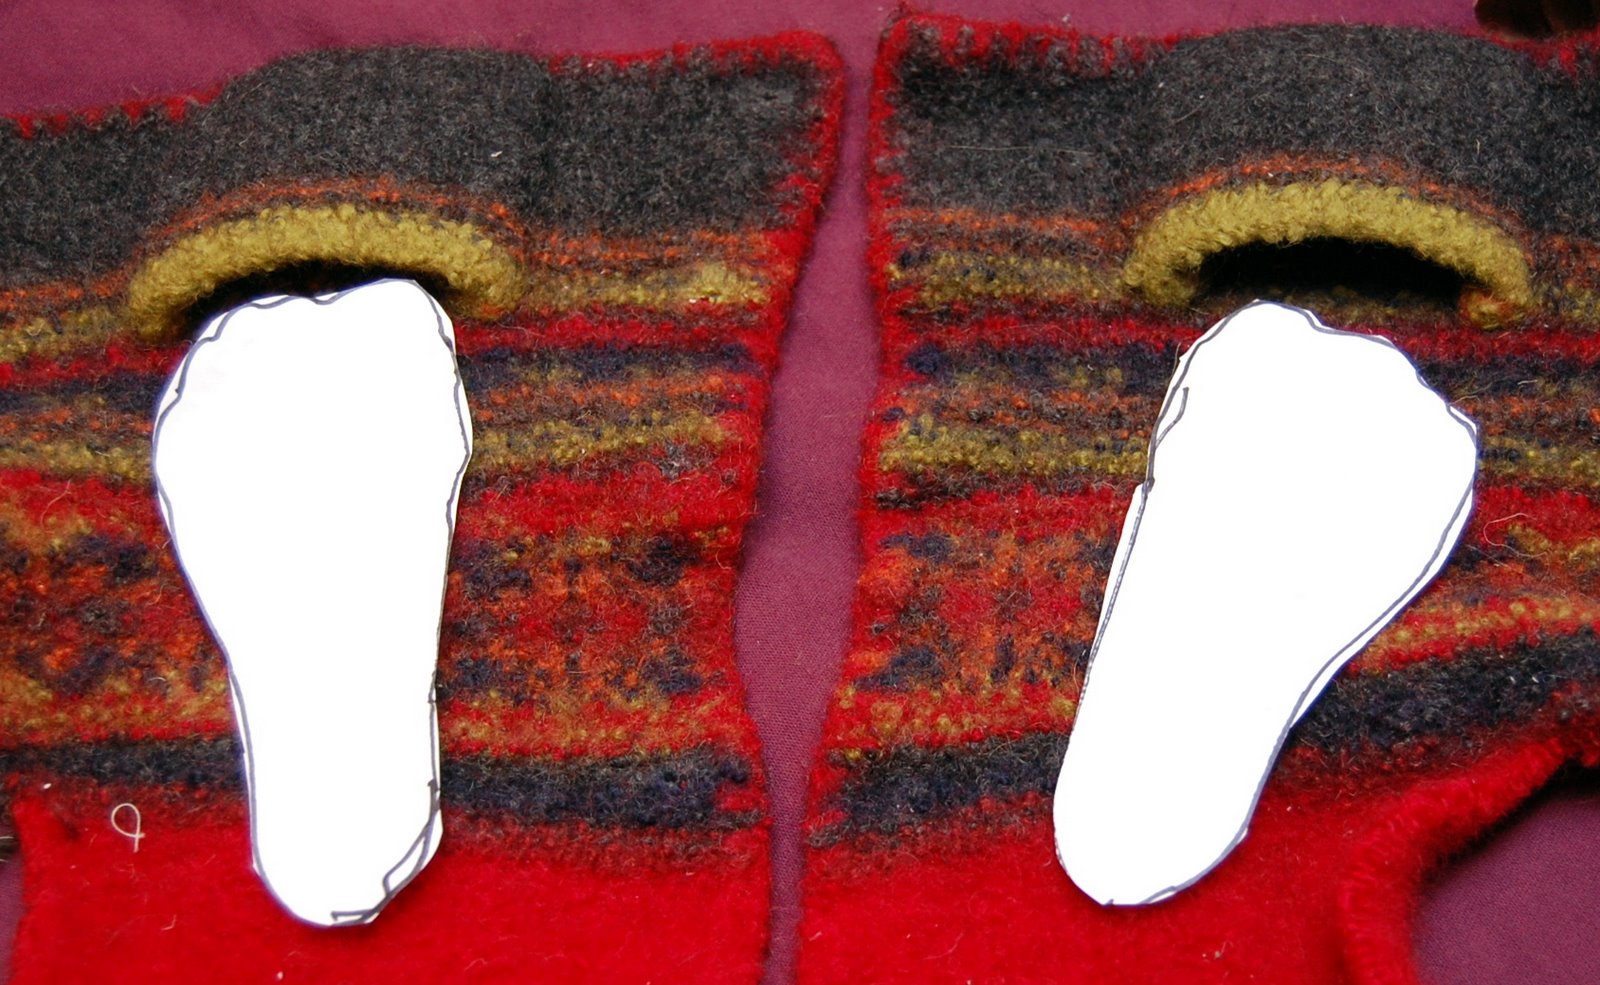
The boy's feet fit right in the pockets from the front of this cardigan, so I decided to use them as the toes of the slippers.
I traced around his feet as a template for the sole.
Then I stuck the template into the pockets and cut around them, leaving plenty of seam allowance because the fabric is REALLY, REALLY thick.
 |
| I first cut one, then used it to cut the same shape for the other. |
To make the back of the slipper, I measured around the back of the sole, then cut a piece that was the right length.
 |
| Mine measured 10 inches. |
 |
| Measuring my 10-inch strip for the back of the slipper |
I decided to make the strip a little wider right in the middle so it would come up a little higher right at the heel. The pin is marking the middle in the picture below.
 |
| As you can see, precision was not a priority. |
I then cut out the second back piece using the first one as a template.
Then I pinned the back pieces to the toe, to hold them in place.
 |
| Looking more like shoes! |
 |
| The backs are still loose at this point |
Then I pinned the back piece to the sole all the way around. I decided that come hell or high water, I was going to use my machine to sew these two pieces together, even though they were SO. THICK. Have I mentioned how thick they were? It was a bit of a pain to machine sew, but worth it to me because hand-sewing is my mortal enemy. Pretty much every felted slipper tutorial I saw when I was trying to figure out how I would make these tells you to hand sew. Well, I am here to tell you that you CAN jam those two thick layers of wool into your machine, and it will work! And because the felt was so thick, I didn't add any extra padding or layers to the sole, I just used it as-is.
 |
The back piece of the top slipper has been sewn around the sole, but not attached to the toe yet.
The bottom slipper has only been pinned. |
After attaching the back to the sole using the machine, I pinned the back piece under the toe. And then I had to get out my old needle and thread and hand-sew that part together. Sigh.
 |
| I tucked the two ends so that they just barely touched in the middle. |
And here they are, on the boy's feet! They seem to fit, they stay on, all is well with the world.
 |
I was going to crop this one to show you the slippers, but had to leave little sister's foot
in there--she does NOT want to be left out! |
But wait...what have we here?
 |
| Another pair of chilly toes |
I made a template of the girl's feet too, then used it to cut out these soles. I left lots of seam allowance and narrowed the sole at the heel a bit.
 |
| Again, precision is not my strong suit. |
To make the upper, I just eyeballed the shape shown below--mimicking the shape of the sole, but a little bigger and squared off at the heel. Then I cut a teardrop shaped opening in each one.
 |
| The uppers |
I lined up the back edges of the upper and held them right next to eachother and sewed them together using a wide zig-zag stitch on my machine. As I was only sewing one layer of fabric, this was no problem at all.
 |
| back view (also, upside down. Not sure why I photographed it that way.) |
 |
| The upper, once you have sewn the back seam. |
Next, I pinned the upper to the sole, stretching the upper a bit at the back so it fit all the way around.
 |
| Pinned all the way around. |
Then I miraculously remembered to switch my machine back to a straight stitch, and sewed all the way around the edge. And DONE!
I love these. I think they are SO CUTE. And they totally stay on, and they are warm and snuggly, and I want some. Too bad there's not enough of the sweater left for me. Isn't that always the way?
You could doll these up with some sort of decorative blanket stitch around the sole and the opening, but I try to avoid hand-sewing at all costs, so for me they are just fine the way they are.
 |
| Show me your shoe! |
OH! I almost forgot! I saw this
tip from Prudent Baby on Pinterest for making slippers non-skid.
 |
| They are...a little less slippery. |
You just use your hot glue gun to draw a pattern on the sole of the slipper to make them a little grippier. I have also seen puff paint recommended for this purpose. If the glue gun doesn't seem sticky enough, I may add some puff paint to the design.


Awww, so cute. I have never had luck with the hot glue. It seems to dry so hard when I do it. I also do not have hot glue skills enough to make such adorable designs. Maybe your thinner glueing will work better than my big ol globs! (I have only added it to cheap socks so when she is in her cart running around the house she can get some traction!) I have some old sweaters around here I might try this with!
ReplyDeleteI'm with you--the glue doesn't seem quite tacky enough to work. I will probably try adding the puff paint to see if that helps!
ReplyDelete