Wednesday, January 18, 2012

Filler! But with Crafts!

I have a post that I am so excited to show you, but it's a gift that I am getting ready to stick in the mail, so I can't tell the internets all about it until it's been shipped off (and then received), so in the meantime I thought I'd check through my files and see if I missed anything. Turns out, I did. So here's a smattering of little projects I forgot to tell you about!

I'm usually pretty snobby about having licensed characters or logos printed on my kids' clothes. I just don't like to PAY someone for clothes that advertise a product, you know what I mean? But, my boy loves him some Disney Cars (what little guy doesn't?) Up until recently, he was only allowed to have Cars printed on his pj's and undies (I figure it's not advertising if nobody sees it but us, right?) But then I relented, and made him a shirt with this applique:

Is Disney going to sue my ass?
He loves it, I don't feel like I'm part of the Disney commercial machine, I still pay for character-printed undies, everybody wins.

In other applique news, the boy didn't have any Christmas PJs (I guess I was slacking on my after-Christmas pj shopping last year), so I did this simple applique on a pair of stripey ones.  We were both pleased with the results.

And presenting...Christmas Tree pj's!

Next I found this:

Our family.  The kids obviously get their good looks from their parents.

Oh man, this was a good one.  We made paper dolls using the kids' faces, then I couldn't find any photos of Mom and Dad so rather than wait for me to have some printed at the grocery store, the boy decided to draw us some heads.  LOVE. IT.  Especially how the kid dolls are high-fiving each other.  And in case it isn't obvious, Dad is wearing a HAT.  He doesn't have rainbow hair.  Duh.

It was also a big month for birthday crowns.  I had three custom orders for them this month (not including the one that I will be making for my own birthday boy soon ahem), including this one:

They are not as exciting to wear when they have
someone else's name on them.
Finally, I sent this pair of slippers made from a felted thrift store sweater off for little Emmy's first birthday over a month ago.


I followed this tutorial from Prudent Baby, but I had to do a lot of fanagling (spellcheck doesn't seem to think that is a word, but I'm going with it) to get this super-thick fabric to work.  I actually lined them with a thin microfleece rather than using two layers of the thick sweater fabric, so that helped, but it was still tough to do the elastic back (when the thick fabric gathers up, it makes the opening either weirdly tight or weirdly loose).  This is probably why I didn't post on this in the first place.  I think the tutorial would be great for a lighter weight fabric (like the recycled denim she uses in the tutorial).

Fancy Footwork
So, that ought to tide you over until my giftie gets unwrapped so I can tell you all about it!  In other news, I am working on another MAJOR birthday present this week and am getting nervous that it won't be done in time for this weekend's birthday party.  Would a three-year-old accept a rain check?


Posted by Picasa

Friday, January 13, 2012

Cheap and Easy Superhero party invitation!

The boy is turning four. In a totally unique and surprising turn of events, this four-year-old likes superheroes. Strange, right?

Luckily, he has a cape (given by a friend, made following this tutorial here). And now he has a mask too (made by me, using this tutorial).

Funny thing, he's a lot more cooperative in a photo shoot when wearing a mask and cape.

It's a bird!  It's a plane!
The photo shoot was really the crucial element in this invitation.  I sat our picnic table in front of the fence, draped both fence and table with a white sheet, and let The Boy play around.

After editing the photos, I made a collage using Picasa:

The Boy helped me choose the photos and lay them out.

Then I added text using Photoshop (sadly, that's about the only thing I know how to do in Photoshop at this point):


I only needed a few of these, so I printed 5x7 photos at Costco for 39 cents each.  39 cents!  If you need a LOT (like 50 or more), you can get 50 photo greeting cards with envelopes for $15 or so.  

Add plain old word processing, printed on cardstock:


Add double stick tape (or glue stick):


Attach info card to the back of the photo, and slip into leftover envelope from your Christmas cards:

And for less than 50 cents a card, you've got adorable informative themed party invitations!  If I do anything crafty for the party itself, I will be sure to let you know :)

Posted by Picasa

Wednesday, January 11, 2012

Our Morning Out!

Gosh, it's great to have talented friends.  Shelby (Shelby Brakken Photography and Bones, Mugs & Harmony) came out to our house and played with me and the kiddos at the park and cruised around the neighborhood the other morning while she snapped gorgeous pics of me and the little guys.  I know you moms with cameras out there know how difficult it can be to get pictures of yourself with your kids, so this was such a treat for me.  Here's Shelby's post with lots of pics from our morning, and here's a couple of previews for you:

Recognize my scarf?  I wear it all. the. time.


Girlfriend has skills.  We had so much fun!

Sunday, January 8, 2012

Boy's Apron!

It's Birthday Season for us, with three little boy birthdays, two big boy (aka grown men) birthdays, and one grandma birthday, all happening in the span of a month.  And right on the heels of Christmas, too!

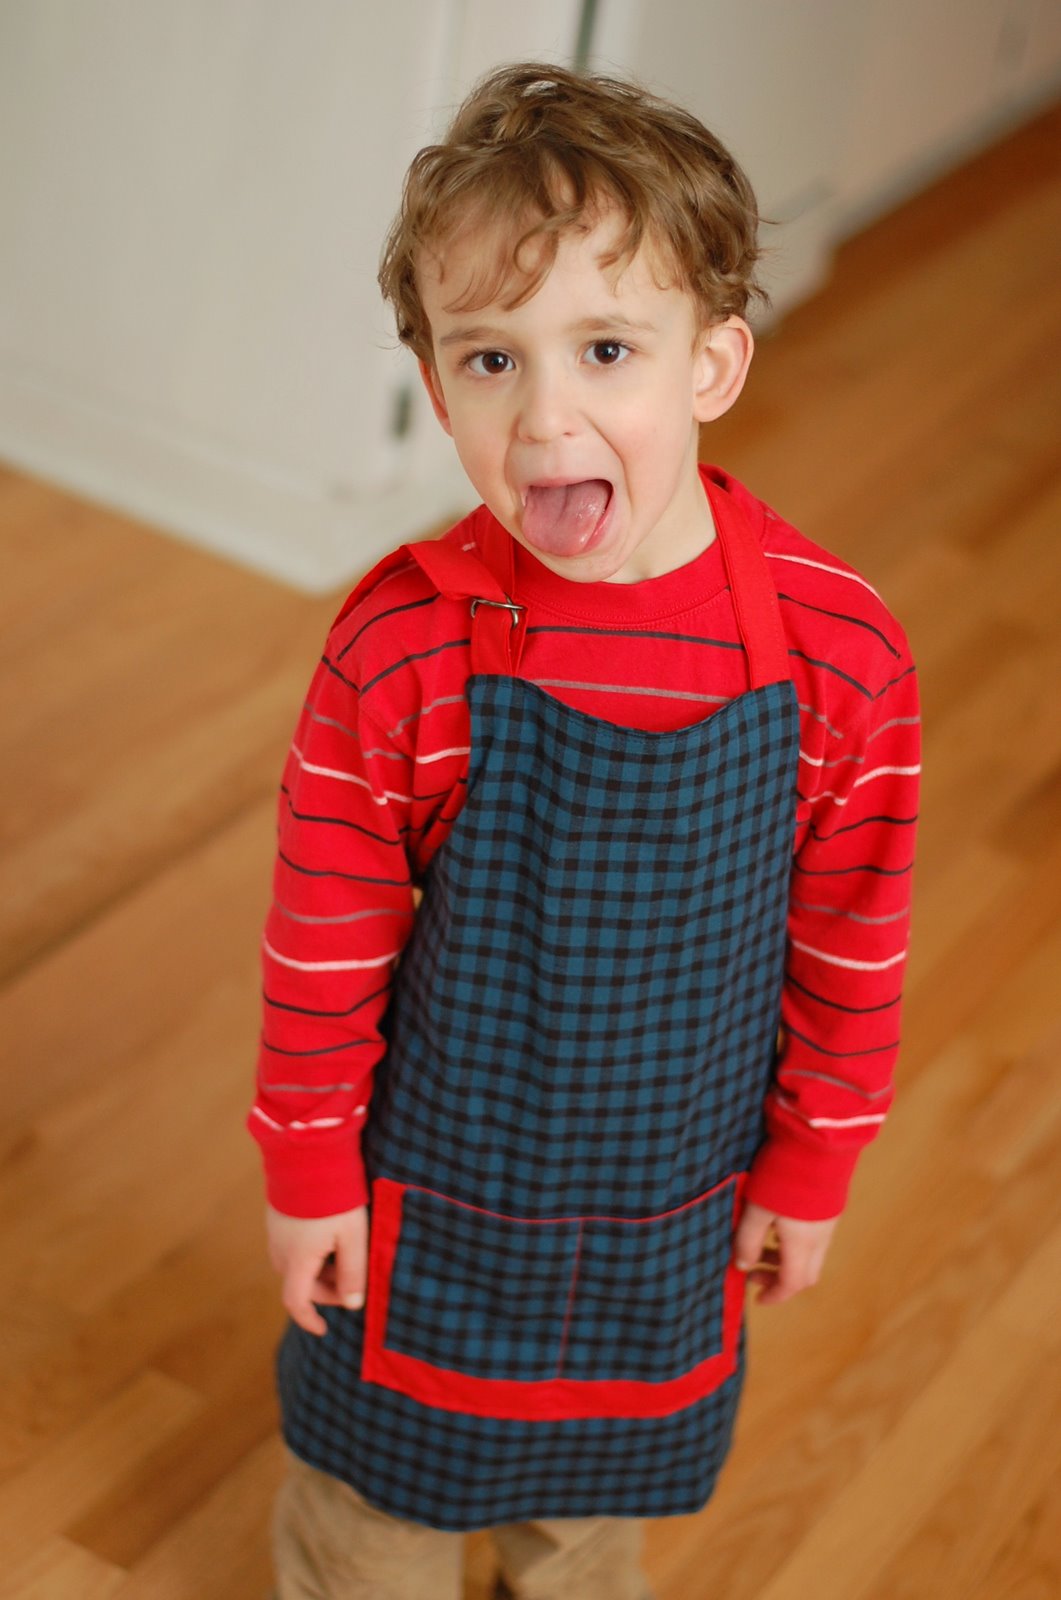
My first birthday gift of the season is this children's apron.  I followed this Michael Miller Fabrics tutorial (directions for child or adult size), but I made the pocket differently.  The rest, I promise, I just followed the directions and it was very simple.  I really like the use of D-rings in the neck strap--adjustable is so important for kids stuff, since it extends its useful life!  I think it turned out great, and I'm going to make another one when my little lady's birthday rolls around.

Masculine apron
Oh, except I didn't make a paper pattern first like the directions tell you to.  Really, you need a paper pattern to cut an arc out of a rectangle of fabric?  Please.

Front and back panels, cut to 23' high and  20" wide,
laid one on top of the other and folded in half lengthwise
I think it's frowned upon to cut the front and the back at the same time too, but this pattern doesn't require a ton of precision in my opinion, so I did it anyway.  I measured out the 16" spot and pinned it on the length,

Then measured and marked  4.5" from the fold on the width:


Then made a lovely curved cut between them, forming what is widely recognized as an apron shape.

Paper pattern be damned.

I also cut out my fabric strips for the apron ties and neck strap in what I consider a tricky way, while others may consider it a lazy way.  I measure the width of the strip and mark it with a pin, then just cut the length.  This shows the three long strips before they are separated.

Pins at the top and bottom, eyeballing the line to cut.
I cut out all my fabrics according to the pattern, then ironed them.   The pocket pieces are cut and ironed differently than the directions show, which I will explain below.  This photo shows everything ready to sew! 

You don't need the corner piece cut out of the body of the apron,
I just forgot to remove it before taking the picture.
I liked the look of the contrast fabric used in the pocket shown in the tutorial, but I thought doing a "pieced pocket" sounded too complicated.  After making up my own way to to do it, I figured out that piecing it is probably more precise, and maybe only a little more complicated than my way, but I'll show you what I did and let you decide for yourself.

I cut out two pieces of fabric for the pocket.  The blue piece (matching the body of the apron) is 9" x 5.5", and the red piece (for the pocket front and back) is 12" x 10".


I ironed the two short edges and one of the long ones under on the blue pocket piece.  For the red piece, I ironed a crease down the middle, so that it measures 6" by 10" when folded.  Then I sewed the blue piece, face down, to the red piece as shown below.

Then I flipped the blue piece out of the way and sewed up the edges of the red piece and around the corners, stopping where the blue piece was sewn on.

Then I turned the red piece right-side out (so that the seams were tucked inside), poked the corners out, then flipped the blue piece back on top of the red.  I stitched across the top, closing the opening on the red piece, and all around the edge of the blue fabric.

Then it was ready to attach to the apron!  I just made one seam right down the middle, creating a double pocket.

Aprons really need pockets, you know?


After that, it was back to the directions--pinning all the strap pieces to the front and folding them in so they didn't get sewn into the seams accidentally (I thought that tucking them into the pocket was a stroke of genius), lining up and pinning the back panel all around the edges, then sewing them together, making sure to leave an opening (about 4" wide) for turning.


After turning it right side out, poke the corners out and give it a good ironing.  Then sew all around the outside to finish it off, add extra stability to the straps, and close the opening.  I debated using red contrast thread, but decided to use the dark blue after all (in case I made any mistakes, it would be hidden much better!)

All done!

I did label this as a "quick project," but by that it means I was able to do it in one session--it took about two hours.  I don't know what your definition of quick is--but there's mine.


And awww, look!  I folded up the rest of our gift inside the apron and used the strings to make a cute little bow!  No wrapping paper required!


Ready for cooking, crafting, or dress-up!  A fun present for boys or girls.

Posted by Picasa

Friday, January 6, 2012

Squash and Spinach Veggie Lasagna!

Looking for something to cook up this Sunday that will get you halfway through the week?  The whole family ate this for dinner twice, then me and the hubs ate it a third time, and still left enough for two lunch-sized portions, not to mention the second, smaller one we've got stashed in the freezer!

I have made this lasagna twice now.  The first time, I made it pretty much by the recipe (originally from Cooking Light, although I found it here), and while it was good (I actually got requests for the recipe), I felt that a few tweaks would turn it into something just about perfect.  

Then those tweaks turned into more of a reworking.  So much that if you wanted to make my lasagna, the orgininal recipe would probably not help you much at all.

So I decided to write it down for you.  Although I only took pictures of it once it was done.

All sliced up and ready to go.

Spinach and Squash Veggie Lasagna, Sponsored By Trader Joe's.  (Not really, but I wish!)

Ingredients:  
1+ boxes no-cook lasagna noodles* (I like the way the square shape fits in my pans--I use a total of 21 noodles, and there are usually 15 in a box)
2 3-cup jars tomato sauce* (I usually use tomato basil, but the first time I made this I made my own sauce using tomatoes I had roasted and it was AWESOME.)
Squash (I have made this with butternut, delicata, and acorn squash, all work well) (4-5 cups cubed)
1 Tb butter

1 tsp minced garlic
1 10oz package baby spinach*
1 smallish onion, diced small
1 32oz container of ricotta
1 package of TJ’s Quattro Formaggio* (divided)
½ cup chopped fresh herbs (parsley and basil work well)
2 eggs
salt and pepper to taste
About 1/2 cup grated parmesan*


*Starred items are things I buy at Trader Joe's.


Hot out of the oven

Directions:

1. Preheat oven to 375 F.

2.  Chop the end off the squash so you can set it on its end and cut it in half.  Scoop out the guts and place face-down on a cookie sheet in a 400 degree oven for 45 minutes. Or if you’re like me, and you think, “I’m already making a LASAGNA, which takes about an hour just to COOK, how much more planning ahead do you want from me?  Then place in microwave safe dish with about a quarter inch of water, cover with plastic wrap and steam until you can easily peel it  It doesn't need to be cooked all the way, just softened so you can take the peel off.  I do it in two-minute increments and check, and it takes 8 minutes or so, while I’m doing other things like sautéing the spinach and mixing the cheeses.  Then peel and cut into 1-inch cubes.  While microwaving, move on to the next steps.
3.  In a large pan (I use my wok), sautee 1 Tb butter over medium heat (Your first indication that this is no longer a Cooking Light recipe).  Once it's melted, throw in the garlic for about 30 seconds then add the onions. Sautee until translucent, then add the spinach a few handfuls at a time, letting it wilt to make room for more spinach.  Use a wooden spoon to distribute the onions and get that spinach wilted down.

3.  In a large bowl, lightly beat the two eggs, then add your ricotta and a big handful of Quattro Formaggio or other shredded cheese (provolone, mozzerella, fontina, what have you)--about a cup or so.  Stir in salt and fresh ground pepper to taste, then fold your chopped herbs in gently to keep the whole mixture from turning green!

4.  Now you're ready to layer this baby into your pans! This recipe makes one 11x17 lasagna plus a smaller one.  An 8x8 or 9x9 pan would work, I have a 6x9 pan that's about perfect.
Cheeeeeeesy.
Start with a thin smear of tomato sauce on the bottom of each pan.  Then lay out your first layer of noodles (I do four noodles in the big pan, three in the small one).  Then comes the ricotta cheese layer.  There will be two cheese layers in each pan, so divide yours up accordingly.  Then sprinkle on your cubed squash--it's all in this one layer so don't be shy.  On top of that spread a healthy amount of tomato sauce.  Then comes your next layer of noodles.  Then cheese again, topped with spinach.  I like to use my hands to get the spinach and onions evenly distributed.  Tomato sauce again on top of the spinach, then noodles again, then more red sauce, then top with a healthy layer of the Quattro Formaggio, and sprinkle that with grated parmesan.  See all that cheese in my version?  Yeah, that's not in the Cooking Light version either.

Since that's a little tough to wade through, here's a layer-by-layer breakdown:

1. thin layer of sauce
2. noodles
3. ricotta
4. squash
5. sauce
6. noodles
7. ricotta
8.  spinach
9. sauce
10. noodles
11. sauce
12. shredded cheese
13. grated parmesan


Put the big one in the oven at 375 so you have lots of leftovers for this week and feel good about cooking a great big lasagna and not having to worry about dinner for a couple of days.  Put tinfoil on top of the little one and stick it in the freezer so you can pull it out when you don’t want to go to the store (it might last one dinner and a lunch).  I freeze my little one uncooked, I think it gets less soggy that way, you just have to cook it for a long long time (like 1.5-2 hours, still at 375.  Or you can take it out to thaw the night before, but who ever remembers to do that?)

I think I like lasagna better when it isn’t an exact science, but if you are an exact science type of person you probably want to check out the links to the original recipe at the beginning of this post.

This was taken day 2, before reheating,
but I liked how the layers were so visible when it's cold.

Posted by Picasa

Wednesday, January 4, 2012

Christmas Sweater Bonanza!

Have you ever wondered when the best time to buy ugly Christmas sweaters is?

Awesome!
Guess what? It's right now. I just picked up these two beauties at Goodwill today for 75% off the GOODWILL price. Meaning they were $1.25 and $2.50.

Just thought I'd let you know, in case you have any ugly Christmas sweater parties to attend next year, or if like me, you've got some crafty ideas for how to use holiday knits but just couldn't do it at $7-$10 per sweater.

I have had homemade Christmas Stockings on my to-do list for at least a year now, and now that I've got these (plus one more I picked up at a mere 50% off before Christmas but was too lazy to pull out for a photo), I'm almost ready to dive in. I'm going hunting for one more sweater tomorrow, then I'm going to get some sort of lining that coordinates with all of them (the other one also has red, black, and white) so that all four family members have cohesive upcycled sweater stockings. Maybe I'll go crazy and embroider our names on them!

I'm thinking of following a pattern such as this one from Prudent Baby, but just use the sweater for my outer fabric and add some sort of cuff at the top to embroider names on.  These adorable ones from Betz White are my inspiration--I don't think I'll buy her book for the pattern, but I'll try to figure it out on my own!  Hopefully I'll have that stocking post ready for you in time to make your own next year :)


Posted by Picasa

Tuesday, January 3, 2012

Family Fun Day

Would it be totally annoying to you all if I started having posts that were not craft-related?  Sometimes I feel like I'm a little overkill with all my photos on facebook but I want to have a place to share them...and what is a blog if not that place?  I totally understand if you want to skip these posts, but if you love them, let me know so I can keep them coming :)

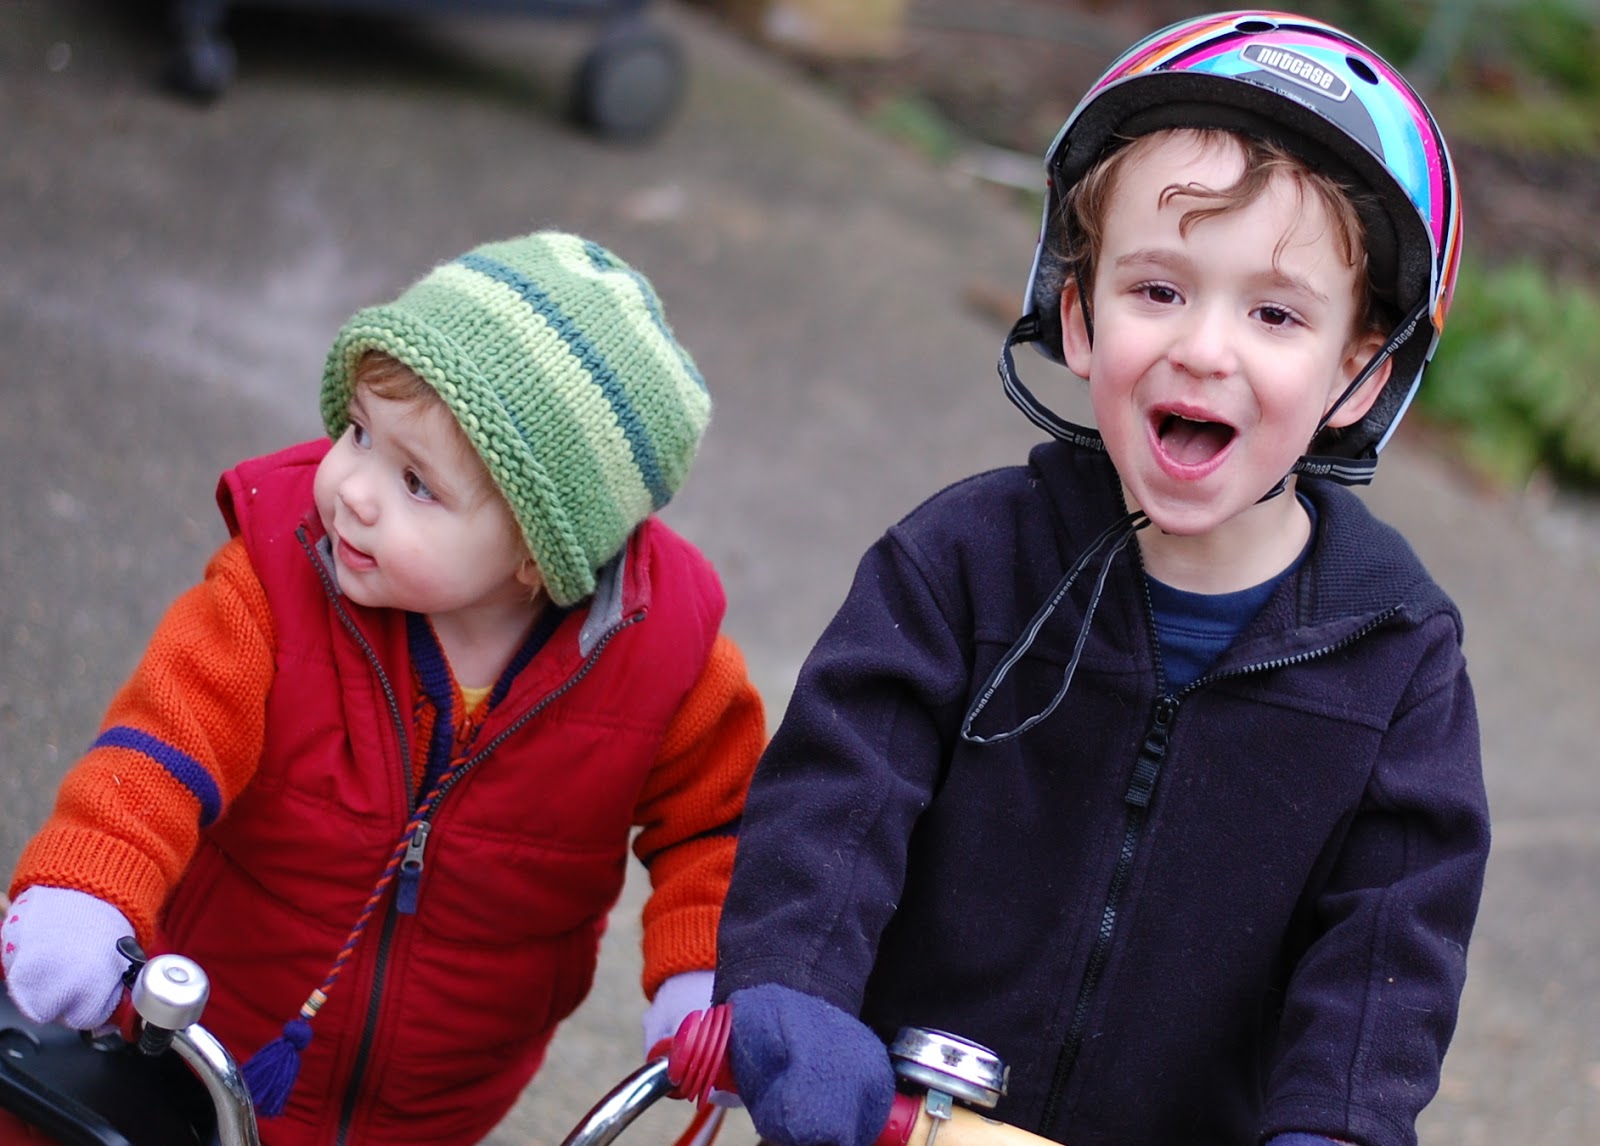
Monday, January 2nd was the hubby's last day of a 13 day vacation.  Not that we laid on a beach the whole time, but still--quite a break from the routine.  Although the last day of vacation was chilly and a little rain-splattered, we still took the time for a backyard bike ride.  Here's the photographic evidence:

Porch Swinging
 I did make all of the hats pictured in this post (except the bike helmet).  That counts for something, right?

winter blue play house visit

Brother's hat, brother's vest.

Love these expressions--taken right after Little Sister (purposefully) backed right in to The Boy.


Little Sister's sad face.  She's not very convincing.


I'm planning to sneak more family updates in here this year, so stay tuned (if you're interested in that kind of thing!)