Wednesday, April 2, 2014

The DIY Frozen Birthday

Honestly, this year with our preparations to move overseas, I was so ready to go buy licensed merchandise for a birthday party and call it a day.  HOWEVER, my daughter, like every other girl in the known universe, is obsessed with Frozen, and therefore there is no merchandise available (at regular retail prices, that is--if you want to pay quadruple markup on Amazon, you have lots of options!).  Luckily, Frozen is a pretty good theme to DIY--even in March, when all of the snowflakes and winter scenes have long been absent from the clearance shelves.

How's that for repurposing Rapunzel's wig from Halloween?


Here are the elements we used to put together a really fun party--I'll go through them for inspiration for anyone else out there trying to put something like this together without spending an arm and a leg or too many hours of their lives!

I almost forgot to include the invitation--I was so proud of it!  I was able to put it together using PicMonkey--I love this photo-editing site so much.  Then I had them printed at Costco (5x7's are something like 30 cents each) and put them in our leftover Christmas card envelopes.  For the ice castle background I used a free download of desktop wallpaper that I found online.


I got some hilarious feedback on the invitation--some girls displayed them in their rooms, some sisters were even fighting over who got to keep it!  Little Sister has hers pinned to the wall by her bed.


Decor:  Primarily, we used snowflakes.  The kids cut out some, and I cut out lots (what can I say; I'm faster!  And I actually love cutting out snowflakes.)


We used them to decorate our main snack table/focal point:


Background is a light blue plastic dollar tree tablecloth.  It was really see-through, but once the snowflakes were on it wasn't too distracting.  I also cut a piece off that was just the right size to cover our kitchen table, where we put the grown up drinks.

Some of the snowflakes were decorated with free printable Frozen images (free printable party kit available for download from Homeketeers)--I printed them on computer paper and the kids glued them down.  We used printables from this kit for other elements of the party too.


We added some tulle (an 8-yard roll from Dollar Tree, I only used a little) and more snowflakes to our dining room light, and strung some snowflakes in the window of our front door too, to add to the atmosphere:

I thought I'd find more uses for the tulle, but this was about it.


Gift Bags:  We also used snowflakes to turn our plain colored party bags (10-pack from Dollar Tree) into Frozen theme bags--Snowflake + picture of a character (or two) + name I printed out from the computer.

Carrots = Olaf's nose.  Ice cream is frozen, so that works too, right?

Our gift bags included ice-cream shaped bubbles (3/$1 at Dollar Tree), a carrot straw (5/$1 at Dollar Tree--easter seasonal stuff, or a snowman's nose?  You decide.), some glittery snowflake stickers ($2 for 30 stickers on Amazon, each kid got 6 stickers, so 40 cents per kid), a little tiara (59 cents at Party City) and a sucker that reminded me of an icicle (3/$1 at Party City, we attached the Frozen tag). The boys got a sparkly pencil (10/$1 at Dollar Tree) with a Frozen label instead of the tiara.  Oh, I also didn't buy enough of the ice cream bubbles and then they ran out, so I supplemented with bubbles in a carrot-shaped bottle--inspired by Olaf's nose.
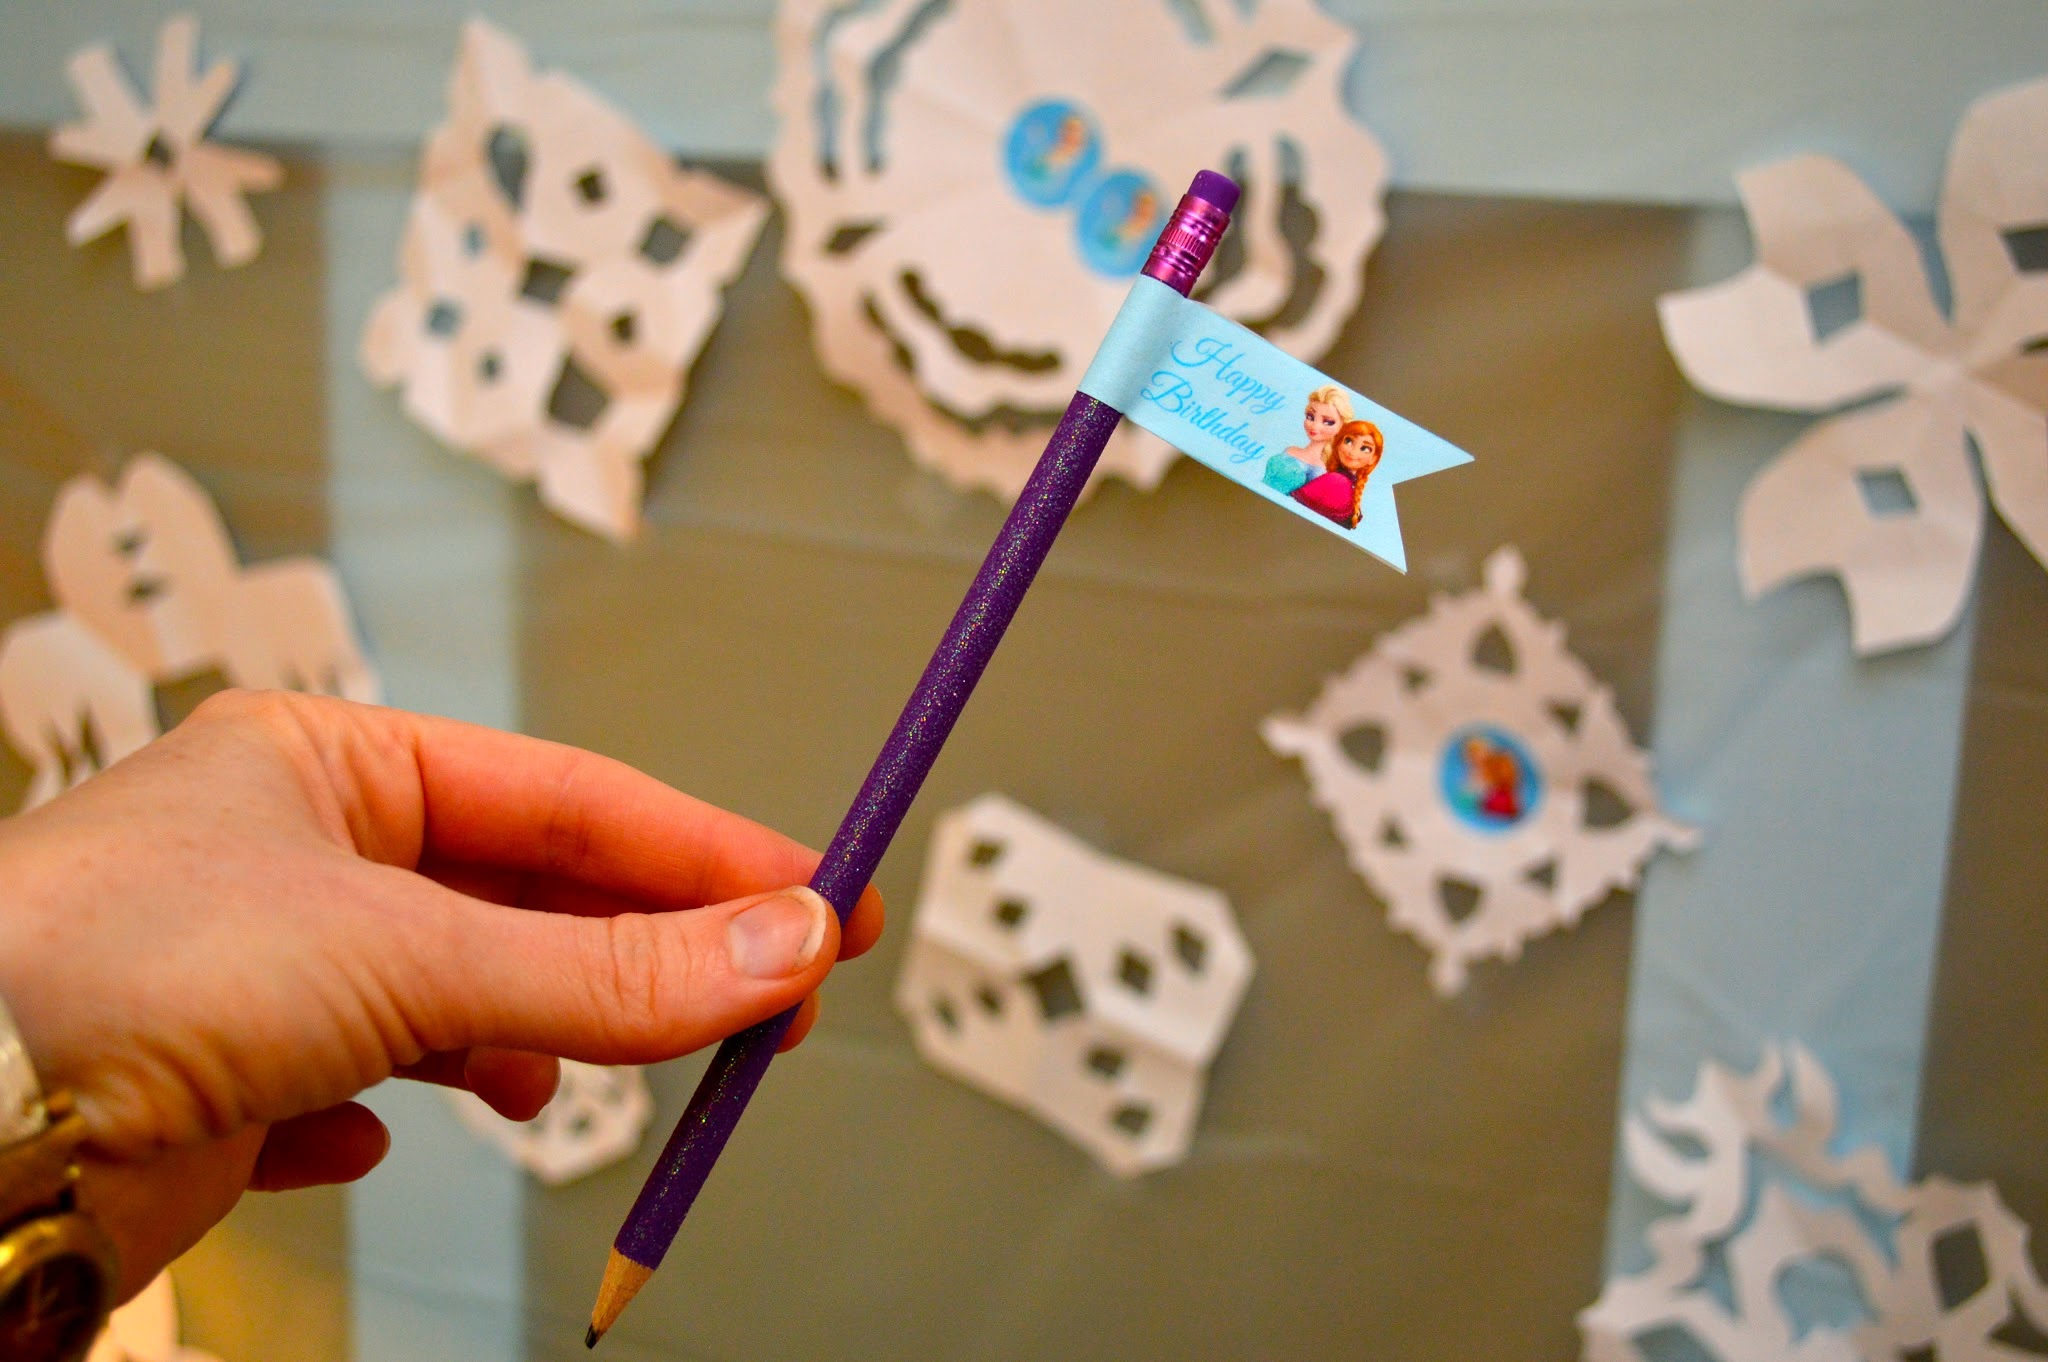
Sparkly pencil with printable straw flag

Prizes for the games (all from Dollar Tree)

Food:  The main course was an ice cream cake from Baskin Robbins:


The birthday girl got to sample flavors and she chose chocolate chip mint with chocolate cake, which was yummy.  I was totally impressed with their decorations!  We provided the snowflake sprinkles and the paper Elsa and Anna, which I printed and cut from this website.  The assembly was pretty painstaking--I don't know that I would have done it in hindsight, but they did turn out cool and they were dramatic on the cake.  I stood them on bamboo skewers--make sure not to put them too close to the candle!

For our other snacks, we had


Snowman Noses (baby carrots) and Snowflake Apples (sliced into circles then cut with a cookie cutter--this was the one snack that was more labor-intensive than it should have been, but they were a big hit).


Reindeer Chow (some sort of trail-mixy stuff from Costco) and Icicle Sticks (pretzel sticks coated in white chocolate bark)

And Snowball Snacks (Pirate's Booty)

Didn't anyone ever tell us not to eat yellow snow?

We labeled the water bottles "Melted Ice" and our juice boxes were "Arendelle Punch."  I used the free printable straw tags from this free Frozen Printable Party Pack and wrote the kids' names on them to keep boxes from getting mixed up.

I made labels for all of the foods using images I found online--the kids got a kick out of looking at all the pictures.

And finally, our activities:

I printed out a bunch of Frozen coloring pages for the kids to do as everyone was arriving--the girls were totally into it.  Don't know how that would have gone over at a boy party, but MY boy was into it.  At least the pictures of Olaf.  And I don't know what I was thinking printing out equal numbers of both Anna and Elsa--I had to print extra Elsas twice to keep the peace.  Coloring happened again at the end of the party as people were leaving.


We played Pin the Nose on Olaf (pretty self-explanatory):


an Icecube balancing game (each kid had a partner and a spoon, I gave one partner an ice cube and they had to walk it to their partner, transfer it, and the partner came back the other way.)


I liked it, and it was really cute to see the concentration on the kids' faces, but it wasn't the kid favorite.  Maybe with an outdoor party this would have worked better, but it was really rainy and soggy here that day.

And Cold Snowball, our version of Hot Potato.

Down to the final four

What worked out really well was that we were using the Frozen soundtrack for the music (obviously), and as kids got "out" of the game, they joined a sing/dance-along to the music while the other kids finished the game.  We ended up adding another round of JUST sing and dance-along at the end.


I also had a bunch of white balloons that I was planning to blow up to play "keep your snowball off the ground" in the backyard, but it was too muddy.  Particularly when the guest of honor had this outfit to keep clean:

Her auntie bought it before Christmas!  Lucky thing, since they've been sold out for months I guess.  Pretty fantastic birthday present.

We had so much fun, and Little Sister was totally delighted when the girls called her Elsa when she arrived at school this week.  None of the preparation I did felt like too much to me--it was all pretty simple and affordable, and I was having fun doing it, and the kids enjoyed it, so it was a win.  I know they would have enjoyed themselves even without the food labels and theme activities etc, but I get a kick out of coming up with that stuff in a manageable way, so we went for it.


Wednesday, February 26, 2014

Make It Work Mini-Cowl


This is sort of my default signature style piece, because it is totally the kind of thing I always like to wear and make, but I didn't set out to make it for Signature Style Week (that's the link you can follow to vote for me starting Friday!) Well, I sort of did, but I planned on making a whole outfit and really doing it right, and things just didn't happen that way.  But I did finish the top, and I do love it, and here's why it's a signature piece for me:

-I like to buy fabric that grabs my attention, without really knowing what I might use it for.  I loved this printed knit when I saw it online at Girl Charlee, but I'm really bad at interpreting the information they give about knits, so I didn't really know what the fabric would be like.  I also never remember to pay attention to print scale when ordering online, so that was a guess too.  Since I didn't know what I was going to use it for, I only ordered a yard, thinking I'd probably do something for the girl.  But I really loved this soft, slinky knit when it arrived, and I wanted to keep it all for myself.

Ah, yes.  How I love to gaze out the window and ruminate.

-I decided that what I really wanted to make was a long-sleeved cowl neck top.  But I only had a yard of this fabric, and I didn't like the idea of adding in any solid fabrics.  I am really picky about length--I like my tops to be longer than average, and my sleeves as well.  I drafted my pattern and cut the bodice and sleeves out first (verrry verrrry carefully to maximize the fabric).  I cut the sleeves short on purpose to leave some bigger pieces for the cowl, and made wide cuffs from scraps to get the length I wanted. I thought I'd figure out how big I could make my cowl when I knew how much I'd have left over.

I thought the slight v in the back of the cowl was cool, but looking at it here
it seems maybe a bit strange?
Well, it turned out I had barely any scraps left for the cowl.  This skinny little baby cowl is pieced together from literally 5 scraps of fabric.  You really can't tell unless you are looking for it, because I was very tricky in hiding my seams on the underside, but it was definitely a puzzle.  And I ended up doing some sort of impromptu french seams when attaching the cowl (can I even call it that?  It barely folds over...) because I wasn't sure where the seams would show when everything flopped around a bit.

One little yard, you guys!
-So, the style of this top is really me.  A fun print in my favorite colors, a comfortable knit with some special details, and with extra length in the bodice and sleeves.

And bonus points that I can wear it with my favorite cardigan!

I didn't make the cardi.  I have tried to recreate it to no avail.
I'm not gonna lie, there are some really amazing sew-along submissions this week in the Signature Style category.  If you want to go ahead and vote for me anyway because you love me, that would be cool (I'm #50), or you can vote for someone else who went all out!  But I do have to let you know, I came in tied for 4th last week, only away from 1st place by 6 votes...so you could make the difference!

Also, if you haven't been following along, you should definitely check out the final week of the REAL Project Sewn competition--voting for the remaining three talented ladies ends on Thursday, I believe!

Monday, February 17, 2014

Best Excuse for Shoe Shopping!

I knew that I'd eventually write about our family's upcoming adventure on my blog, but I didn't think it would come about in such a roundabout way.  But I can't think of any other way to write about the outfit I made for "Inspired by Shoes" week on Project Sewn other than to tell you why my shoe collection is in major overhaul right now.


I love shoes, but I have a hard time investing in the good quality shoes that are going to last me a while and be comfortable AND stylish.  So I usually end up buying lots and lots of cheap, cute, disposable shoes...except that I then hang onto them even when they are worn out and gross.  

Not even all of them.

So, when we decided that we would be moving our family to Tokyo this spring for 1-2 years (how's that for a lot of fanfare for such an announcement?), I knew that I would need to make some big changes in my shoe wardrobe.  I wear a size 9 (sometimes 9.5), which can be hard to find in Japan, so I wanted to get the basics that I would need while I was still in the states, and I wanted to get good stuff.  Which meant getting rid of 15 pairs of worn-out shoes, and buying (so far) 4 new pairs.  Which brings me to my outfit!  

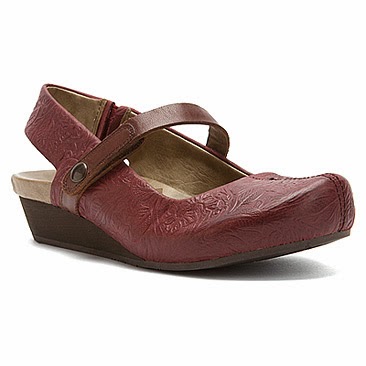
My outfit was inspired by this pair of shoes:

Image from Shoebuy.com, where I bought my pair

Burgundy, with a print (well, sort of) and an open back, and it can be dressed up or down.

Gotta watch my posture--looking a little maternity here!
I knew I wanted to make a casual skirt, because it would go well with the style of the shoe and also show the shoes off.  I made mine out of a much larger skirt that I found at goodwill--a nice, thick mini-striped interlock--and used Adrianna's tutorial from Crafterhours on making a fitted knit pencil skirt.  


This went really quickly, because I made the pattern a while back for my Mad Men-inspired skirt for last season's Project Sewn Era challenge.  I did a hidden elastic waistband this time though and (gasp!!) skipped the pockets for a more streamlined look.


To go with it, I made a top that I had been wanting to make for a while.  I saw this tutorial from Jess at Me Sew Crazy for an open-back knit tunic top, and thought it was so cute!  


Perfect with the pencil skirt or a pair of skinny jeans.  The burgundy and black bird print knit that I bought from Girl Charlee tied in the color of the shoe nicely, and of course the open back of the shirt mimics the slingback of the shoe.

The back looks pretty low, but I can actually wear a regular bra with this.
I made my sleeves more fitted and longer, and I lined the bottom part of the tunic as well as the bodice because the bird print knit was so thin, and I didn't want it to be see-through. I made the lining a tad longer so it would show at the bottom, but I left the sleeves unlined.

To top it off, I had a wrap dress that my friend passed into my upcycling pile that happened to be the same color as the shoes, so I made an open cardigan to tie the outfit together.  It was so simple--I saw the idea here, and adapted mine to my liking by curving the bottom edges and adding an elastic band to the back at the waistline.


I love the way the pieces work together, and that they are so versatile in other outfits!  And they go great with my new shoes!  Think this outfit will work for a mom-on-the-go in Tokyo?


And yes, there will be voting!  Starting Friday and running through Sunday, you can find my image along with all of the other sew-along submissions at the bottom of this page, where you can VOTE FOR ME (I'm lucky number 13)!!

My assistant did a great job of staying out of the photos until I was done :)

Silly girls!

Monday, February 3, 2014

Crossover Hoodie Dress

If I were three, this is what I would want to wear every day.


It's made from a lightweight sweatshirt fleece.  It has a cozy lined hood.  The neckline is easy to pull on yet covered up due to a wide crossover coming together at an empire waist.  It's got fun  mixed prints (black and white owls with chevron accents in the hood lining, pocket lining, and cuffs--all from Girl Charlee), a splash of my (and my girl's) favorite color, purple (upcycled from a jersey sheet, trimming the pockets and cuffs)--and of COURSE it's got pockets!


After the initial wear, I did end up trimming the length a little bit to make sure it steers clear of her back bike tire.  She's not too disappointed despite her love of long dresses, so that's good.


Here's a closer look at the bodice:

It's hard for me to photograph details on a white garment--can you see what's happening here?
I love the way it came out so much!  I want to recreate it for myself in a different print.  I drafted the pattern after looking longingly at this tutorial for a similar little baby sweatshirt by Made by Me and Shared with You, which is way too small for both of my kiddos.

The hood (and crossover neckline) is lined in the same chevron as the cuffs, as I mentioned--here's how that looks:

I straightened out the hem a bit when I shortened it :)
She has been requesting this dress when it's not in the wash, so that's a good sign.  It is spending more time in the wash than I would like--I guess that's what you get when you make a 3-year-old a white dress!

How many more pictures?
The pocket is a detail I loved.  I had pinned the tutorial for this pocket from anu*miki ages ago and this seemed like the perfect dress to try it on.  The tutorial is in Dutch, but between Google Translate and the photos it was no problem to follow.

Side seam pockets with purple accent and chevron pocket lining
Since this dress has a little bit of all of the things that I and Little Sister love, it seemed like a good submission for Signature Style week on Project Run & Play.  I have been sewing, but it seems like it's been harder and harder to get my projects posted here lately.  So thanks for the inspiration and motivation, Project Run & Play!  I hope to join in for at least a few of the Project Sewn themes as well!

Hope to see you again soon, Blogland!

Thursday, January 23, 2014

Little Leia Costume

Oh, I am so mad at myself!  I meant to finish this blog post last night so that I could upload it into the "Movie Inspired" week for Project Run and Play, and now submissions are closed.  Boo.  But I'm going to post it here anyway, since it's done and everything.


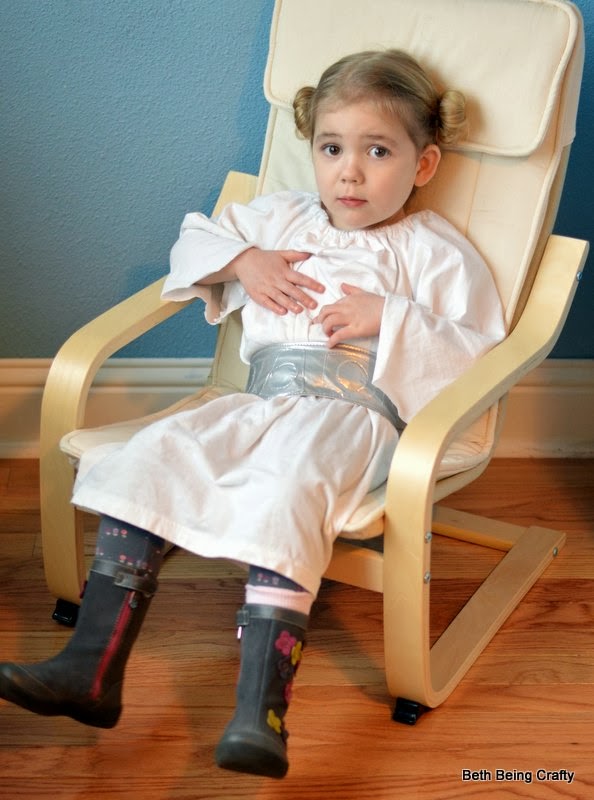
The Boy is having a Star Wars themed (SIXTH!!!) birthday party next weekend, and he already has his Luke Skywalker costume since that's what he wore for Halloween.  Little Sister will be the only girl at the party, so it seemed fitting that she have a Princess Leia costume to wear.  IF I could make it quickly, easily, and cheaply.


Well, check, check, and check!

I know, I know, Leia doesn't have a light saber, let alone a purple one, but give a girl a break!
Light saber is made from a wrapping paper tube covered in fabric from an old sheet and duct tape.
This costume is made from a couple of old t-shirts that I cut up and sewed together using a couple of free peasant top/dress tutorials.  Here are the links I looked at (free peasant dress tutorial from Trendy Treehouse and free peasant top tutorial from indietutes), and for reference, I cut the body panels out at 16" wide at the top, widening to about 18 inches at the bottom, and 25 inches in length.  I used the existing hem of the old t-shirts so I didn't lose any of that length to hemming.

I didn't have quite enough length so I had to sew two t-shirt pieces
together to get one of the panels.  I thought the belt would cover the seam...
maybe we should turn the dress around the other way!

For the sleeves I cut out two rectangles that were 12.5 inches wide and 18 inches long, and ended up cutting them off at an angle to mimic Leia's sleeves.  I didn't hem the sleeves since jersey doesn't fray.


The belt is obviously a defining feature.  It's the only thing I spent money on--I spent $1.35 on a quarter yard of silver vinyl fabric at Joann's.  I already had the velcro I used for the closure in the back on hand.  And Jess from Craftiness is Not Optional was nice enough to provide a free printable template and tutorial that I followed (except that I added a few extra inches to the belt's length).  Oh, and I didn't have any stitch witchery on hand, so I used regular double-stick tape to hold the pieces together while sewing.  It won't dissolve when washed, but since I'm not planning on washing or drying this belt in the machine anyway it should be fine.  I was surprised at how easy the vinyl was to sew--I expected more stickiness or something.  But you do have to be careful because every hole your needle pokes in that stuff is permanent!


And what kind of a Leia costume would this be without the hairdo?  I cut the toes off of a pair of too-small baby socks and made these mini-sock buns!  So crazy cute.

Ready to take on the galaxy!

And then have a rest.


Tuesday, January 21, 2014

Upcycled Earwarmer/Cowl

This one is so, so easy.  It literally took me 5 minutes to make, including snapping the selfies of me wearing this item.


I have been growing out my hair, and I like to wear it up, but the mornings are chilly and it messes with my hairstyles if I have to shove a hat on my head to walk the kids to school in the morning.  I know, life is hard. But I've been meaning to make a snuggly headband so I can wear my hair up and still keep my ears warm while walking around outside, and I've finally done it.

I found the remains of a cashmere sleeveless tank in my sweater upcycling pile--I had used the rest to make a pair of armwarmers which I am now wishing I had kept!  I was going to follow this cute tutorial to make one, but then it occurred to me--a turtleneck would probably do the trick.

I cut off the turtleneck, folded the raw edge under and sewed with a zig-zag, and I was done.  And it feels great!

If you didn't want the double-duty of using it around your neck as well, it would be fun to embellish or gather the headband together, but I like the idea of pulling it down around my neck sometimes when I do want a full-on hat on my head.  This would also work well for a kid's cowl!

If you wanted to make something similar but didn't have a turtleneck to work with, any stretchy sweater fabric should do.  Just cut  a rectangle about 20x7, fold in half right-sides together and sew the 7" long ends together, then turn right side out and hem the top AND bottom with a zig-zag stitch.

And guess what?  It fits Little Sister, too!  Dang it, why is it so much cuter on her?

I plonked it on her while we ran errands this afternoon.