Showing posts with label skirt. Show all posts

Friday, July 15, 2016

Well Hello There! Tank + Skirt = Dress Combo

Let me get this out of the way:  It's been a while.

Clearly, I have not been blogging, but I'm trying not to let that bug me.  So what if I only blog every once in a while now?  Just because I have ignored the blog for the last 5 months or so doesn't mean that I'm not allowed to post when I DO feel like it, right?

It's just that I've been using Instagram (I'm bkcav, if you want to follow me there) to share my sewing lately, which has been more satisfying and engaging--I can immediately see what others are sewing, and there's such a huge active sewing community there.

But THIS project requires a few more words than what fits on an instagram photo, so I thought I'd accompany my instagram pic with an actual blog post to show off what I did here. I'm pretty pleased with myself!

First of all, I ordered a yard of this great rayon challis print with the intention of making a loose tank top (I've been perfecting my pattern for a while now--I started with the free Sorbetto Tank from Colette Patterns, and have tweaked and shifted and adjusted so many times that I'm not sure you can even count it any more!).


I was pleasantly surprised to get a bonus in the mail--I got the end of the bolt, so I got almost 2 yards of it instead of just one, but that meant I was faced with a dilemma--use the extra fabric to make a dress instead of a tank, or make the tank I originally had in mind and see what was left over?  I couldn't really let go of the tank, since that was what I pictured when I saw the fabric and I was anxious to use the tank pattern now that it was just how I wanted it, but I hated to waste the rest!


I have been doing a curved hemline on this tank pattern, but this time I wanted to try a vented side with straight hems on the front and back.  It was a nice break from the curves--I have been using bias tape to get curved hemlines to lay flat, and this time I could just fold, press, and hem the old-fashioned way!


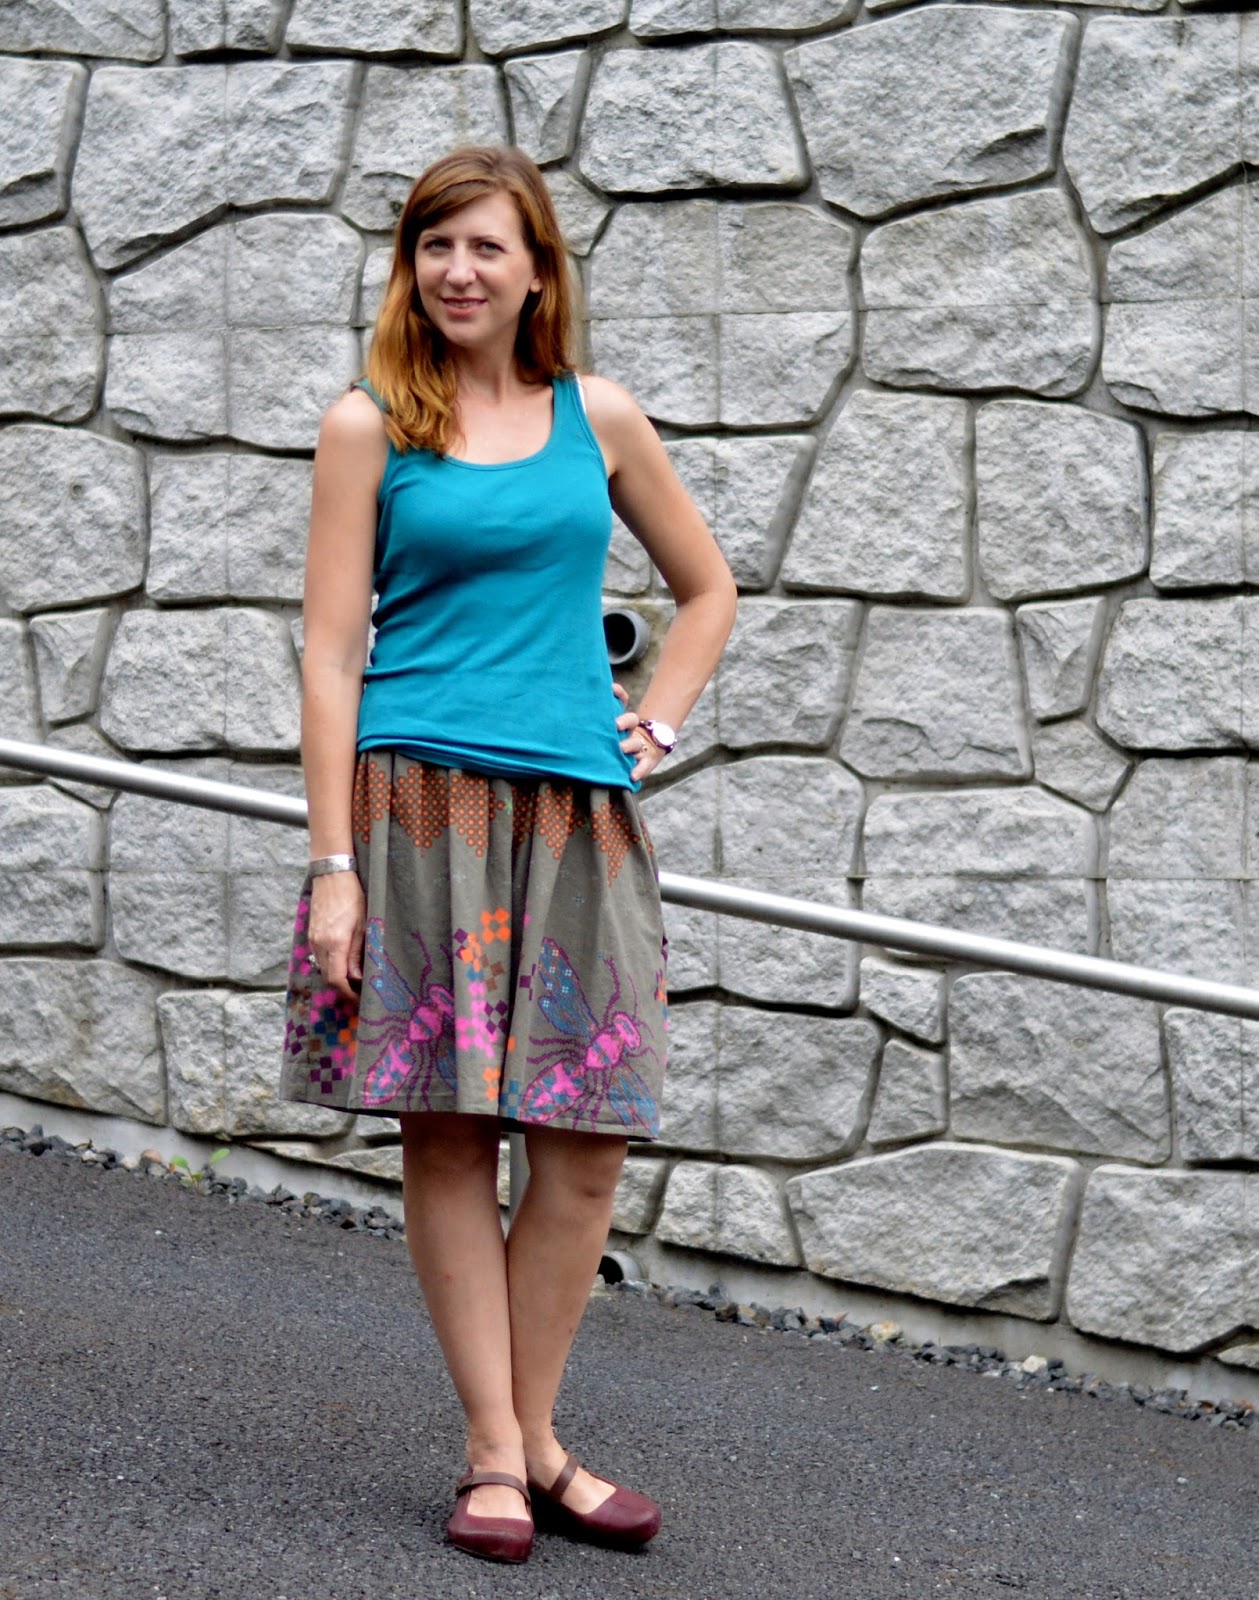
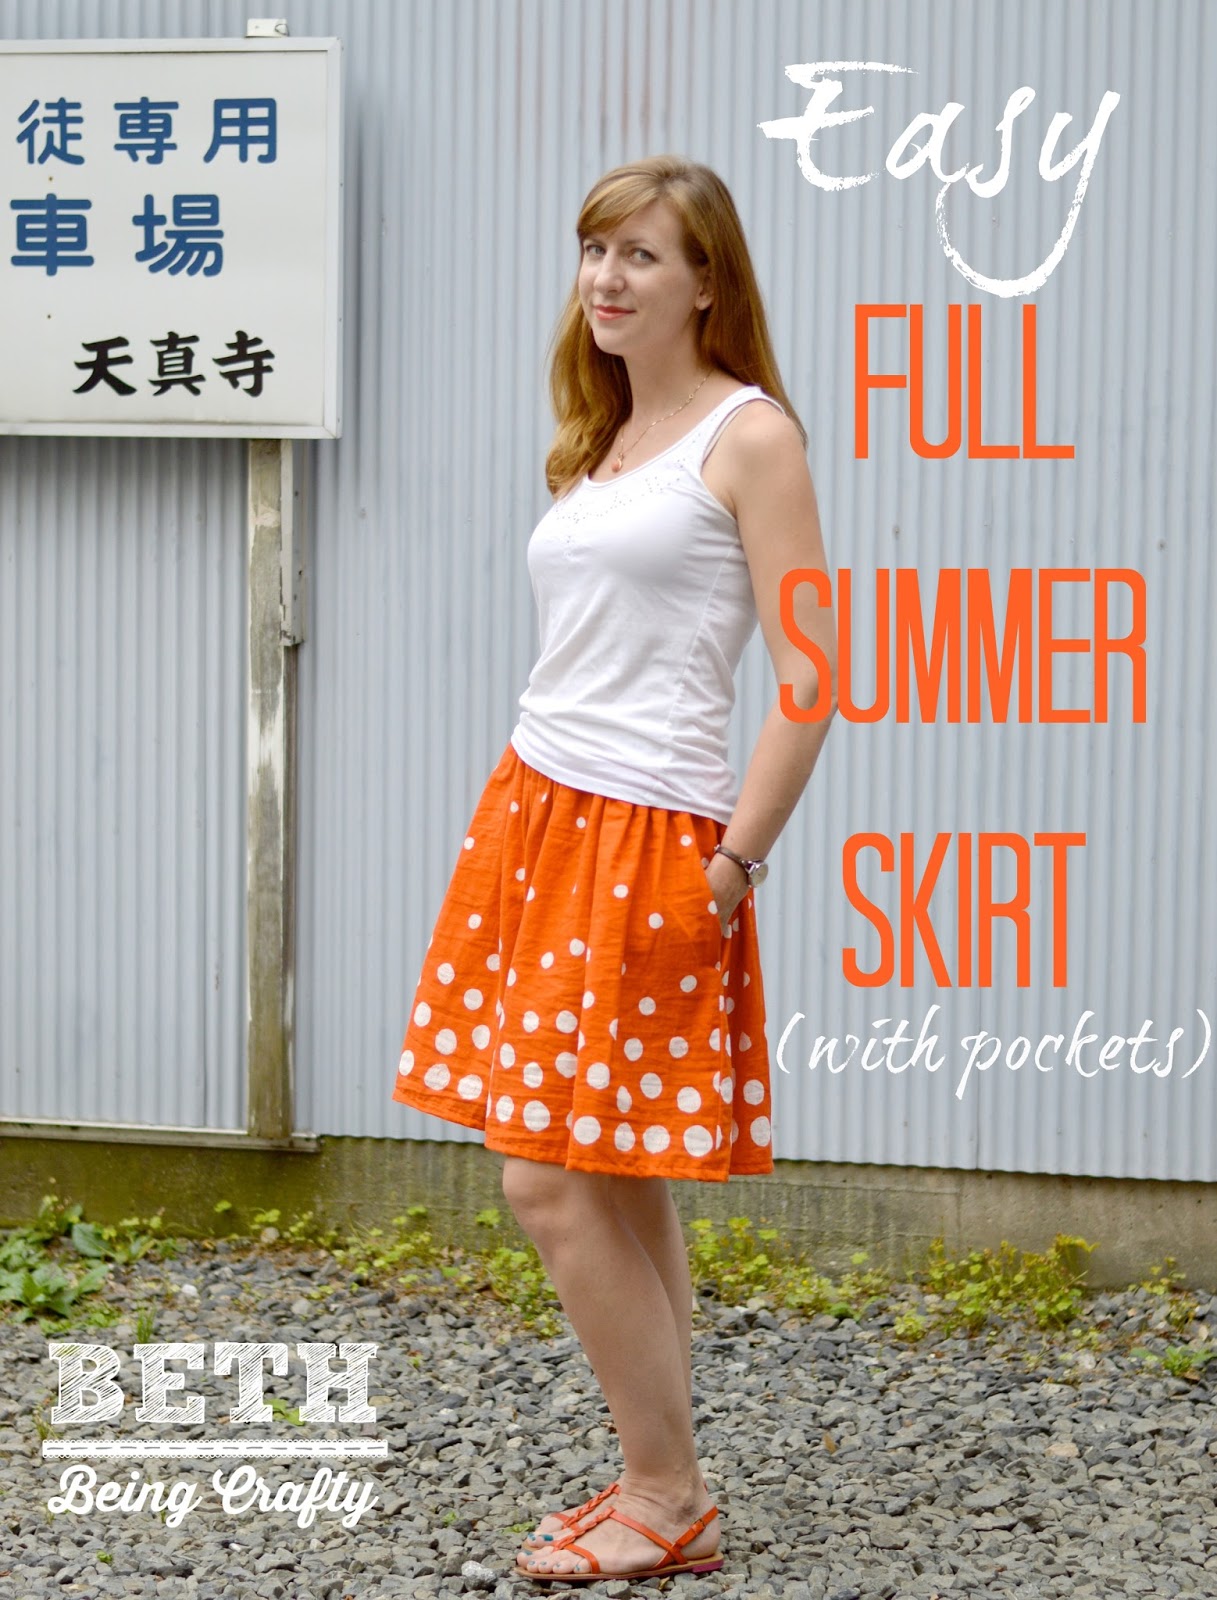
Well, it turned out there was JUST enough to eke out a simple gathered skirt.  I did a rolled hem on my serger to avoid using fabric in the hem, and gave it an elastic waistband, both for ease and again to save fabric.  I was able to make pockets (OF COURSE) from the scraps around the tank top pieces.

I was ALWAYS going to give it pockets.
And now for the cool part--when I put the two together, it totally looks like a dress!

The skirt's elastic waistband gives it a belted-dress look.
And not only that, I have dress OPTIONS!  Depending on where I put the waistband, I can also get a dropped-waist more slouchy style:


Honestly, this is less my style, but it's still nice to play around with it!

And I could wear the top out over the skirt as well, giving it a layered look, although one that I probably won't wear.  Maybe with a belt--a sort of peplum idea?

Who can resist this kind of variety?  And I love the way it plays with my Totinette necklace too :)


Anyway, I have been sewing with rayon challis a LOT this summer--it's so nice and soft and drapey, and easy to sew with!  But it definitely wrinkles, which means a lot more ironing that I am used to.  But I think it's worth it, so far!

Monday, February 1, 2016

Strawberry Tap Dance Togs

You guys, Project Run and Play is back!  I get so inspired by sewing with a group of people and seeing everyone's take on a theme, and frankly having a specific project that I know will end up in front of more than my average number of eyeballs is very motivational to me.

When I saw that the theme of the first week was knitwear, I knew immediately what I wanted to make.  Little Sister just started a fun tap dance class at a community center, and although there is nothing strict about it, we did notice that there was a dress code sign hanging up that specified tights and a leotard.  Well, Little Sister didn't have a leotard but I thought it would be fun to make one.  My first try was an awkward fit in pale pink stripes that gave me enough information to draw a new pattern and start designing a full knitwear look for Project Run and Play.

I'm getting down to the last bit of the awesome realistic strawberry print knit that I bought in Japan for less than $2/yard (I made this newborn set using it, and this tee for myself), and I instantly knew it would be a perfect leotard.  I could picture black and white accents for a graphic pop, and once I got started I couldn't stop!


The leotard was the no-brainer (I started with the free 24 month pattern from Shwin and Shwin and adapted it--added sleeves, and made it fit an almost-6-year-old), and I wanted to make a cardigan inspired by ballet wrap tops to go over it, but with a bit funkier vibe.


I love the black and white stripes against the strawberries--so fun!  Actually, all of the fabrics I used except for the black ponte knit in the cardi came from the fantastic Knits floor of Tomato fabrics in Nippori (Fabric Town in Tokyo).  I decided to add a little accent on the waistband (well, rib-cage band, I guess, since it's well above her waist!)--a bit of the black stripe gathering the band up a bit.

Sorry for the washed-out photo--it's hard to get the details to show up in black knit!
But the strawberry leotard is definitely the star of this look.  The fabric is a 4-way stretch, and the legs and neck are bound with foldover elastic.


The back of the leotard dips down a bit, and I cut the legs pretty low to avoid that awkward underwear-under-the-tights bunching.  And then of course we needed leg warmers--essential for dance class!


And while I was at it-- a headband too!  Why not?  I mean, when you start with that strawberry fabric, you go big or you go home.

This hairstyle cracks me up.
Next I added a pull-on french terry skirt to throw on after class.  The pattern is free, from Craftiness is not Optional--wonder where I got the idea to use this fabric?


Is it a bit much when you put everything together?  I don't know...I just can't get enough of it!


Little Sister prefers to wear just a few of the pieces at a time, but so far she has been excited about mixing and matching them.


I love all of the options!  And now I want to go eat a strawberry!


Wednesday, August 19, 2015

Catch-up Time--a fun elastic-waist skirt!

Wow, moving from one country to another does not go well with blogging!  I have been out of it for a couple of weeks, what with getting ready to move back to our home in the US and then working through the settling-in process, and now I think I'm about ready to start catching up on blogging some of the projects I've finished in the last few months!

I'm taking baby steps--this first post will be a quick one on a simple elastic waist skirt I made.

Rainy day photo shoot!


I used the same proportions as when I made this double-gauze skirt, but I only had wide white elastic, and I didn't like the way it looked with the more muted color palette of this lovely Melody Miller print.  So I decided to make an easy encased elastic waistband this time, and I think it's a great look!

I bought everything they had at Tomato in Nippori when I found this
Melody Miller print for about $3.25 a yard!  I think I've got about 8 yards of it left.

The waistband gives the skirt a little bit more professionally finished look, I think, than the exposed elastic waistband, although I think those have their place as well!  Rather than just folding the fabric over to make a waistband, I cut one that was about 1.5 inches longer than my hip measurement.  This reduces bulk at the waist while still allowing me to make an easy pull-on skirt.  To figure the width, I just doubled the width of my elastic and added about an inch for seam allowances.

My classic pose!
I attached the waistband to the inside first, then topstitched it to the outside of the skirt so that there would be no raw edges on the inside.  I also did french seams on the sides, so everything is enclosed! These are the little things that I appreciate now as my sewing skills increase--my older garments with raw, fraying edges on the inside just aren't holding up as well as I'd like, plus they feel much more "homemade" rather than hand-crafted when the inside doesn't look nice!


When I wear this skirt, I usually push the gathers to the back so that I get a flatter front and more poof in the back.  Just personal preference!  And I also like the way it looks with an untucked top, although I definitely only wear full skirts with fitted tops, unlike many of the Japanese women I see walking around!  They can pull off head-to-toe loose garments, but they just look like sacks on me.


I had to finish this shoot quick, since I was really starting to get wet!


The people walking down this street thought I was crazy!

I've got a few more things to show you, hopefully soon!  I was pretty busy sewing things up before we left Tokyo since I knew it would be a few months before I saw all of my pretty fabric again.

Sunday, July 19, 2015

Skirting the Issue 2015: My contribution

Hi!  This is a quick post to show you a couple of quick skirts that I made and tell you about a really cool project going on this month, Skirting the Issue.  Simple Simon and Company host this event in order to inspire sewists to donate skirts to kids in foster care, just in time for the start of the new school year, and they are collaborating with several sewing bloggers this month to provide lots of free skirt patterns and tutorials.  The goal is to collect 1000 skirts this year, and if you'd like to participate the details are in the link I provided above--the basics are that you sew a skirt (or several) by August 15th and donate it to an organization in your area that provides clothing to foster kids.  Then you let the ladies at Simple Simon know how many skirts you made so that they can keep track.

I made this simple elastic-waist full skirt from some fun Melody Miller Rubystar fabric:


size 3T

And this knit a-line skirt with a yoga waistband, using this tutorial from Craftiness is not Optional:

this one is a size 5, but was totally too big for my skinny 5-year-old!
I'll be mailing my skirts to With Love Oregon, an awesome organization that helps set up foster parents with great quality clothing and other supplies they need to help them successfully bring a foster child into their family.  I'd be happy to provide you with a mailing address for your donations if you'd like to participate!


Friday, July 17, 2015

Summer Outfit from Free Patterns!


I have been struggling with getting decent pictures lately, which makes me less motivated to get new things up on my blog.  For some reason, I just could NOT get the photos of this outfit in focus.  My least favorite thing about doing this blog is getting photos of myself--sometimes, using the remote is easy, but more often than not I just can't get the focus or exposure right when I don't have anything to focus on.  As I was going through these photos, I can see my facial expression getting more and more strained as I failed to get the shots I wanted, and of course I feel weird whenever people walk by.

BUT!  I will still share the outfit, because these are good patterns and you should try them out.

You get the idea.
First, the skirt.  This is the free Simple Summer Pleated Skirt pattern from Sew So Easy, and here are my thoughts about it.

1.  The pattern goes together easily and looks really professional.  Here's my back zip!  I really liked putting it together.

Pattern matching WHAT!
2.  The pattern suggests using a lightweight drapey fabric, and I concur.  I used a stiffer Japanese linen/cotton blend, and I'm not in love with the way it falls.  This pattern is not meant for a structured skirt.  You could, however, use a more structured fabric for the waistband but something with drape for the skirt.  I was thinking the structured fabric would give the skirt more of a pencil look, but it doesn't.  I'm thinking of trying Delia's pleated pencil skirt to get the effect I was going for here.

3.  The pattern runs big.  I cut out the appropriate waistband based on my measurements, and had to cut out over 3 inches altogether.  Be sure to test your waistband size before you attach it to the skirt.

4.  There are POCKETS!  Yay.

The top is the free Perfect Cap Sleeve Tee from iCandy Homemade.  I have made this top a few times before, and I love its simplicity.  The free pattern is a size medium, and it works well for a loose top on me.  This time though, I was going for a more fitted look, so I tried cutting this one smaller just by placing the pattern off the fold a little bit.  That was not the best way to do the fit adjustment because now I don't like the neckline quite as much and the sleeves fit a little weird (I added the sleeve bands, but that's not the problem), but it's still baggier than I want in the torso.  I will have to play around with resizing this pattern differently to get the fit I want.


This fabric is a slub knit from Girl Charlee.  It's almost see through but not quite--I can get away with it if I wear a nude bra.  Anyway, I like this outfit better with the shirt tucked in (NOT my usual M.O. but in this case...)


Anyway, there's an outfit I made lately and am moderately happy with but not excited.  It can't all be perfect!

Monday, June 15, 2015

Double Gauze Dotty Skirt

This is one of those easy projects I've been meaning to do for a while, and finally got around to it.  Just in time, too--the weather is perfect for a breezy, comfy, fun, bright skirt!

Let's pretend that sign says "I love your skirt!"

This skirt has an exposed elastic waistband (here's a great tutorial on doing one from Dana of MADE), and the skirt is just a rectangle of some dreamy Japanese double-gauze (with pockets, of course!)


In case you want to make one JUST like mine, I'll give you some details:

1.  I had just over 2 meters of a border-print double gauze (like, 6 cm over), so I cut it lengthwise down the middle to put the print along the hem.  I had a tiny hem, first to use as little fabric as possible but also so I could remember what this fabric was later by keeping the selvage visible ;)

2.  I wanted 2 side seams, rather than one back seam, so that I could add pockets.  So I cut 2 rectangles that were each 103 cm wide (40.5 inches) and 20.5 inches long (since I had that tiny selvage hem--if you're doing a regular hem you will want to add a little length).  Oh, I guess it's relevant to know that my waist measurement is about 31", so the total width of the skirt was just about 2.5 times my waist measurement.  I wanted it to be full, since the double gauze is so soft and floaty!

Or maybe the sign says, "Parking for Awesome Skirts Only."


3.  I cut out four pocket pieces (I used a basic white muslin so I could save the rest of my double gauze) and attached them 2.5 inches down from the top of the skirt.  Here's a perfect free pocket pattern from See Kate Sew if you don't already have one you like!

Boo on my pattern matching!

4.  I sewed my side seams using french seams since double gauze frays quite a bit.  (Here's a french seam tutorial from Tilly and the Buttons.) Did you know you can sew a french seam even when you've added a pocket?  You just go right around it, and make sure to clip the curves when you turn it around to sew the second seam!  However you sew the side seams together, make sure to give it a good pressing before you continue.

5.  If I had a serger here in Japan, I would have serged the raw edges at the top of the skirt before attaching the elastic waist.  I don't, so instead I pressed the raw edges towards the outside of the skirt twice like I was doing a teeny tiny hem, except for turned to the outside of the skirt instead of the inside.  It doesn't really matter which way, but this way it's hidden under the elastic so you don't see it on the inside or the outside.

6.  Next, I gathered the top of the skirt so that it was just slightly bigger than my hip measurement.  I wanted it to easily slip on and off.  Dana from Made ALSO has a nice gathering tutorial if you need it--I admit to using the cheater method whenever I think I can get away with it! I like to gather the front and back separately, just because I get nervous gathering such a large amount all at once!  Once I have it to the width I want, I tie off my gathering threads then make sure the gathers are adjusted evenly.

7.  Time to attach the elastic!  The gathered top of your skirt should be a few inches wider than your elastic.  Now's the time to look at the tutorial from Dana on making the waistband and attaching the elastic!  Hers is an easy and nice-looking method--it's for a circle skirt but this one will work the same way.  But....

8.  Full disclosure--I did attach my elastic differently.  First of all, I started with the skirt inside out (with the gathers visible, laying on top of the elastic) so that I could make sure I had my gathers laying flat on the inside.  I did a wide zig-zag grabbing the gathered top of the skirt, about a half inch away from the edge of the elastic.  Second of all, I actually sewed the elastic twice.  After attaching the elastic, I turned the skirt right-side out and sewed the bottom edge of the elastic down with a tiny zig-zag.   Here's how my waistband looks, outside and in:

See the two zig-zag lines of stitching?


9.  Oh, you can see that I also covered the back seam on my elastic waistband with some bias tape.  Just for fun.  And then I don't need to put a tag in to find the back easily :)  If you do this, put it on before attaching the waistband to the skirt!

They had little one-meter packs of traditional Japanese print bias tape at the 100 yen store! I bought lots.


10.  I saved the hemming for last, so I could adjust the length if necessary.  I was using a border print, which gave me less leeway than usual on how much I can hem it, so I tried to be accurate with my cutting and it turned out right on.  I am 5'7", and depending on where I place the skirt on my waist it's just above knee or knee length.

With the elastic sitting below my belly-button.
I tried it at my natural waist but it just wasn't as flattering.

11.  I tried to find an online source for this fabric, but alas, I haven't had any luck.  This was a remnant I bought at Tomato, the awesome fabric store in Nippori, so just to rub it in I'll tell you that I paid 600 yen (less than $5) for 2 meters of it.

And now, I just want to wear this skirt all summer!  Or maybe I'll make a few more--I have been addicted to buying double gauze and this would be the perfect thing to make out of it :)

Oh, and one more thing...

Hey guys...guess what?  This skirt just won an award!

Yes, that IS how I really feel about it!
And from the skirtmaster herself, Audrey from Skirt Fixation!  This is so cool and unexpected.


I was awarded the Best Woven Skirt in her 2015 Spring Skirt awards.  Believe me, you have got to check out the winners in the other categories--so many great skirts!  I'm excited to check them out.