Thursday, October 23, 2014

Halloween 2014: Peter Pan and Tinkerbell

I don't know how it happened, but the kids came up with the idea all on their own to be Peter Pan and Tinkerbell for Halloween this year!  I thought our themed costume days were over once they started having their own opinions, but somehow it worked out!  I went and bought fabric before they could change their minds, because at our house once Mom has bought the fabric, there is no more costume indecision.


Thanks to the wonders of Nippori Fabric Town, I was able to get the fabrics I needed for Tinkerbell's costume (dress plus winter fairy coat and trim) for about $4.  I had to spend a little more to get the great french terry I used for Peter Pan's pants and hat (I spent $6), and I bought a pre-made green mens' shirt for his tunic.


I'll do a quick run-down of the Peter Pan costume, since it was pretty straightforward, then I will share a little more about how I made the Tinkerbell dress and winter gear.  Isn't it nice that Tinkerbell has some stories where she gets bundled up, so I can make my daughter put on a coat and she'll still be in costume?

Winter fairy photobombed by Peter Pan
Like I said, the Peter Pan tunic is just a men's t-shirt.  I cut jagged lines along the sleeves and hem, and cut off the neck binding and cut a small slit straight down to mimic Peter Pan's collar.  That made the neckline pretty wide, so after The Boy tried it on I added a couple of angled seams from the neckline to the top of the shoulder to make the neck opening smaller.  Done!


I used my modified Hosh Pants pattern that I have used previously to make pajama pants for these Peter Pan Pants (I like to call them the Peter Pants).  I wanted them to be slim, since Peter wears leggings, but I wanted The Boy to possibly get use out of them as sweats after Halloween, so I didn't go full legging.

Flying
He had a belt from last year's Luke Skywalker costume that worked well--he can carry his Pixie Dust in there!  For the hat I mostly followed this tutorial, and I used this one for the boots using leftover fabric from my denim challenge outfit from Project Run and Play.


I had fun with Tinkerbell's dress.  I cobbled together ideas from a few different tutorials to come up with a shirred back tank dress with a double square circle skirt, and I think it worked great!

Very twirly

If you want to do something similar, I recommend adapting this free shirred back sundress bodice tutorial and adding this circle skirt (another free tutorial) to it--the points from the double square are perfect for mimicking Tinkerbell's leaves, I think!

Shirred back
I was only planning to buy a meter of fabric, and when the woman cut it for me it turned out there was a little over 1.5 meters on the bolt left, so she just gave me all of it for the price of one meter--which was only $1! (well, 100 yen).  And I was lucky she did, because I used almost all of it once I decided to make the double skirt.  Since I used a woven (a silky satiny stuff, which was not as difficult to work with as I feared it might be), I hemmed the skirt layers, which wasn't a big deal time wise.  I lined the bodice since the fabric was pretty thin, and I also added a layer of thin interfacing to the front of the bodice.

If I were Tinkerbell though, I might be a little chilly walking around in October, so I thought I'd try to make a winter fairy jacket.  I was so excited to find this quilted fabric (it's the same on the front and the back) for only $4 a meter!  And I only used half of it making this cute little coat!


I self-drafted the pattern using a t-shirt pattern.  I did french seams on the sides and shoulders since there's no lining; the fabric is double-sided so I wanted the inside to look nice and finished and also lay flat and feel comfortable.

The front and back dip down a bit to mimic the jagged leaf hem on Tinkerbell's coat.
The white crushed velvet trim came in a wide ribbon, so I just attached it like bias tape all the way around and as cuffs on the sleeves.  And I used a magnetic clasp to hold it closed!  The green quilted fabric is silky and has pin dots on it, and I've told Little Sister that she can use it as a jacket even after Halloween--I'm pretty proud of how it turned out!


I couldn't find any good green knit fabric to make leggings for her (or a shirt for Peter Pan for that matter), so I bought a pack of Rit dye in Kelly green and dyed a pair of white leggings out of our drawer for the winter wear.  Amazingly, they came out exactly the same color as the dress!  I would have liked them to be lighter, but at least they don't clash terribly!  I added some more of the velvet ribbon at the hem.


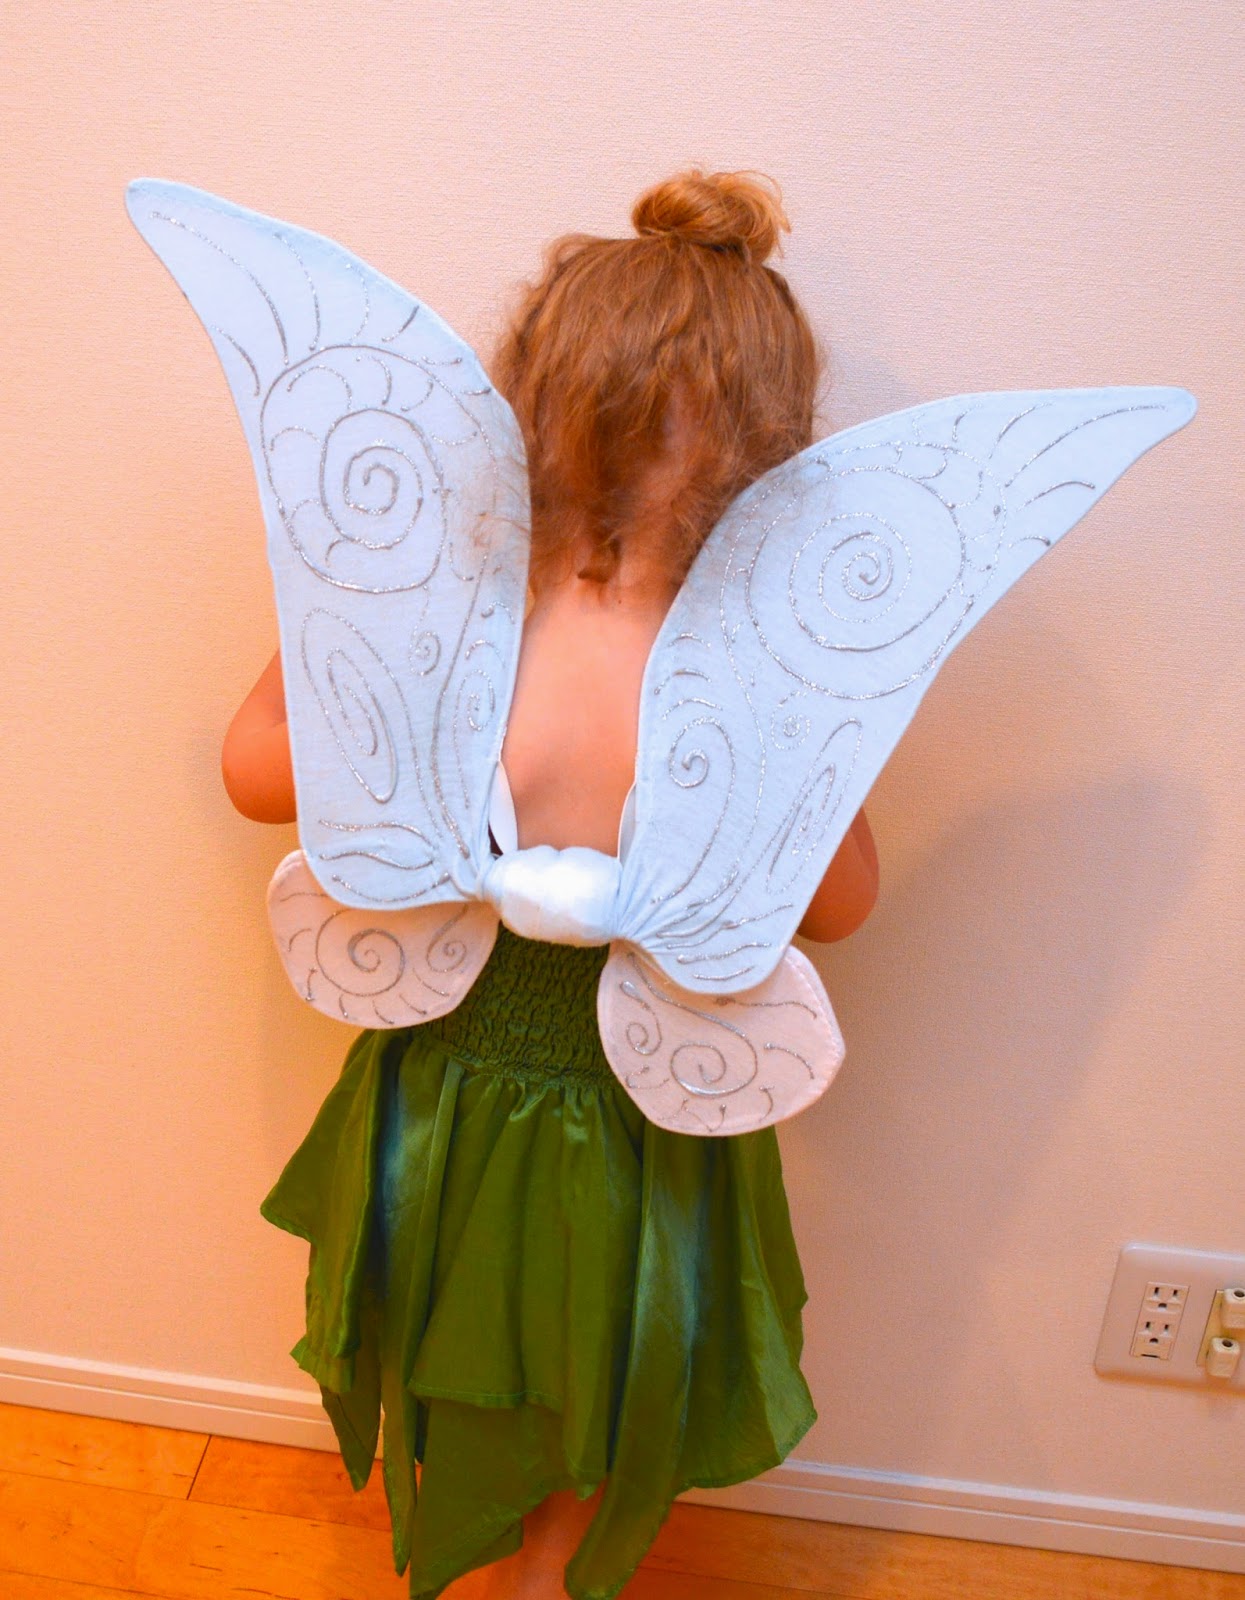
The dye match was even more amazing because I actually bought the dye for turning a white shirt green for Peter Pan.  But I couldn't read the fabric content of the white tee I bought, and while the leggings came out very green, the shirt came out a soft baby blue.  Not great for Peter Pan, but it was perfect for Tinkerbell's wings!  I had planned to buy the fairy wings but couldn't find any (except for fancy expensive ones for adult costumes), so I followed this tutorial to make our own, adapting the shape for Tinkerbell.  And I didn't have any white tights, so I improvised with 100 yen store t-shirts--both the one I accidentally dyed light blue and a plain white one.


And finally, I couldn't forget Tinkerbell's shoes!  Luckily these little white fabric shoes are easy to find in Japan--they are used as indoor shoes for little kids at school usually.  But they were a great blank canvas for fabric paint and a pom-pom.


If you've stuck with me this far, you get a reward--the silly pictures we took of these costumes! I would have loved to get out in the park for some fun outdoorsy shots, but it's been rainy and they get to wear the costumes to school tomorrow and I was afraid they'll get ruined before I got a chance to get good photos if I didn't just go for it.  These guys were so funny anyway.

Sneakerbell


Telling secrets

Toot noises: always funny.
Oh!  And we will be visiting Tokyo's unique Disney theme park, Disney Sea, on the day before Halloween!  So the kids will be able to wear their costumes to the park and be a part of the Disney Halloween fun.

Monday, October 13, 2014

Foldover Waist Pocket Skirt

I had a little piece of my Kokka Owl print double gauze leftover from my Ruby tunic, so I asked Little Sister if she wanted a skirt made out of it.  She said she did, but she wouldn't wear it unless it had purple on it.

I didn't mind obliging.


I added pockets, which are essential for her these days, and since the only purple I had in my stash was a thickish jersey, I decided to make a foldover waistband.  I also added a band of the purple at the hem, and used a little bit to trim the pockets as well.


Quick, cute, comfy, and made from scraps--a winner of a project!


She chose to wear it on her half-birthday.

Who's four and a half?
Clearly she needed a crown to accessorize.

Couldn't resist this silly face
I love this skirt for her--I actually think this fabric is better on a kid than it is on me, but I still couldn't resist it!

Monday, October 6, 2014

Signature Style Week: Hello Kitty Liberty of London!

Well, my photo shoot plans had to be cancelled for the typhoon we are currently experiencing here in Tokyo (Typhoon Phanfone, which I keep misreading as Pantone)--the kids' school is even closed today!  But I did finish my final look for this season's Project Run and Play, Signature Style Week.

This kind of challenge often stymies me, because it's so wide open--what IS my personal style?  And how does that translate when I am sewing for someone else?  Someone who has opinions, and increasingly strong ones at that?  Well, this week it all came together with an outfit that we are both really happy with.


On my first fabric shopping trip in Tokyo, I found this amazing Liberty of London print featuring Hello Kitty on Tana Cotton Lawn.

Hello Kitty in a formal garden!
Now, if you know me, this does not sound like the beginning of a signature style look for me.  I normally steer clear of licensed characters on the kids' clothing, and I am always in search of a bargain, which Liberty of London most definitely is not.  But I had just gotten my first-ever Liberty print using a gift certificate I had won, and I was still all aflutter with how lovely it was.  And the kitties (which, as I'm sure you know, are not actually kitties at all) were subtle--a fun little accent and nod to our recent arrival in Japan.  And I knew Little Sister would go crazy for it, since she never gets to have characters on anything except her underwear.  So since it was 20% off, I went for it, and thus marks the most money I have spent on fabric for a garment ever.  And it wasn't even for me!  But I was right--as soon as she saw the fabric, she started bugging me--"When are you going to make my Hello Kitty dress?  Have you made my Hello Kitty dress yet?  Are you making my Hello Kitty dress today?"

Lucky duck!
For the dress, I used The Caroline Party Dress from Mouse House Creations, a pattern I had purchased a while back but had yet to try.  The classic design seemed perfect for this cotton lawn, and I love the peter pan collar for a little accent.

The lining is the same pale pink fabric I used for the collar.
I sewed up the pockets-and-underskirt with no tulle version, and added piping as well, on the collar and at the waist. My girl is 4.5, and a bit on the small side, but she loves a big long skirt, so I sewed a size 4 bodice with a size 5 skirt.  The bodice is roomy, but not so much that she can't wear it, and I feel like it will fit for a while (which is good since it was an investment!).  I love the way this fabric moves, with the pattern's full skirt and underskirt--it's just as graceful as my girl!

Tiny dancer
But this is definitely a summery-feeling dress, and it is the first week of October.  Even when it's warm out, Little Sister likes to throw a cardigan on over her clothes, so I thought it would be fun to have a little coordinating cardi.  I love mixing prints, so this was a bit of my style thrown in--especially since I love the blues and turquoise in the print, but for Little Sister's style I featured the pink on her dress accents.


I based the cardi off of a little pink shrug that Little Sister wears all the time.  And as I was looking at it to get ready to make this new cardi, I realized that with all of the wear it gets (plus the other two girls who wore it before handing it down to us), that it might be time to replace that cardi anyway.  So I made this one reversible--the light pink on the inside is a pretty close match to the old one.

Little Sister likes this side better, because she says the striped fabric is softer against her skin.
Both cardi fabrics came from Girl Charlee--the pink is a baby rib knit, and the stripe is a cotton jersey blend.  In my opinion, BOTH are super soft!

I almost forgot to show off the back!  But boo, I didn't get any pictures of my perfectly invisible invisible zipper.

I made the sleeves a little longer than normal so that I could cuff them to show the opposite fabric, and I used a hook-and-eye closure so that it could be easily closed from either side.


I used one of my little scraps to make a matching headband too.  It's just a tube of fabric, then I made some pleats at the end and tucked a piece of Foldover Elastic in both ends and sewed it together!  Easy peasy.  Going to make a few in different fabrics for myself.

Which she actually does like, I promise!
It's funny--I was looking at pictures of Little Sister taken about two and a half years ago, where she was wearing a dress my mom had made for me when I was two (the third dress in this post, if you're curious).  It was in a fancy fabric (I was a flower girl in her friend's wedding), and it had a piped collar and waistband, and I remember thinking, I would NEVER be able to sew these kinds of details!  But guess what?  Here I am, doing it!  And I must say, I am pretty proud of the results.  And while I would consider this dress to be more fancy than everyday, Little Sister disagrees--she has worn it three days in a row, somehow keeping it clean, and wants to wear it to school this week.  I helped her choose something else for tomorrow, since she has both PE and Art, but she assured me it was great for running fast!  This dress definitely has Little Sister's signature style written all over it.

Oh!  And I have been watching the dreamy outfits that have been coming from the I [heart] Marcel Marlier series that Straight Grain and sewpony are hosting, and even though I have never been exposed to Marcel Marlier's books before, I feel pretty confident in linking this look up with their sewalong--between the peter pan collar, the full skirt, the cardigan, and the headband, I'm pretty sure this outfit works!