Showing posts with label accessories. Show all posts

Monday, February 1, 2016

Strawberry Tap Dance Togs

You guys, Project Run and Play is back!  I get so inspired by sewing with a group of people and seeing everyone's take on a theme, and frankly having a specific project that I know will end up in front of more than my average number of eyeballs is very motivational to me.

When I saw that the theme of the first week was knitwear, I knew immediately what I wanted to make.  Little Sister just started a fun tap dance class at a community center, and although there is nothing strict about it, we did notice that there was a dress code sign hanging up that specified tights and a leotard.  Well, Little Sister didn't have a leotard but I thought it would be fun to make one.  My first try was an awkward fit in pale pink stripes that gave me enough information to draw a new pattern and start designing a full knitwear look for Project Run and Play.

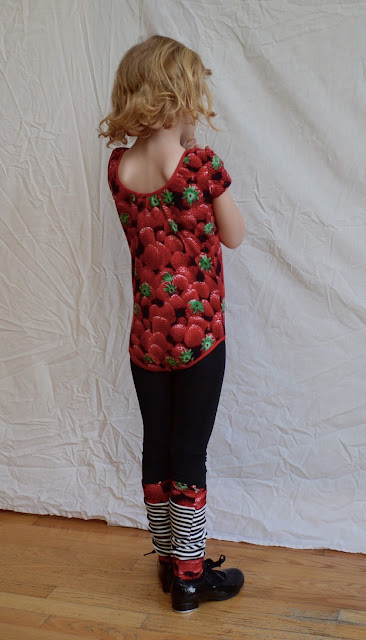
I'm getting down to the last bit of the awesome realistic strawberry print knit that I bought in Japan for less than $2/yard (I made this newborn set using it, and this tee for myself), and I instantly knew it would be a perfect leotard.  I could picture black and white accents for a graphic pop, and once I got started I couldn't stop!


The leotard was the no-brainer (I started with the free 24 month pattern from Shwin and Shwin and adapted it--added sleeves, and made it fit an almost-6-year-old), and I wanted to make a cardigan inspired by ballet wrap tops to go over it, but with a bit funkier vibe.


I love the black and white stripes against the strawberries--so fun!  Actually, all of the fabrics I used except for the black ponte knit in the cardi came from the fantastic Knits floor of Tomato fabrics in Nippori (Fabric Town in Tokyo).  I decided to add a little accent on the waistband (well, rib-cage band, I guess, since it's well above her waist!)--a bit of the black stripe gathering the band up a bit.

Sorry for the washed-out photo--it's hard to get the details to show up in black knit!
But the strawberry leotard is definitely the star of this look.  The fabric is a 4-way stretch, and the legs and neck are bound with foldover elastic.


The back of the leotard dips down a bit, and I cut the legs pretty low to avoid that awkward underwear-under-the-tights bunching.  And then of course we needed leg warmers--essential for dance class!


And while I was at it-- a headband too!  Why not?  I mean, when you start with that strawberry fabric, you go big or you go home.

This hairstyle cracks me up.
Next I added a pull-on french terry skirt to throw on after class.  The pattern is free, from Craftiness is not Optional--wonder where I got the idea to use this fabric?


Is it a bit much when you put everything together?  I don't know...I just can't get enough of it!


Little Sister prefers to wear just a few of the pieces at a time, but so far she has been excited about mixing and matching them.


I love all of the options!  And now I want to go eat a strawberry!


Monday, May 18, 2015

Random Never-blogged gifts

Looking through photos I found several little projects that I gave as gifts but never blogged about.  Thought you might be interested in seeing them!  I'll have to do another post like this soon--I just tucked some very special baby gifts in the mail so I'll tell you about those once they have been received!

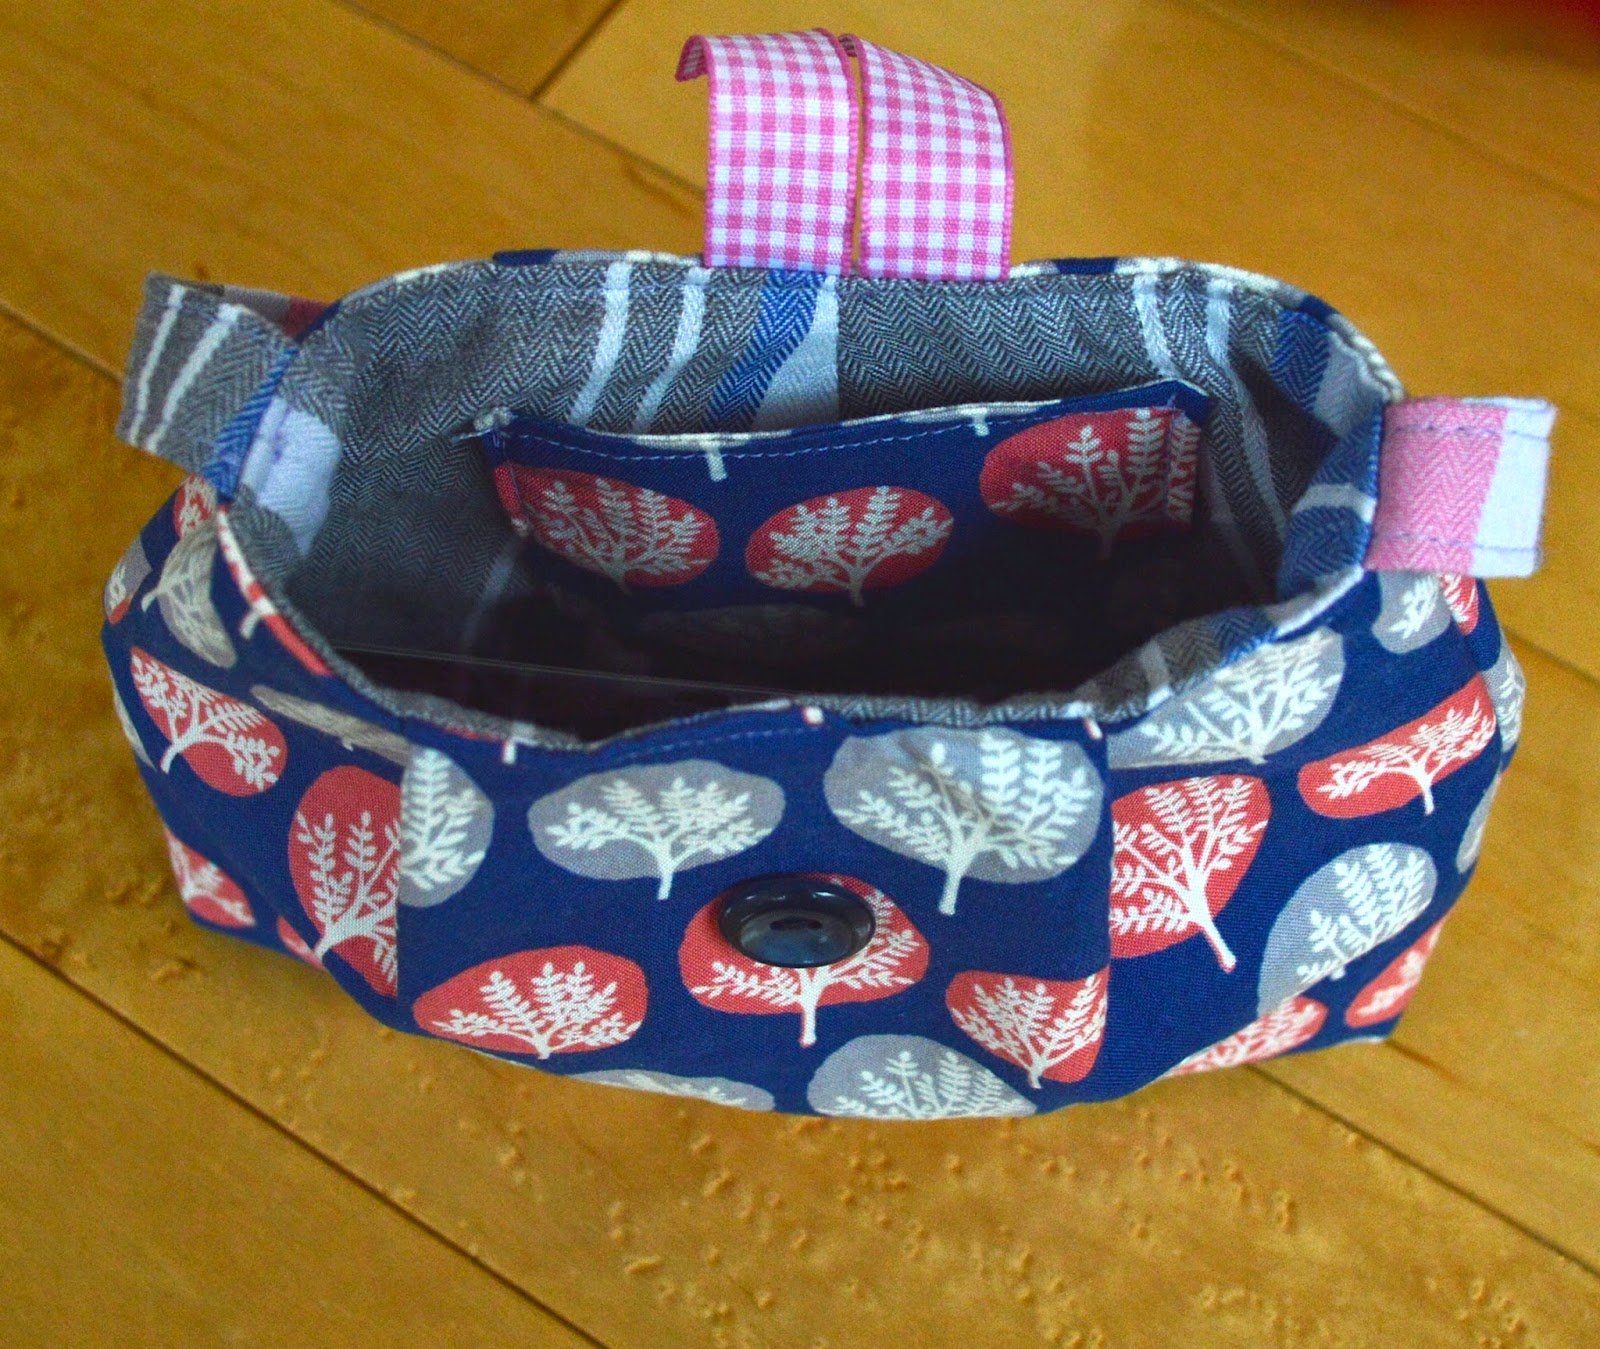
1.  This cute little purse, made from the free tutorial from Seven Layer Studio for one of Little Sister's friends:


2.  A Totoro stuffie, for our little friend's first birthday (along with a bib/apron that I didn't manage to photograph).  I used this free pattern, but using the stretchy knit I had on hand made him pretty lumpy.  I recommend using something more like the felt in the tutorial!


Oh, and I don't think I ever blogged about the pajamas they have on in those photos either--bonus!

3.  I made 10 of these reversible fat quarter aprons as a custom order for a friend who used them as favors for her daughter's cooking theme birthday party--fun idea!

Little Sister was not happy about modeling this, so her grumpy face is cropped out ;P

4.  I made this purse with leather trim to donate to a school fundraiser.  First time sewing with leather, and it was pretty easy!

Adapted from the free Phoebe bag pattern


5.  Mother/daughter birthday outfits--my friend and her daughter have birthdays two days apart, so how could I resist?


The top is the Fun Summer Tee from iCandy Handmade, except that I added a woven insert for the shoulders.   The printed fabric is a Nani Iro double gauze--sooooo nice!  The stripe is a 100 yen per meter find.

And the dress is this free Caravan Dress patter from Dotta.  Since I used the same woven for this skirt, I cut the back pattern piece in half instead of having the same fabric top and bottom.


I thought it would look cute to have this little inverted pleat in the back instead of a gather.


Update--I finally got a photo of these lovely ladies wearing the outfits I sent!  How cute are they?


6.  A skirt from the fabric that my friend picked out when she visited in November--I finally got it made in April!  I'm terrible!  It's a Milkmaid Skirt, from this free Crafterhours tutorial.


It works better as a spring skirt anyway, right?  She wouldn't have been wearing it in the winter...


7.  The scarf I included with my friend's skirt as an apology for taking so long on her skirt ;)  Dimensions from this Imagine Gnats Circle Scarf Tutorial.


8.  Oh wow--this one is old!  I made this dog sweater out of a thrifted sweater sleeve as a joke for my parents' dog after my dad sent me a link to a similar idea.


Modeled by Maddie Dog:


Thursday, April 23, 2015

Beach Sling Bag

Guess what?  In less than 2 weeks we are headed to Hawaii on vacation!  This month's Project Run and Play theme of a reversible sling bag helped me decide that the kids would definitely need beach bags for this trip.


I followed the free Reversible Sling Bag pattern from SugarBee Crafts pretty closely, only making a few adaptations in order to incorporate the materials that I was using--reusable shopping bags and towels from the 100Y store!  I spent 400 yen on materials, which is a little over $3.  If I'd been in the states, I would have looked for some thrifted towels that were a little more substantial, but this did the trick.

The supplies

The microfiber towel I used for the contrast on the lining had stripes, but I liked this description better ;)

"A soft towel with the feeling that the touch is very sufficient."
I have been wanting to make a towel-lined bag for a long time, and since this easy bag consists of an outer and a lining, I went for it.

I'm experimenting with putting in a jump so that more posts appear on my main page--read the rest after you click, and let me know if you love/hate having a jump!

Wednesday, March 4, 2015

Field Trip Day Pack!

At our international school, the Pre-K class's big field trip of the year is during their transportation unit.  For this trip, the 24 students (with about 12 adults supervising, myself included) rode the school bus to a train station, where we boarded the busy Yamanote Line train, then after a few stops switched to the Tokyo Monorail, which delivered us to Odaiba, a man-made island across the Rainbow Bridge from Central Tokyo.  From there we walked a few blocks to the beach, where we had a picnic lunch and some playtime, after which we walked to the ferry dock and rode back to our bus parking by boat.  The school bus then brought us back to school.

It was a fun and exhausting day!  And knowing that the kids would be toting their lunches/water/snacks through all of these different modes of transportation inspired me to make a backpack for Little Sister that was more manageable for her to carry around all day than her usual big school backpack, which has to be larger to accommodate her school work and such.  This is what I came up with:

Overlooking the Rainbow Bridge in Odaiba

It's the perfect size to fit her lunch box and water bottle (or when it's a family day, her coloring wallet, kids kindle fire, some snacks, and sunglasses), and I just couldn't love this fabric any more than I do.


It's from the Melody Miller RubyStar line, and it has so many different prints mixed into one cut of fabric so it's perfect for a pieced project like this--I can give each element a different print!


The front flap has the iconic Viewmaster print--I definitely wanted to show that off.  I added some piping around the outside, and the lining fabric is all the same double-sided quilted stuff I used to make Little Sister's Tinkerbell jacket for Halloween.  It was nice for giving the back some padding and stability without having to add interfacing.  It's impossible to tell in these photos, but I also quilted around some of the Viewmaster circles for a. some added interest/texture and b. some quilting practice.

I also love the print that's on the main front panel of the bag.  It's a dark purple, and I love that it has personality of its own while still letting the viewmasters stand out.  In this shot you can also see that I used the pink and aqua stripes (with gold dots!) to make the straps, and it's a bit hard to tell but the top of the bag (where the purple hanging loop is inserted) has a cool arrow going across it!

She loves that the straps are different :)  Recognize that Bimaa dress?

I forgot to take pics of the back but you can sort of see it here, along with the floral side panels.


And here it is in action on the field trip-

Riding the monorail

Picnic Lunch time!

Stuffed into the Yamanote Line!

I made up the pattern for this bag, but if you want to make one, I followed some basic messenger bag instructions like these but added backpack straps between the flap and the body of the bag instead of putting a shoulder strap on the sides.  The important thing for keeping the backpack from sliding off the shoulders is to get the straps as close together as possible at the top.  I cut my straps 18" long, and ended up trimming off just a bit when I attached them, making sure they were still even.

I actually started by making another backpack, which was adorable but too small to hold Little Sister's lunch box and water bottle:

My favorite part are the arrows on the straps!
This one was from this great tutorial (with free pattern!) from Indietutes, except that I scaled the whole thing a little bigger since the tutorial is for a two year old and my girl is almost five.  Also, I added a little elastic to the inside of the top front of the back to keep it closed.  So when I made the bigger bag, I had these proportions to go on, but I also decided that the flap would keep things more contained while still being easy enough for Little Sister to handle on her own.

Sunday, February 8, 2015

Convertible Messenger Bag

Sometimes, I really impress myself.  I am not the first person to think of this, but that doesn't make it any less cool--for The Boy's birthday, I made him a messenger bag that converts to a backpack.


This idea was born because I am sick of toting my own stuff plus the two kids' stuff all over Tokyo.  But when you are using trains as your main mode of transportation, if you think you might want a snack or a drink or an activity at some point during the day, you've got to carry it with you--no stashing it in the back seat of the car for when you need it!  

Now, The Boy can carry his own stuff, and when he wants a snack, he can get it himself.  When he wants to read his book on the train, he can pull it out.  Fostering independence!  And freeing myself from some of the constant barrage of questions while we are on an outing..."Mom, can I have a snack? Mom, where's my book?  Mom, did you bring my sunglasses?"  

The best part of this bag though, in my opinion, is that it can be carried as a traditional cross-body messenger bag...

Oops--ignore the safety pins, I hadn't installed the sliders for the adjustible length on the strap yet!

OR you can slip the straps towards the back and carry it as a backpack!


I had the idea, so did a search to try and figure out how to make this work, and saw lots of good ideas online.  None were exactly like what I ended up doing, which was to add fabric loops with D rings at the bottom and top edges of the back of the bag, then attaching one long strap with sliders on both ends to adjust the length depending on how the bag is being carried (this tutorial was a good resource for the adjustable strap, but I made mine adjustable on both ends).  I looked at this tutorial from Hillmade to figure out my dimensions (I made mine slightly bigger based on the repeat of my fabric)--it worked well for inserting the loops for the D-rings since it had a separate strip for the bottom and sides of the bag, as compared to the patterns that use one front panel and one back panel and then box the corners.  But I did make the flap a separate piece, both to conserve my printed fabric and also to create a seam for inserting the loops for the top D-rings.

I also put lots of pockets in--two under the messenger flap, one big one on the inside, and a small zipper pocket on the flap (first time I've done a zipper pocket--thanks, Vanilla Joy, for the great tutorial!)


I also added reflective tape as a decorative and safety element on the front flap.


The one thing I think I will need to add now that I've seen the bag in action is some sort of chest strap for when it's being used as a backpack.  Because the straps are set fairly wide apart to allow it to be both types of bag, it can have a tendency to slip off The Boy's shoulders. 

I'm now planning to make another one of these, for myself this time!  I love this concept.  If you'd like to see it as a tutorial, let me know and I can be more deliberate with my steps next time around!

Oh, and I'm linked up with this week's Sew and Show over at Straight Grain!  I'm #55, if you feel like clicking through :)