Tuesday, February 28, 2012

Upcycled Chunky Knit Infinity Scarf

Hey guys!  I made another infinity scarf! 

This one was a present for my mom. She's one of the only people I know that I hadn't made one for yet.  I thought that the big chunky knit of this sweater, especially with the metallic thread running through it, would make a better scarf than a sweater. It was actually more of a sweater coat:

Oops, I forgot to take a picture of it before I started cutting!

Which was great because it meant lots of material to work with. This is what I got when I chopped it up (removed trim and button plackets and cut along the seams):


I left the sleeves intact because I thought I might be able to use them for something else, but I ended up needing part of them for length after all.

I still have two little pieces of the sleeves left (see in the upper left?); not sure what I'll
use them for!  Arm warmers?  Coffee cup sleeves?  We'll see!
My total length was 108" (54 inches for each 3-piece side),and 7 inches wide. I based this on the length I liked when I made this cashmere scarf before, but if I use a knit that is this loose again, I will add a few inches, because I had to leave huge seam allowances to make sure I didn't have loose yarn. Seven inches is narrower than I had done before, but I maybe would have gone even narrower because of how thick the fabric was.

Anyway, once these pieces were cut, I followed these directions, except that as I mentioned before I had huge seam allowances--close to an inch!

You can see above how it came out when you snug it right up to your neck; below is pictured how you can loosen it up into more of a cowl. I think it would be great under a coat, but it's maybe not my favorite for just wearing around. Fortunately, my mom would never just wear a scarf with an outfit anyway, because it would cover up her jewelry! So a scarf that is meant to be outerwear is perfect for her.


There are links to all of the other infinity scarves I have upcycled on the accessories page, if you feel like taking a look!
Posted by Picasa

Thursday, February 23, 2012

The Big Four--superhero birthday party!

Well, my little guy is four years old.

Crown courtesy of Liam's preschool
I can hardly believe it. Four years! That's the same amount of time I spent in college!  When did I get old enough to have a four-year-old?

I'm not so great with theme parties/decorations/coordinated thingamabobs, but I did my cheapskate/DIY best for this superhero party. As you may recall, we sent out these invitations:


Luckily, all of the kids who were invited already had their own capes, so I just made masks to throw into the goody bags. The Boy chose colors for each friend, which was fun.

For goody bags, I printed out pictures of superheroes for The Boy to color, then we glued them to plain brown paper bags. This solved the problem that I was having finding any mixed superhero party supplies--everything was a 12-pack of Spiderman OR a 12-pack of Batman OR Superman, and we love them all!

Supplemented with star stickers, and The Boy wrote everyone's names on the bags.


I knew from the get-go I wanted to serve a "super" hero sandwich, and the one we got from Subway was a hit. Not all of the kids were into deli sandwiches though, so I made these little p-b-and-j guys to supplement.

Unfortunately, I was totally not thinking about blogging this party, so my pictures are pretty lame from a "here's what I did" standpoint.  Below, Batman and Superman are standing next to one of the party games--I put a dark sheet over a card table and called it The Batcave (you can see the edge of it there on the left).  I threw some glow-bracelets in there and told them they had to find their power bracelets in the batcave.   You can also see our party decorations on the wall--I printed out extra superheroes for The Boy to color and we stuck them all over the place.

Our other party "activity" was to find the villains (more colored-in computer printouts) hidden around the room.  Each one had a "treasure" that he/she had stolen for the superheroes to rescue.  These were little gold boxes (an 8-pack from the dollar store), and each had a big plastic ring and a prism thingy inside it (also 8-packs from the dollar store).

I couldn't resist the adhesive mustaches I found at the dollar store, so I figured they could be "alter-egos" for any of the adults who didn't feel like coming in their superhero clothes.

Alter-ego, or villain costume?  You decide.
And then there was the cake.  Oh, this cake.  I can't believe I wasn't thinking about blogging, because this was seriously the ugliest cake I have ever seen, and I didn't take any pictures of it before we attempted to rescue it.  So far, I have yet to bake a cake for a kids' birthday party--I just always feel like I have enough other stuff to do, and up until now we have gotten such great bakery decorations that I didn't even want to worry about it.  But this year, The Boy had really specific requests for his cake (various superheroes fighting bad guys), and there were all kinds of rules at the bakery (no licensed characters, no putting figurines on the cake that I brought in in case they weren't food grade, no improvising based on the book of sanctioned designs, etc) and I ended up reaching what sounded like a good compromise with the decorator over the phone--she would frost the cake using the "construction" scene, which had some hills and grass that I could use to place my figurines and stage a "fight" once I picked up the cake.  I had asked for bright colors for the writing.

But when we picked it up, this cake was...well, the hubby referred to it as "the dog park cake."  It was army green and brown swirls, with big piles of brown in the corners that resembled nothing so much as what you might see in the dog park before a responsible dog owner takes action.  I can't BELIEVE I didn't take a picture.  And then it had the same army green writing with The Boy's birthday wishes on it.

So we scraped off the brown frosting piles, poked our random assortment of superhero paraphernalia on top (along with a couple of dollar store ninjas, the best I could do for bad guys), used some old frosting tubes to add some "POW!"s and "BAM!"s, and even though it was still the worst birthday cake I'd ever seen, The Boy was totally impressed, so I guess it all worked out okay.


And that is everything I know about throwing a superhero party.  If you have any superhero party needs, just give us a call.  Phone lines are open.

Posted by Picasa

Tuesday, February 21, 2012

Shrinky Dink Coffee Pot Tags!


My mom likes to entertain. She entertains people who drink decaf coffee, and she entertains people who drink regular coffee--often at the same time! Don't worry, she has two identical stainless steel carafes that she can brew into...but how will her guests know which one is which?

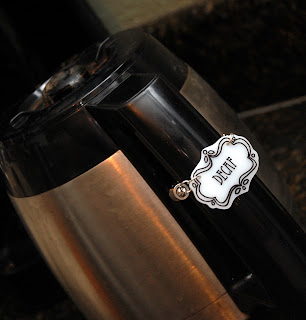
Enter the decorative coffee pot tags.


I had the idea to make these for her a while ago, but wasn't sure what I was going to use to make them. I thought about painting ceramic, or making some sort of clay, but then I saw something about making jewelry out of shrinky dinks, and I thought that sounded just about perfect. Plus, how fun are shrinky dinks? They work exactly the way I remember--you cut them out and put them in the oven, then watch them curl up and shrink down, and they come out tiny and practically indestructible.  Of course, now that I'm a grown-up, I'm not buying ACTUAL shrinky dinks--that's a brand name, and most of their stuff is pre-printed with cartoon images to color in, so I used something more like this.  Some of it is even safe for inkjet printers, which would be cool.  I couldn't find the exact one I used online, but I got it at Joann's, and it is not for inkjet printers so I just used a sharpie.

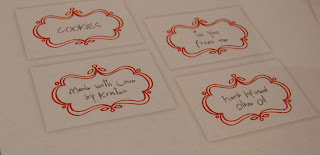
I read that you don't want to use a design that's too precise, because it might come out a little askew and drive you crazy.  Now, I'm not the type to be driven crazy by something like that, but I'm also the type that likes a design that's not too precise anyway.  I found these free printable labels from Domestifluff and made them a little bigger before printing them out (since shrinky dinks end up somewhere around 20% of their original size).


Then I traced the design onto my shrink plastic with a sharpie.  You can also see from this photo how big the design was in relation to my sharpie.  I took no measurements--I printed out one copy, thought it looked too small, and printed out another one, planning to try it out then redo it if it came out too small.  This was not a huge investment--I paid a whopping $3.00 for a 6-pack of shrink plastic sheets, and I could probably have fit at least 8 of this design on a sheet if I was being careful about placement.

I also decided to print out my lettering to trace, rather than trusting my own handwriting.  I chose a font called Eccentric, which you can find on this free font site (as well as a zillion others, I'm sure, this is just the first one that came up when I googled the font.  I don't remember where I downloaded it.  And I just now noticed that it is the same font I used in my header.  I guess I like it, or something.)


After cutting out the design, I used a slightly-smaller-than-normal hole punch to make the holes for my jump rings to go through.  I'm sorry, I don't know what size it is--it turned up in a box of office supplies I got from my grandpa and just looked like it would be about right.  And it did work perfectly.

Now, this part I don't remember from my childhood shrinky dinks.  The package directions say to lay a piece of parchment over the top of the piece so that it doesn't stick to itself when it curls up.  Practical, I'm sure, but it does take away some of the fun of watching it cook.  But it didn't stick to itself, so it works.


And here's how big it was when it came out of the oven about three minutes later!  That's the same sharpie; I wouldn't try to trick you.


So I went on and did my second tag, and uh-oh--it came out a totally different size!  I thought maybe there was some variation since I did them separately, so I'd better try again and cook them both at the same time.


But then I realized that I had just traced the smaller design that I had deemed too small by mistake (the font being the same size on both pieces was my clue).  So I made one more in each size, so I have a set too.  Not that I have two matching coffee pots, but I still like the idea.


Anyway, once that was all squared away, I attached these little jewelry clasps I bought.  I think they were $1.29 each.  I wanted the magnetic ones so that you could just pull them off and on rather than having to do a clasp every time you wanted to attach it.


These worked well because they had the lobster clasps to adjust the length, but once you set the length you could just open and close it using the magnet.

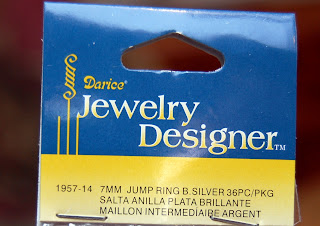
I also bought these little 7mm jump rings.  They were on the big end of the jump ring spectrum available at Joann's Fabrics.


ANYWAY, depending on what kind of attachment mechanism you end up using this might be different, but I just put a jump ring in each hole (I don't even have any pliers, I just used my fingers.  RAWR I am strong).  One of them I closed right up, and to the other I attached one end of the magnetic clasp.


Then I closed it up.  This step definitely needed a photo because I'm sure you would never have figured out that you needed to do that.

Alas, I will never have a career as a hand model.

You just attach the lobster clasp at the end of the chain extender to the jump ring, and then hook the lobster clasp at the end of the magnetic clasp to the length of chain that's right for your coffee pot.


Now you're ready to put out two coffee pots and not confuse anybody.  Although now that I think of it, my mom probably needs a "Half Decaf" tag too.

An example of why I am not a props stylist.
These were totally fun to make.  Now what else can I shrink?  

Posted by Picasa


Saturday, February 18, 2012

The Phoebe Bag (from www.rebekalambert.com)

I saw this bag in a blog post with links to several purse tutorials (several good ones in there), and at first glance I skipped right past it because it looked like it would be too complicated for me. Man, I am so glad I gave it a second look!  This is called the Phoebe Bag, and it's a free tutorial and printable pattern from Artsy Craftsy Babe--here's the link!

Not only am I really really happy with the way it turned out, but also the directions in the tutorial were really intuitive and easy to follow, the printable pattern is free, and you only need to buy 1/2 yard exterior fabric, 1/2 yard lining fabric, 1/2 yard fusible fleece lining, and a magnetic clasp, so it's a really affordable project. Especially if you have your fabrics in your stash, like I did--I spent $$2.40 on the fusible fleece and 66 cents on the clasp, so I feel like it was a great price for a birthday present for a friend (the reason I made this). I am so excited to make more of these, including one for myself.


I bought these fabrics when I made my huge Amy Butler Birdie Sling, which is great for hauling diapers, snacks, water bottles, changes of clothes, and spare toys, but thankfully I don't always need all of that stuff anymore.  And since that Amy Butler pattern listed waaaaay more fabric than I actually needed (kind of annoying), I had lots of these three coordinating fabrics left over. I used the third fabric for the exterior of the handle and the flap.  Again, this was a perfect gift because I love these fabrics, but it would be a little silly to have a second bag that looks like the mini-me of my big bag, so I'll make mine in a different fabric.


I like how you can see the lining fabric peeking out as well as on the underside of the handle.

I used the coordinating fabric for the interior pocket as well--and I added a seam to the center of the pocket (the pattern doesn't say to do that, but the pocket felt too wide to me otherwise).


The magnetic clasp was really easy to install--I hadn't done one before, and the pattern doesn't really explain it, so I'll tell you what I did.  First, the fabric you put the clasp into should have fusible fleece or some other stabilizer so that the clasp won't tear through the fabric, since you'll be pulling on it to open and close the clasp.  This is one thing I would change about the pattern--it says to attach your fusible fleece to the lining panels, but the next time I do this I would attach them to the exterior panels since that's where you'll be attaching the clasp.  Since I didn't do that this time, I attached an extra little piece of the fusible fleece where I wanted the clasp to go.   I also cut out a rectangle of thin cardboard (maybe 1 1/2 by 2 inches) for a little more stability in the exterior of the bag--I really didn't want the clasp pulling out.  One half of the clasp goes into the underside of the flap, which has the fusible fleece, and the other goes on the exterior of the bag. The clasp has two prongs sticking out the back of each piece, so you press those into the fabric in the spot you want to install it to leave an indentation, then snip tiny holes in the fabric and stabilizer to shove the prongs through the fabric and the stabilizer (and the cardboard, if using--snip the holes in that ahead of time too).  Then slide the backing piece back into place and fold the prongs down.  The back side of the two halves of the clasp end up being covered by the other piece of fabric (the exterior piece of the flap and the lining piece of the bag).

It's a great size for when you're not hauling diapers around.


(to show scale)
Sits comfortably on my shoulder!
I made a few notes I made for myself while making this bag, so I'll list them for you here in case they are helpful to you.

1.  The pattern didn't specify if seam allowances were included so I assumed they were, and I like the finished size.
2.  The directions didn't say to do this, so it's probably obvious to most of you, but I had to think about it--you SHOULD trim off the little triangle you get when sewing the darts in the bottom corners.
3.   I already mentioned this, but I would iron the fusible fleece to the EXTERIOR panels rather than the lining, so you have that stability for attaching the magnetic clasp or snap.  Or, like the tutorial suggests, you could put fleece on both the exterior and lining panels, making a more structured bag.
4. I made the strap lining a little narrower than the strap exterior (just barely) so that it's easier to keep it from sticking out beyond the exterior fabric (personal preference).
5.  Since the fabric requirements are so small, wouldn't it be fun to make this out of a felted sweater?  Depending on how thick your wool was, you might not even need the stabilizer.

Anyway, I thought it was a fun and easy project with great results.  I can't wait to make my own, so it can be just how I want it--no more "I wish I could find a purse with this type of pockets" or "I just wish the strap was longer," you can customize it to be just how you want it!

Posted by Picasa

Monday, February 13, 2012

Three-Ingredient Red Velvet Cookies!


I came up with this recipe after trying a 2-ingredient cookie recipe that used just yellow cake mix and butter to make an almost shortbread-like crisp bar cookie. The recipe said you could use any kind of cake mix, and with Valentine's Day right around the corner I knew I wanted to try to tweak it a bit. I usually keep boxes of red velvet cake mix on hand (I stock up around Christmas and Valentine's Day, since in my grocery store it's hard to come by other times of year) because I love these cookies, but I hate how sticky-blood-red my hands get after rolling all the dough balls when making them, and don't even get me started on how messy they are to make with kids.

I wanted my red velvet cookies to be a little softer than the two-ingredient kind, and since the other recipe had cream cheese in it I thought that might be a nice addition. I'll go through the directions/ingredients here first, then if you want to stick around I just have to share the trials of my first batch at the end of the post. Luckily it only took me two batches to get it just right!

Here's what you'll need:

Ingredients:

1 box red velvet cake mix
1/2 box cream cheese, softened (4 oz)
1/4 cup of butter, melted (1/2 stick)

Optional toppings:
chocolate chips (about 1/2 cup)
Vanilla Candy Coating (1-2 cubes)
Cream cheese frosting would be really good too--you could really do anything you want on top!


After using parchment paper to line my pan on my first failed batch, I decided to try foil the second time around. You can safely use either--my failure had nothing to do with the parchment, I just wanted to see if the foil would work because it's easier to get it in the nooks and crannies of the pan. It didn't stick or tear at all, so I liked using the foil better.


Throw your softened cream cheese (1/2 brick) into the bowl on your mixer--if you didn't let it soften on the counter, the microwave works just fine. Beat it with the mixer a bit to soften a bit more, scrape it off the bottom of the bowl, then add the cake mix and mix on low. It will still be pretty dry.

It's good to have a helper.


Pour the melted butter on top and mix again. It should start to come together at this point, but will remain chunky.


Your helper may lick the beater at this point.


Pour the chunky batter into the pan and spread it around evenly.


Take off your rings at this point--the best way to press it evenly into the pan is to use your bare hands.

Way too many crevices to clean red velvet dough out of.
I know from experience.
Or to let someone else do it.

Yours will not be this squishy.  This is the failed first batch.
You might get some other interested parties as well.

How close can you get?
But guess what?  It didn't even turn our hands red.  A little greasy, but we didn't look like we'd just butchered something, which is a definite concern when working with red velvet.

That's it! You're ready to put it in the oven. Bake it at 350 degrees F for about 25 minutes. Make sure your toothpick comes out clean (but it should also have a dry look to the top--my first batch passed the toothpick test but still ended up back in the oven for another 15-20 minutes!)


Now it's decision time. How do you want to top these puppies?

Yes, my candy coating was on clearance.  Doesn't expire for another two years,
so I stocked up--I'll need it for next December's Christmas Crack.

If you're using the chocolate chips, sprinkle them on top right away so they melt from the heat of the cookies. If you want to drizzle the candy coating or put frosting on (or just eat them as is), then let it cool in the pan until you can use your foil or parchment to lift the whole batch out of the pan and onto a cutting board.

Then you're ready to decorate!

Note--this is my first batch, that ended up going back in the oven.
Yours should look drier than this.
For drizzling, I used two squares of the candy coating. Melt in the microwave according to package directions.


Then scoop your melted candy into a zip-top bag and snip off one corner. The bigger your snip, the wider your drizzle will be. I went both vertical and horizontal. Then let the candy cool before doing anything else.


If you're doing the chocolate, sprinkle a thin layer of chips immediately after removing from the oven and let them melt. These chips are milk chocolate because it's what I had--if I were doing this again I would personally prefer dark chocolate chips since the cookies are already pretty darn sweet.

I know, this looks skimpy on the chocolate. But trust me--they're pretty
rich on their own and you don't want overkill.
Once they're melted, spread the chocolate thin to cover the surface:


I only used one cube of the candy coating for this one. And I just drizzled it with a spoon, since it didn't need to look as pretty at this point:

Since I knew I'd be doing this, and I like having the variation in there.


I just dragged a toothpick up and down the length of the pan to pull the white and milk chocolate together--you can vary the widths however you like. Once it's cooled enough, I moved the whole batch to a cutting board. After cutting out one heart, I decided that this decoration didn't show enough valentiney-red for me, so I added some red sprinkles.


SO after the cookies and the toppings have cooled, you can cut them into any shape you want. I chose hearts, since it's valentine's day (duh).


I have to admit though, if it weren't a holiday, there is no way I would have used a cookie cutter on these. So much waste. I don't mind eating the scraps, but it is a bit of a bummer for the kids, especially once they've seen all the pretty heart cookies. Instead I would totally just cut them into squares. Much more efficient.


 If you're really good with wielding a plastic bag, maybe you could just apply your melted candy coating in a heart shape to the top of the squares, and eliminate this whole problem.

Little  Sister doesn't seem to mind the scraps.
But the hearts do make pretty valentines for neighbors, teachers, postmen,  whoever.  If I had some pretty cellophane I might have dressed these up even more.


OK, so here we go with the directions all in one place for easy cutting-pasting--I'll repeat the ingredient list (all three of them) so you don't have to keep scrolling back up:


Ingredients (makes 15-24 cookies depending on how you cut them)

1 box red velvet cake mix
1/2 box cream cheese, softened (4 oz)
1/4 cup of butter, melted (1/2 stick)

Optional toppings:
chocolate chips (about 1/2 cup)
Vanilla Candy Coating (1-2 cubes)
Cream cheese frosting would be really good too--you could really do anything you want on top!


Directions:
1.  Preheat oven to 350.
2.  Place softened cream cheese in mixer bowl and beat at medium speed until soft.  Scrape bowl with a spatula.
3.  Dump cake mix into bowl and mix on low to begin blending the cream cheese in .
4.  Pour melted butter over other ingredients, then mix until blended (still chunky).
5.  Pour chunky batter into pan lined with parchment or tinfoil and press evenly into pan.
6.  Bake at 350 for 25 minutes.

Decorating with chocolate chips--sprinkle immediately after removing from oven to melt chips, then drizzle white candy coating before dragging toothpick up and down in parallel lines to form a chevron pattern.  Once cookie and topping is cooled, remove in one piece to a cutting board for cutting, either into squares or with a cookie cutter.

Otherwise, let cool in pan, then remove in one piece before decorating on a cutting board.

Once cookie and topping are both cool, cut into squares or use a cookie cutter to cut shapes.

Oh, and if you're still around, I guess my failed batch actually isn't that good of a story--I started with a whole cube of cream cheese and a whole stick of butter, and ended up putting the whole thing back in the oven for an extra 10 minutes, and then AFTER decorating and cutting out, I stuck them on a cookie sheet and baked them AGAIN for another 7 minutes or so before they finally held together.  In the end, they turned out pretty good, but using half the cream cheese and butter tasted just as good, had a better texture and way shorter baking time, and all around were just an easier cookie to deal with.  This may be the first time in history that LESS butter turned out better.  Take that, Paula Deen!

Posted by Picasa