Showing posts with label home decor. Show all posts

Sunday, December 15, 2013

Upcycled Sweater Stockings!

While we were home for this "snow day,"...

Obviously.
The kids and I were all productive.

I FINALLY finished the stockings I have been planning since I got Christmas sweaters for 75% off at Goodwill after the holiday last year,

All hung by the chimney with care

And many forts and bear caves were built.


There are lots of stocking tutorials online, and I did get some inspiration there but ultimately ended up doing this my own way, as usual.  Since I made four of them in a row, by the time I was about to start the fourth one I thought I probably had enough information and expertise to do a tutorial.  So if you want to make stockings like this, read on!

Or if you  just want a better look at the end product, here you go:


The Boy was primarily excited about the new stockings because that meant he could take his old one up to his room for Christmas decorations.  I hope he realizes that he does not have a chimney in his room, meaning that Santa will not be filling up his secondary stocking.  Honestly though, he just loves the holiday decorations and wants to spread the cheer into his bedroom--he asked me if he could bring some of the nutcrackers up there too; they are his favorite.

I had not anticipated how much more fun Christmas would be this year.  Our kids are now 3.5 and almost 6 and there is a huge difference between how a two-year old reacts to the holidays and how it is for a three year old.  Little Sister is SO EXCITED!  About EVERYTHING!  And it's not even about the presents--she is asking Santa for a Rapunzel doll, but other than that she told me that she doesn't want anything.  I asked her if her family should just choose something that they think she would like, since they know her pretty well, and she said "Yeah!"  She is way more interested in dancing in front of the lights, playing I-Spy with ornaments on the tree, and singing Christmas songs.  And The Boy had an opportunity to "shop" for his family at school, choosing presents carefully for all of us (nothing costing more than $1.)  He can't wait for us to see what he chose, and he was so thoughtful about it!  He has been making snowflake garlands and pictures of reindeer to put up around the house, and he can't stop talking about playing The Angel Gabriel in the annual church Christmas play. It is fantastic.

Snowflake garland.  In the center he cut out the letters to spell "WINTER."

He adds a new reindeer every day--he's up to Cupid, I think.

My personal favorite decoration--when he saw me about to recycle the scotch tape wrapping, he said "Don't throw that out!  I can use it to make Santa's sleigh!"  And so he can.

Is he my kid, or what?


Alright!  Ready for the stocking tutorial?  Great!  These is such a Beth project:  Upcycled?  Check!  Clearance? Check! Figuring it out as I go?  Check!

You can easily find a printable stocking pattern online, but I just used our old stockings as a guide for cutting out my shape.  I had to be strategic about where to cut, since most of my sweaters were cardigans or had zip-fronts.  It's a lot more straightforward if you find a crewneck to start with.

I cut two main stocking pieces (one facing each direction for front and back), two lining pieces, and two cuff pieces cut from the hem of the sweater so it has a finished edge.  I then cut my letters out of felt and sewed them to the cuff piece that would be the front of the stocking.


Attach the letters towards the bottom of the cuff piece, close to the finished edge.

Sew the cuff pieces to the top of the stocking pieces.  Make sure that you attach the cuff piece with the name on it to the stocking piece that is facing the direction you want the stocking to hang.


Do the same with the back piece and blank cuff.


Now lay your lining panels on top of the stocking pieces, right sides together, and sew across the top of the cuff.

My lining was a thin curtain panel, also from Goodwill.
 Flip the lining pieces up and lay flat,


Then lay one on top of the other, right sides together, and pin.


Leave an opening in the lining between the heel and the top of the stocking.


Before sewing, make a little loop for hanging.  I used ribbon and tied a knot in one end.


Insert the loop with the loop tucked in towards the middle of the stocking, close to the top of the cuff.


Pin the loop in place so that you will sew the knot or raw edges into the seam.


Sew around the outside of the stocking and lining, leaving the gap to turn the stocking right-side out.  Trim the edges, being careful not to get too close to the seam.  This is especially important for the sweater portion, since a cut sweater edge can unravel if not handled carefully.


To close up the hole used for turning, I just sewed it shut on my machine, but if you'd like it to be invisible you can do it by hand.  I just thought that nobody would see the lining so it didn't matter.


You could be done here, but depending on the thickness of your sweater/cuff, the lining may stick out.  This bugged me, so I decided to do a topstitch around the opening to tuck the lining down inside the stocking.

Before

After topstitching
 And here they are!  I love them.

Dad and Mom

The kiddos
 Here's how they look on the mantle!  The pets didn't get new stockings.


And luckily, each member of the family chose their own stocking as their favorite.  Phew!

Wednesday, February 13, 2013

Another Casserole Carrier

I made another casserole carrier, this time as a wedding shower gift (accomanied by a lidded 9x13 casserole dish).  And I must say, it was satisfying to have it opened and ooh-ed and aaah-ed over by a roomful of women that have known me since I was a child, impressed that I had made it myself.  That's one of the reasons I love bringing handmade things as shower gifts--because the whole point is to open it up in front of people and show it off, and I love a little public affirmation.


I found this cute striped belting as a remnant a while back, and thought I'd make the boy a belt out of it, but since I hadn't done that yet and there was pretty much EXACTLY how much I'd need to make a carrier strap, I thought now was the time to use it up.  Almost three yards of belting for 75 cents!  Although since I hadn't opened up the package until I was ready to use it, I didn't realize that it was ever-so-slightly elasticized.  So it bounces a little as you carry it along.  BUT, I was inspired by the slight stretch--I sewed the straps down in a couple of spots to make slots to carry utensils, rather than attaching a separate utensil loop like I'd done before.


I made some spots wider and some smaller so there are some options for what size of utensil will fit.

You know I have to show you the interior contrast fabric too!


I had juuuuuuust enough of both the railroad stripe exterior (I had used it before in this skirt and this jumper, plus a pair of pants for the boy that I STILL haven't had a chance to photograph--it cost $1 a yard and now all three yards I bought are gone.) The couple had registered for some red kitchen accessories, so I was pleased that I could make this little remnant work for the interior--it matched the stripe in the belting perfectly too.  For the record, this remnant was 2/3 yard and I was able to squeak it out, even though the tutorial calls for a full yard.

Fabric close-up

On a related topic, WHAT is Pyrex thinking with the giant handles on their casserole dishes now?  I'd hate to try and fit one of these into my cupboard!  They look even bigger in real life than this photo shows.
Pyrex Easy Grab


I ended up finding one of these Anchor ones with normal-sized handles so I could make my casserole carrier without an extra foot of fabric.  Sheesh!
Anchor Hocking with TrueFit lid

Anyway, there MAY have been enough fabric left from my casserole carrier project to make a little coordinating kitchen accessory to go with the wedding gift.  Time will tell!

Monday, December 17, 2012

Fused Glass Ornaments and Tiles!

I don't get too many opportunities to double up the material I am writing about on this blog with the subject matter for the blog I write for my mother-in-law's fused glass art (www.anncavanaugh.com), but I am going to take advantage!  My mother-in-law, Ann Cavanaugh, is a fantastic fused glass artist. She invited our kids to her studio, along with the kids of several of her friends, to make Christmas ornaments.  I've written about the process on her blog here, but I thought I'd give a little sneak-peek right here.

The kids made these lovely tree ornaments (The Boy's are in the top row, and Little Sister's are the bottom row):


They also made these stars.  We're using them like decorative trivets.

by Little Sister

By The Boy
They took it so seriously!  I had to swallow my worries about my two- and four-year-old using tiny pieces of glass and superglue and let them at it, because they had such a good time and were being so very careful.

Putting the final touches on her masterpiece

I mean, I only had to tell Little Sister to take the chunk of glass out of her mouth once.  (Yes, that really happened).

The Boy's finished work, awaiting the kiln

My favorite part of the day was making glass tiles.  I supervised Little Sister making hers with the abandon that only a two-year-old possesses, dumping any mix of colors and textures she could get her hands on into the glass tray Ann had provided.  Colby oversaw The Boy's methodical placement of glass pebbles and colored glass sprinkles in his frame.  And I even got to make one myself!

My snowy woods
The Boy's careful placement
Little Sister's wild mix
 And afterwards, we got to play in the woods and explore Grandma Ann's property!  Such a great day.

The Boy in the bamboo forest
That's not a leaf.  THIS is a leaf.
If you have a chance, you should totally check out Ann's work on the website I've been putting together for her.  The gallery page shows off a bunch of her newer pieces, and there's info on taking classes and current events as well.  You can like her on Facebook too!

Wednesday, November 28, 2012

Kiddo Padded Headboard!


Our little girl has moved into her big girl bed!  She transitioned pretty easily to a toddler bed (her crib converted into one), and even though SHE would have been comfortable there for a while, her dad and I were most definitely NOT comfortable when we snuggled in for stories at bedtime.  So we found a twin captain's bed on Craigslist and moved it in (breaking this family picture in the process, sniff).

Before
It was working pretty well, except...maybe it was intended to use a box spring?  I don't know.  It's a platform bed, so doesn't need a box spring, and adding one would have felt like my little girl was teetering a bit high above the floor for my taste.  But there was a lot of blank headboard showing.

With pillows removed.

And this handy little hole:


Great for stuffing toys and books into.  Not so fun for toy-and-book retrieval.

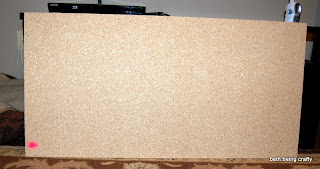
Sooo, I took it upon myself to make a padded covering for that area between the mattress and the cubby shelves on the headboard.  I measured the width and the height that I wanted, went to Home Depot where I found a piece of MDF in the scrap bin and they cut it to the right size for me (cost me two bucks, yeah!).

That pink dot means it costs $2.

I also had a roll of 1 inch thick foam that I bought at Joanns' with a coupon a while back, intending to make a headboard like this for the boy.  He may still get one at some point; we'll see!  This was the most expensive part of the project, since the stuff costs something like $17/yard.  Use a coupon!

My quilt batting was handed down from the hubby's grandma, and for my fabric I cut up the duvet cover my mom had made for Little Sister's crib.  The fabric matches the curtains that are still in her room.  That's why the two fabrics are on my headboard--they were already sewn together that way!  You can easily use more than one fabric as well.

Little Sister's original nursery--you can see her duvet and curtains here


Supplies:

Backing board, thick enough so that you can attach it (I used screws coming through the backside of it so they didn't show in front)
1 inch thick foam, same size (or slightly smaller) than the backing board
Sheet of quilt batting large enough to wrap over the foam and around the edges of the board
Fabric same size as the quilt batting
Spray Adhesive (not required but helpful.  You could also use hot glue, but it would be more of a pain.)
Staplegun and staples (make sure they aren't longer than your board!)


Directions:

First, cut your foam to the same size as your backing board.  Lay it out on top of the board, then lift up one end and spray the board with spray adhesive.  Get that end stuck down, then lift up the other end and spray the board little by little, laying the foam and pressing it in place.


Once the foam is adhered, lay out your batting over the top.  Make sure you have plenty to stretch to the back side of the board, where you will staple it in place.  I was lazy and didn't staple the batting separately; I just skipped on to putting the fabric on top.

Lay the fabric over the batting.  I started with the top since I wanted to make sure I had a straight line with my contrasting fabric.  I stapled right in the middle first, then stretched the fabric around the bottom and stapled in the middle down there.  Then I did the same thing on the sides.  Making sure the fabric was stretched tight and the line across the top was straight, I stapled the rest of the way across the top, then did the rest of the board.  I folded fabric under and stapled at the corners.  Because the back won't be visible, I wasn't too careful about the way the back looked--I just made sure the front was smooth.

Back side
 Once I was happy with the way everything was stapled down, I was done!


The only thing left was attaching it to the original headboard.  So I called in the husband.  I held the headboard in place from the front while he screwed through the original white headboard and into the new padded piece, and through to the bed frame.


Minor problem--I was thinking it would be more secure if I had the headboard go down below the actual mattress.  Turns out, it would have been easier to attach if the headboard just lined right up with the platform where the mattress rests (or a teeny smidge above that).  Because the headboard has THICKNESS.  Duh.  So we ended up with this issue:

Mind the gap.
Not such a big deal, really, so we decided to let it slide.  However we did have to be careful when attaching it that we didn't screw the drawer that's in the base of the captain's bed shut.  Not an issue if your padded headboard is smaller.

But all in all, I love it!  It brightens up a rather boring-looking bed, and it's way more comfy to lean on during story time.  Plus it softens the edge of the shelf for head-bonking.  So now we have an official big-girl room!