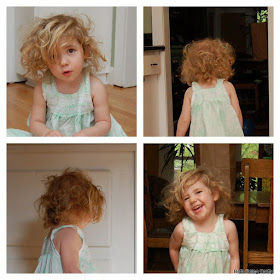
It's amazing how something that on a grown woman could be a little...hmm. Frumpy? Old-lady? Can then, in miniature form, look so sweetly vintage on a little girl. This woman's nightgown, of a variety I feel like you could find fairly easily at a thrift store, was pretty easily converted into a nightgown (that goes long-long to the floor, of course) for my little girl. Before watching the movie Annie, I don't think she knew that pj's that were actually dresses were even an option. When that red-headed moppet headed towards her big bed at Daddy Warbucks' house (the silk--no, the satin sheets I think), Little Sister was totally fascinated with Annie's nightgown. How could I resist, when I had this nightie in my "to upcycle" stash? Now she wants to wear these to bed every single night, and with the exception of when they are in the laundry, she has done so. I would call that a winner of a project.
The only supply I needed other than the original gown was a little bit of double-fold bias tape--just enough to go around the underside of the armholes.
I knew I wanted to preserve a few things from the original nightgown, namely the lace bodice, the straps, and the pintucking at the hem.
 |
| Original bodice |
 |
| Original hem |
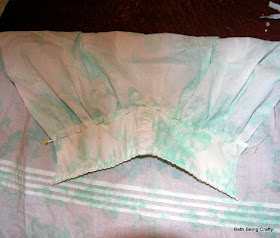
I started by separating the bodice from the straps and the gown. In the photo below, I hadn't altered the bodice pieces yet but I had cut the new gown front and back. Based on my daughter's measurements (she's an on-the-small-side 3-year-old) I cut it about 20 inches long (at the sides--the middle is a little lower on the front panel as you can see). For the width I just eyeballed what I thought looked good, but you could use the hemline of an existing gathered skirt for a guideline.
I had a bodice pattern that fit her pretty well that I used as a guide for cutting down my bodice. I wasn't worried about seam allowance on the sides because I used double-fold bias tape to finish those edges.
 |
| I used the printable Playdate Dress pattern from Craftiness is not Optional, but it's not an exact match by any means, just a guide. |
 |
| I cut just one side at a time then folded my bodice in half and used my first cut as a guide to do the other side. |
 |
| Then I lined up the back bodice piece and cut armhole curves using the front piece as a guide. |
Next was gathering up the skirt. I basted two rows at the top of the back and front gown pieces, then gathered them to the length of the bodice pieces.
Before assembling, I ironed the raw edge of the lining under (where I had removed the bodice) so that it would be finished on the inside. Then I sandwiched my gathered skirt inbetween the lacy bodice and the lining. I pinned carefully to make sure they were lined up exactly so that I would catch all three layers with one seam.
 |
| All pinned and ready to go |
 |
| The inside of the bodice--making sure to catch the lining with my pins too |
This time I sewed the lining to the skirt first:
Then flipped the back bodice piece over and sewed the outside down.
Then I sewed up the sides of the gown, making sure to stop when I got to the armholes.
I did have some issues with attaching the straps, so the photos below are not how the straps actually ended up. I'll try to explain so there's less confusion later on--the straps were just too wide to place them proportionally on the nightgown and still leave enough room to get her head through without unbuttoning the placket. I wanted it to slide over her head,so I ended up pleating the straps a little, and it gives the finished strap a little bit of a cap-sleeve effect that I think works. There is a close-up photo of the finished strap later on, so scroll down to take a look so you know what I'm talking about. If you are using a narrower strap, you may be able to attach it flat like the photos below.
Ok. So. I first sewed the straps on so that they lined up with the armhole, and sewed them to the bodice as well (this is where you should pleat the strap if you're going to do that.)
Then, I cut a piece of double-fold bias tape for each opening. I folded it under at the top of the bodice and pinned it into place around the opening, stopping at the back of the strap and folding it under there too for a finished look. Make sure you pin the slightly narrower side of the bias tape to the outside of your nightgown, so that you have an easier time catching all of the layers when you sew!
 |
| Armhole |
 |
| Both straps, ready to go |
 |
| Tell me more, Sis! |
 |
| How's that peanut butter waffle treating you? |
That collage also shows you the straps before I unpicked them from the bodice to put in the pleat. A little off, see? But that hair! It kills me!


This is so sweet and your daughter is absolutely adorable - LOVE the hair. And I am so into vintage nightgowns. Awesome :)
ReplyDelete