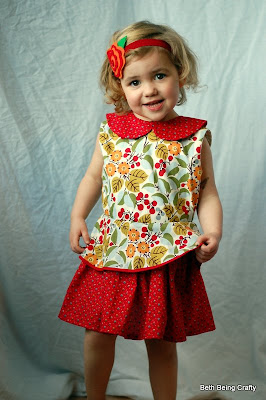
This dress is a lot more complicated than the things I usually sew. Collar! Lining! Peplum! ZIPPER! As a matter of fact, this dress marks the FIRST ZIPPER I have ever sewn into a garment! Thanks for the motivation, Alviana!
The pattern has options to make a dress or a top, with or without short sleeves, and with or without a collar. I did the dress version, because getting Little Sister to wear anything other than a dress these days is pretty challenging, and I went sleeveless because I think that will work better with long sleeves underneath in cold weather. Plus you know girlfriend loves a tank top dress. I also loved the look of the collar using coordinating fabric, so I did that too. So without further ado, here are my results!
 |
| Little Sister's headband courtesy of SewBaby Crafts, my little business. |
The directions were clear and easy to follow. It is a lot of pages, but it's worth it for the clear descriptions and lots of accompanying photos--something that the big publisher's patterns sorely lack, in my limited opinion. As a matter of fact, after reading Alviana's directions, I thought, "Oh, THAT'S probably what they meant for me to do in that McCall's pattern that I couldn't decipher!"
I never found myself scratching my head. Not even with the installation of the invisible zipper, something I had never done before! It was pretty darn easy, and my zipper doesn't stick at all. It is not, however, invisible, (partially due to the fact that the only zipper I had was black and I didn't want to go purchase any supplies)--not sure if that's the way it's supposed to be or if it was user error, but I don't mind how it looks.
 |
| My very first zipper |
 |
| Iris trying to show me the back |
Look at those beautiful tiny, even, hand stitches! Under ordinary circumstances, I don't hand sew. I use every method possible to avoid it. But I felt a responsibility as a pattern tester to follow the directions as written. And as I sat there with my needle and thread and cup of tea, I felt like Meg March, or Sansa Stark. Except that it will never come naturally to me, like it does to those pretty, dutiful girls who can sew perfect hand stitches but really aren't that much fun. I'd rather be Jo any day, but it was still fun to pretend. Or at least it was a way to get through the hand sewing--it's not like I'll be making a habit of it!
 |
| Little Sister is also impressed with my work on the lining. |
Oh, and I didn't even get any blood on the dress! Now, I know it's supposed to be good luck for the seamstress to get a little blood on the item she's sewing, but I just figured that was an old wives' tale intended to let the seamstress feel better about staining a garment.
 |
| Way to go, Mom! |
 |
| Ballerina style |
 |
| Did you happen to notice my peplum? |
 |
| Yep, that's my peplum! |
One downside, for me, to any online pattern, is printing and assembling the pattern. I am fairly computer-illiterate about certain things, and one of them is figuring out if my print job is accurate. This pattern does have a test square that should be an inch square if your pattern is the right size, so I could have faith, but it's still kind of painful to cut out all the pieces and hope you are lining them up correctly when you tape them together. Another thing you might like to know if you plan on making one of these yourself one of these days is that the project took me about 4 hours from beginning to end, keeping in mind that I was learning several new skills along the way. If you've done things like linings and zippers before, it will probably be faster for you.
The pattern is still in the test phase (that's part of my job, right?) so I will be passing on a little feedback, mostly about fit. It's a funny thing though, isn't it, because no two kids are the same size! I sewed a size 3 for Little Sister, who will be three next month (be still my heart!) and the waist and neckline are just right, but the armholes do gap a bit and the bodice is a little wide.
 |
| This one shows the gap at the armhole pretty well. |
And if I make this dress again, I would make the skirt longer and the collar a little smaller. But those things are just preferences--some people would think that the skirt length and collar size were perfect. In my case though, especially since she's got room to grow in the bodice, I worry that it will be much too short before she's grown out of the top. But for wee toddlers with cute little diaper covers poking out underneath I think the length would be great!
 |
| It starts to get pretty mini when she tilts forward even a little. |
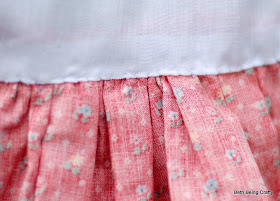
Oh, I almost forgot--I was using some vintage fabric from my grandma for the skirt, and I didn't have quite enough, so my skirt is not quite as full as the pattern calls for. It's 11 inches short--74 inches of gathered fabric instead of 85. I actually thought the sample looked a little too full for me, so I think the 74 inches is perfect. My other fabric was a quilting cotton remnant that I just loved. I had been staring at that fabric for a while, waiting for the perfect project to make with it, and this dress just called out for it, especially with that sweet little red vintage floral for contrast. It was a Joann's fabric, nothing fancy, just a print that caught my eye. And the lining was purchased for a dress I intended to make for myself but have put off because it involved installing a zipper. Well, I have no more reason to fear! Now I just hope I have enough of that lining fabric left!
Being a pattern tester was fun for me! It put a level of pressure and responsibility on the project that I don't usually have (timeline, I committed to doing it, following directions) and I am happy with the results. Makes me think that maybe I CAN have nice things. Once the pattern is through the testing phase (and I'm sorry, but I have NO idea how long these things take), you will probably be able to find it on Popolok Design's Etsy page, but until then there are loads of other cute patterns there!
Edited: The pattern is now HERE!


I absolutely love your Cece Dres version. The fabric choice, color & print combination is brilliant! She looks so adorable.
ReplyDeleteI did't know that you don't use patterns really often. All i know is that you make beautiful clothing for your kids. Your Cece Dress is a proof that you are really a fantastic pattern tester!
Good job on your first zipper! You actually did a good job. I'm sure with more zipper projects, you'll be expert. Great job on the lining too!
I Love how yours turned out! It looks amazing and your little girl is adorable! :D
ReplyDeleteBeautiful little girl and very pretty dress. Great blog and good to hear from someone else who's learning as they go along. Well done!
ReplyDelete