 |
| Rocking it. |
So here's the run-down of how I made it, if you're interested in that kind of thing.
I started with this lightweight A-line skirt and scrap of t-shirt fabric.
 |
| Hello, old friend. |
First, I put the t-shirt waistband piece around the girl's waist to see how small I should make it. I actually ended up taking it in some more, since (duh) it's stretchy, so it was slipping down on her. So make it a pretty snug fit. My finished waistband for my 2-year-old is about 15 inches around, to give you an idea. You could just fold it in half lengthwise and sew a seam, making it a loop, then press the raw edges open on the inside, or you could press the raw edges in first to give it a more finished look on the inside. It's not going to fray, so either way is fine.
When I was ready to start cutting the skirt up, I had my trusty helper hold the obnoxious dog out of the way:
Then I stripped off the puffy skirt that Little Sister was wearing (one of her current favorites, that of COURSE I didn't make) to check the width.
My skirt was quite a bit wider, but I figured a little extra puffiness wouldn't hurt anybody. I aim to please. I definitely wanted to use the existing hem on this skirt, as I am pretty much incapable of sewing one of those tiny perfect rolled hems.
I decided to make the new skirt a little longer as well, which may account for some of the lack of puffiness, but the brown skirt does have an underlayer too, which is the real secret to its success.
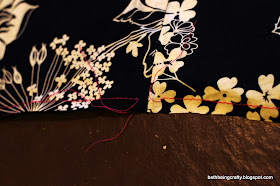
Next was to sew a straight basting seam (machine set to the widest stitch length) all along the top of the skirt, without backstitching at the beginning and end.
This way, if you pull on your bobbin thread (the one on the bottom), you will create a gather. Do it carefully, so that you don't break the thread. You could have a separate gathering seam for the front and back so you don't have to gather quite as much at once, but I'm lazy so I just do it all at once.
Gather the top of your skirt up until it's a bit wider than your waistband. That way you can stretch your waistband as you attach it so that there's enough room to pull the non-stretchy part over her hips/diaper. When I gather, I'm not too careful about getting the gathers even at first--I just bunch the fabric up until the top of the skirt is the width I want, then I tie the loose threads together so it doesn't get any looser or tighter and THEN even out my gathers.
Then flip the waistband inside out and upside down, and pin it to the right-side-out skirt, with the raw edges of the waistband lined up with the raw skirt edges.
I started by pinning the two side seams on the skirt, then the front and back in the center, then pinning inbetween my pins, to make sure I had equal amounts of skirt all around the waistband. You will be stretching the waistband a bit as you pin it.
I opted to use a zig-zag stitch as I sewed my waistband to my skirt, to give it a little more stretch. I also made sure to stretch the t-shirt waistband as I sewed. After sewing the two pieces together, I flipped up the waistband, then (again stretching as I sewed) added a topstitched seam on the waistband right above where it meets the skirt, making sure to catch the ruffled edge in the seam. This helps flatten the waistband and secure the seam.
And just look at that sass!
 |
| Cue the "tsssss!" sound effect. Okay, I apologize for that one, but with that pose you know you were thinking it. |
Yeah, I had too many photos to choose just one or two. Here is a tip for those of you having a hard time getting your toddler to cooperate during a photo shoot: throw food at them! We had been picking raspberries off the bush you see behind her in the pictures, and I literally took a handful of them and told her to catch. One of our best photo sessions to date! Note: I do not recommend this method when photographing a white outfit.
 |
| I can't tell if the dog was impressed or not. |


No comments:
Post a Comment
Note: Only a member of this blog may post a comment.