Remember this pretty, pretty bag I made? It's the Birdie Sling from Amy Butler, and I use it ALL THE TIME.

Unfortunately, here's the proof:

Yeah, this bag gets a lot of use. So I was very sad when I noticed the fraying edges at the top of the shoulder strap. But I had a feeling that something could be done about it.

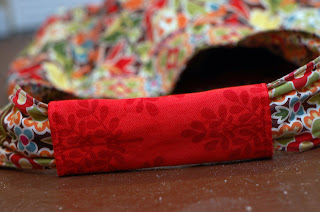
Ta-da! A padded cover for the fraying section. Adds padding, hides the fray, and shows off a little of the cute lining fabric that usually nobody can see. Oh, and I didn't even have to empty out my bag to do it (that probably would have doubled the amount of time it took to do this.)

You could choose the same fabric as the rest of the strap, or even the body of the bag, if you wanted to be more subtle. I think that this shoulder pad is the perfect thing to add on at a later date--that way, you can wear out your bag multiple times before it's obvious to the general public! I even made this so that you could easily remove it to add a new one if the shoulder pad starts to fray at some point (although I don't think it will, because of the way it's constructed.)
So, here's how it went down:
I measured the width of the strap and the length of the frayed area, then cut out a rectangle of fabric that was 1 inch wider than that and a 1/2 inch or so longer. I cut this out of the fabric and the fusible fleece lining, actually--the same lining that I used when I made the bag in the first place.

Then I ironed the top and bottom ends over (the ones that will form the top and bottom of the tube):

I then folded the rectangle in half, right sides together, so that the raw edges lined up, and pinned it around the strap, and sewed a seam straight down the edge, forming a wrong-side-out tube.


No comments:
Post a Comment
Note: Only a member of this blog may post a comment.