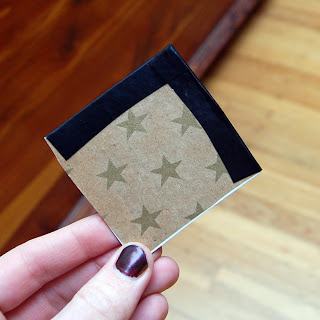
I was trying to think of an age-appropriate game for a two-year-old that I could make myself, and what I landed on was those matching memory cards that can be used in any number of ways. I decided to personalize the project by using photos of our family and the recipient's family for the matching images, creating a total of 16 cards (4 members in each family X 2 of each photo).
 |
| Here we all are! |
Supplies you will need for this project:
-Thin cardboard
-16 Photos (2 of each of 8 images)
-Scissors
-Decorative Paper
-Mod Podge (or Elmer's Glue and water)
-Craft Brush
-Electrical Tape
I started with cardboard scraps that I cut from a composition book. This board was the perfect thickness--easy to cut with scissors, but sturdy enough to hold up to the decoupage and hopefully two-year-old playtime. Luckily this composition book was filled with graph paper, so I used a few sheets of that to do my measuring. I figured out the largest squares I could cut out of the front and back cover in order to get sixteen squares (9.5 blocks on the graph paper, if you're curious). You can make these any size you like--2.5 inches seems about right. Cereal boxes might be a good board to use too, but any cardboard scraps you have will probably work.

I printed out a set of 4 by 6 photos that I had cropped so that the people's heads were all close to the same size. Then I cut a window into a sheet of paper that was the same size as my squares. That way I could line up the face right where I wanted it.
I have the hardest time cutting straight, so I fit a blank square into the hole in my "window" once I knew where I wanted it to go:
Then lifted off the piece with the window cut in it so that I could just cut around the remaining square. I cut both photos at the same time--risky, I know, but it worked out OK.
 |
| Where are you? |
Once I had all the photos cut out, I spread out my cardboard squares (on the totally required Thomas the Tank Engine place mat) and spread a thin layer of homemade Mod Podge on each using a foam craft brush. Really, you only need a thin layer.
Then I laid the photos on top of the squares and applied a layer of mod podge again. This layer can (and should) be REALLY thin, as it will not only dry more quickly but it will look better on the photos.
I've heard that you're not supposed to decoupage on top of photos, and I understand why (it definitely changes the look, and if you get a bubble then the layer can peel right off in places), but since these were going to spend a lot of time face-down (literally! ha!) I thought the extra layer of protection for the photos would be nice.
I had cut out 16 squares of wrapping paper for the back sides. It is important to choose a relatively small repeating pattern, so that the kiddo can't memorize which card is which by the pattern on the back! You want the backside to look as uniform as possible.
Once the photos were dry (I did mine before bed then left them to dry overnight), I flipped them and applied the mod podge to the back. Then I placed my wrapping paper on, and painted on one more thin layer of mod podge. Once those babies are dry (the wrapping paper dried MUCH more quickly than the photos), you're on to the next step!
Oh, if you get bubbles like what you see below, just carefully lift the paper and pull it to straighten before laying back down again. I just used my thumb to smooth out the paper after laying it back down.
I originally planned to use a paint pen to decorate the edges, but then I had a genius idea--electrical tape! It was perfect, because since it's slightly rubbery it was easy to stretch it across so that it grabbed tightly.
I started at a corner and cut one piece the length of the edge. I chose to have a smaller "frame" on the photo side, so I didn't stick the tape right down the center. Your choice, just try to keep it uniform so the backs all match. I pulled the tape tight (see how it's stretched out?) then it was easy to stick down on the back with no overhang.
Do the same with the other three sides, trimming particularly carefully on the last piece of tape.
In case you don't remember how to play Concentration--
Lay the cards out face down in a square formation.
Player one flips two cards over. If they match, he keeps the cards and takes another turn. If they don't, he flips them back over and it's the other player's turn. Player two does the same thing.
Strategery note: REMEMBER what cards you flip over, even when they don't match!


so damn cute. love these!!
ReplyDelete