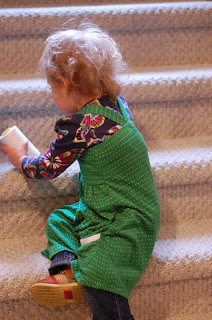
Would you believe me if I told you that this
toddler dress started life as a women’s tank?
I mean, look at it! No grown
woman should ever have worn that shirt.
I’ll give you pre-teen, I guess.
Teenager maybe. But
considering the rest of the clothes in the free box on the sidewalk that I
picked this out of, this did not belong to a teenager. (What is it with my neighborhood and the
free boxes, anyway? Have you people
never heard of Goodwill?) In any case,
I knew that this top was meant to be a dress for my two-year-old.

When I picked it up, I thought it would be a simple enough refashion. I mean, it's crazy how many women's sleeveless tops can be made into little girl dresses with just a simple seam down the sides, maybe closing up the armhole a bit. This top was the perfect length for a toddler dress, just too wide.
The problem that I had though, was that the front of the top had an empire seam and gathers, and the back of the top was all one piece. Not too bad to deal with, but the pockets (a highlight of any dress for my little girl) were right by the side seams. This meant that I couldn't just take the side seams in, or I would cut into the pockets. And I couldn't just take the width out of the one-piece back, because then the pockets would end up towards the back of the dress. So it was a little trickier than I anticipated, but still simple and totally doable.
I decided to just take the extra width out of the bodice portion of the dress, both at the front and the back. I would just add extra gathers in the front and taper the back so that the skirt portion would be basically untouched, leaving the pockets right where I wanted them (and the bonus of having the hem already done).
I decided to just take the extra width out of the bodice portion of the dress, both at the front and the back. I would just add extra gathers in the front and taper the back so that the skirt portion would be basically untouched, leaving the pockets right where I wanted them (and the bonus of having the hem already done).
I first removed the straps.
 |
| Yes, it had those little heart buttons to begin with! |
Next was to separate the bodice from the skirt at the empire seam. It ended up being attached more securely than I anticipated, so I soon abandoned the seam ripper and just snipped.
 |
| Too much work! |
Once I removed the bodice, I figured out how wide I wanted the top of my dress to be. I was keeping the elastic band that was already at the top, so there is some stretch. I actually made this while Little Sister was awake (I know, crazy), which meant that I could measure her to see how big around it should be.
 |
| The inside of the back of the dress |
 |
| The bodice panel that I cut off |
Once I cut the bodice panel and the back of the dress down to size, these are the pieces that I had:
-Body of the dress
-Bodice panel
-Two straps

I set my machine to a basting stitch and sewed a straight line along the top edge of the front panel of the dress (where I had cut off the bodice).

Then I pulled on the bobbin thread on the back side to gather the fabric until it was the same width as the bodice.

Next, I laid the bodice on top of the skirt piece, right sides together, so that the raw edges were lined up, and sewed them together, making sure to sew below the thread I used for gathering.

So now, because I cut the bodice off and reattached it, my back panel was taller than my front. So I just folded the back panel in and sewed a seam right where the channel for the elastic was, making the back panel line up with the front one.
 |
| Pinched in! |
I don't have pictures for this, but to sew the side seams together, I turned the dress inside out and pinned the top section, then angled slowly on the skirt portion until I met up with the original seam. That way the original hem stayed intact. So I only removed width from the bodice portion of the dress--the skirt retained the original fullness.
Next was to reattach the straps. I figured out where to attach them and marked it with pins:

I sewed the straps, with buttons attached, to the front. The original straps had the buttons sewn on, with no real buttonholes--I did mine the same way.

As I mentioned before, Little Sister was actually awake and entertaining herself pretty well while I made this dress. So I could try it on her to check the strap length before attaching in the back. I didn't even poke her with a pin!

Once the straps were attached, I was done! I left some extra inches hanging on the inside so that I could lengthen the straps down the road if I needed to.

And it fits comfortably (a bit loosely actually, but the straps keep it in place), but because of the elastic around the top I think she can actually get a couple of years of wear out of it. Such a deal, because in the first place it was FREEEEEEE!
 |
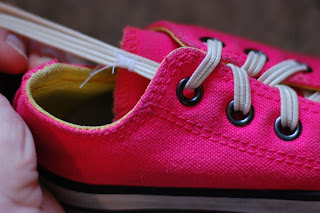
| Recognize these shoes? |
If I hadn’t already stocked up on Kiss MeI’m Irish t-shirts for her, she would totally wear this next St. Patricks’s Day. It might be worth it anyway.


